Fantasy fairy card
Hi everyone!!
Today I'm going to show you how I made this fantasy fairy card. I'm afraid I'm a little obsessed with using the Lavinia stamps at the moment. I just love the fact you can make really quick striking cards.
Start off with a 4x4inch thick good quality card.
You will need a glass place mat or I highly recommend purchasing a messy mat from Wilco (this is a large thick plastic mat that you can wipe clean)
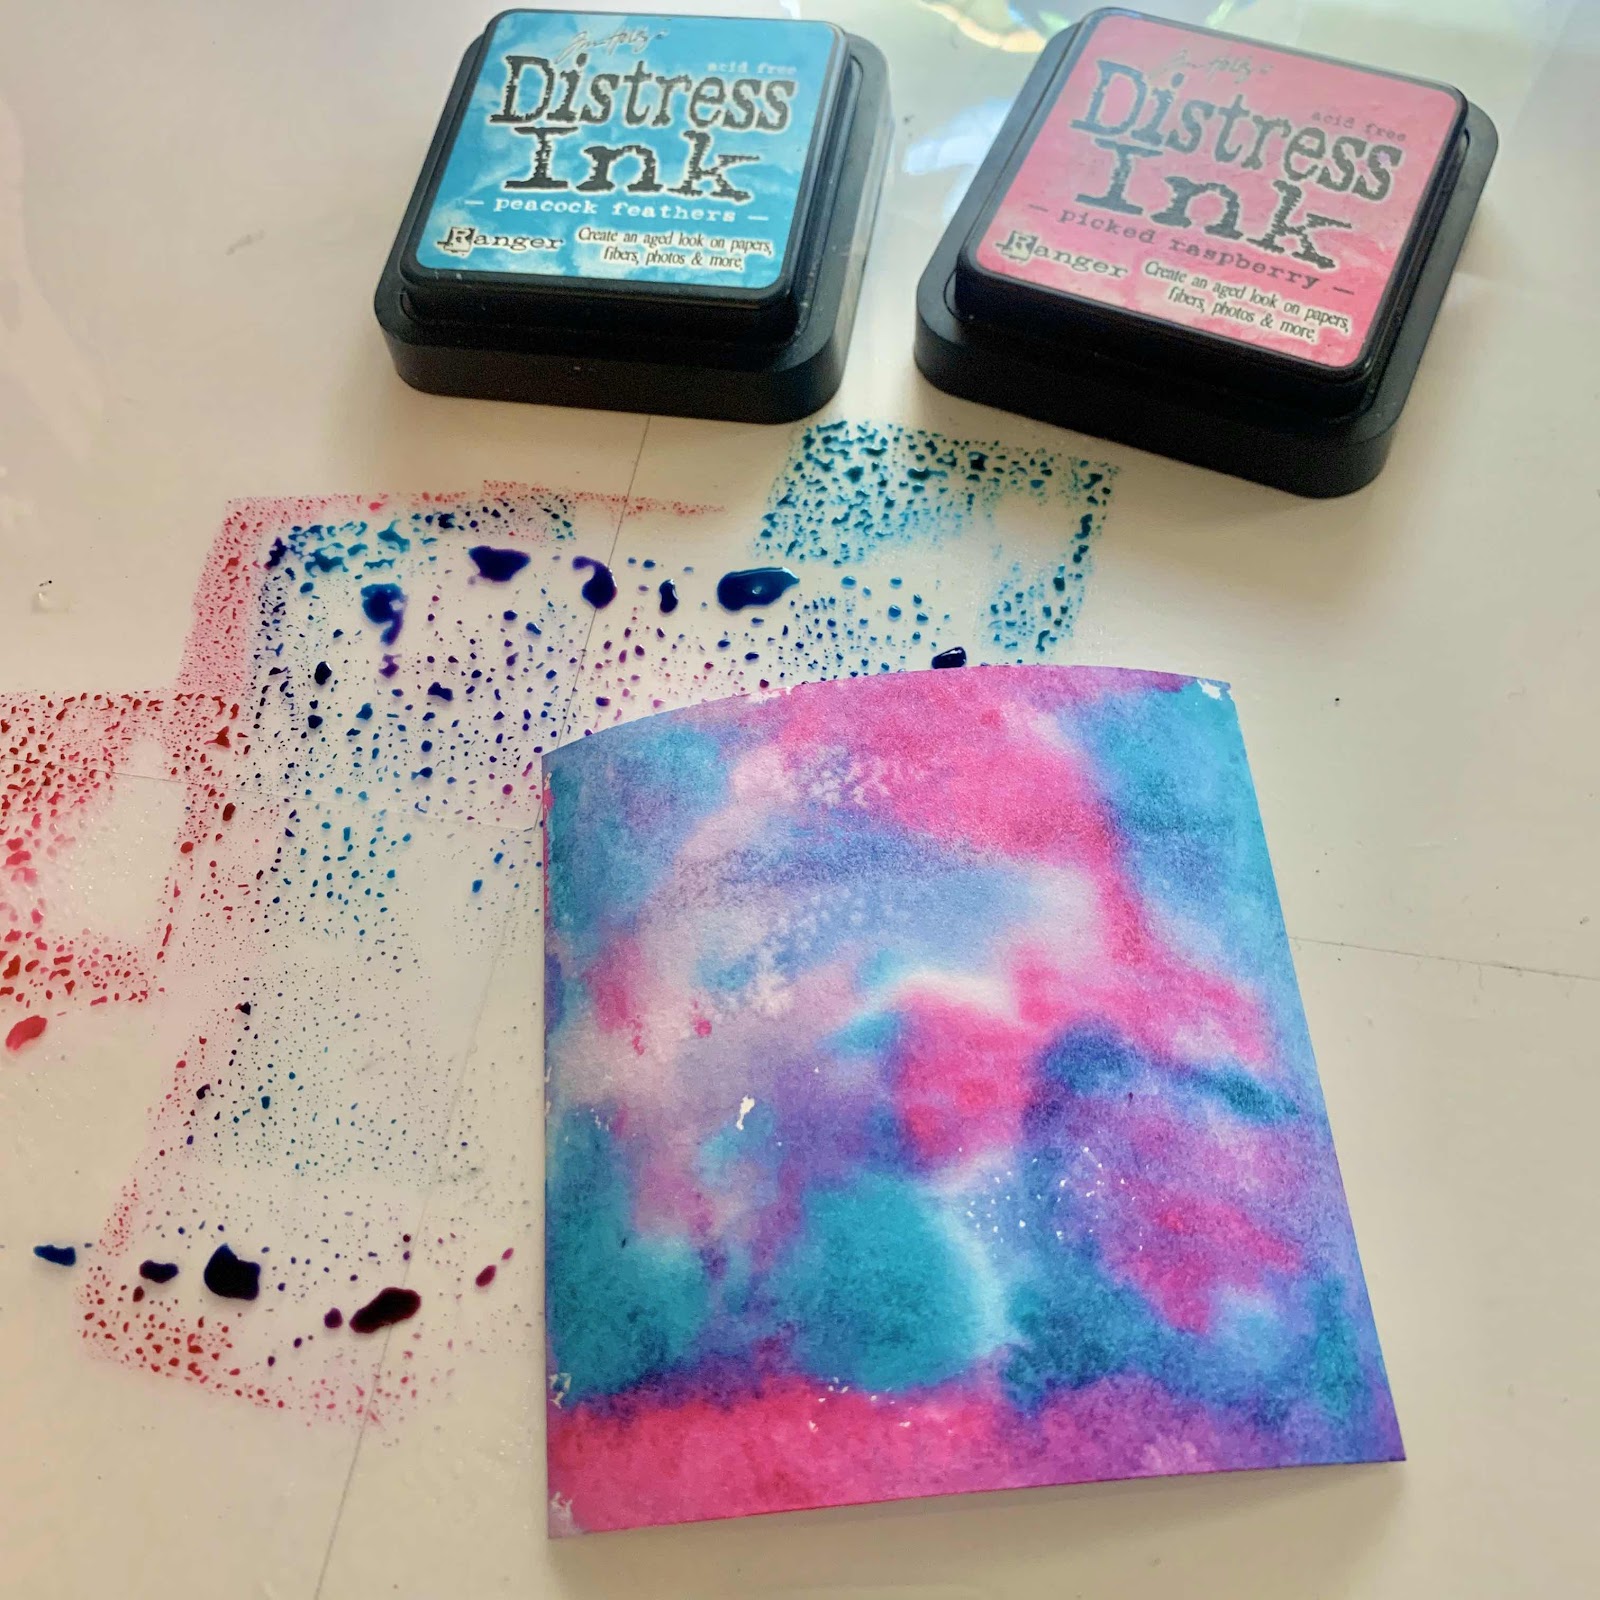
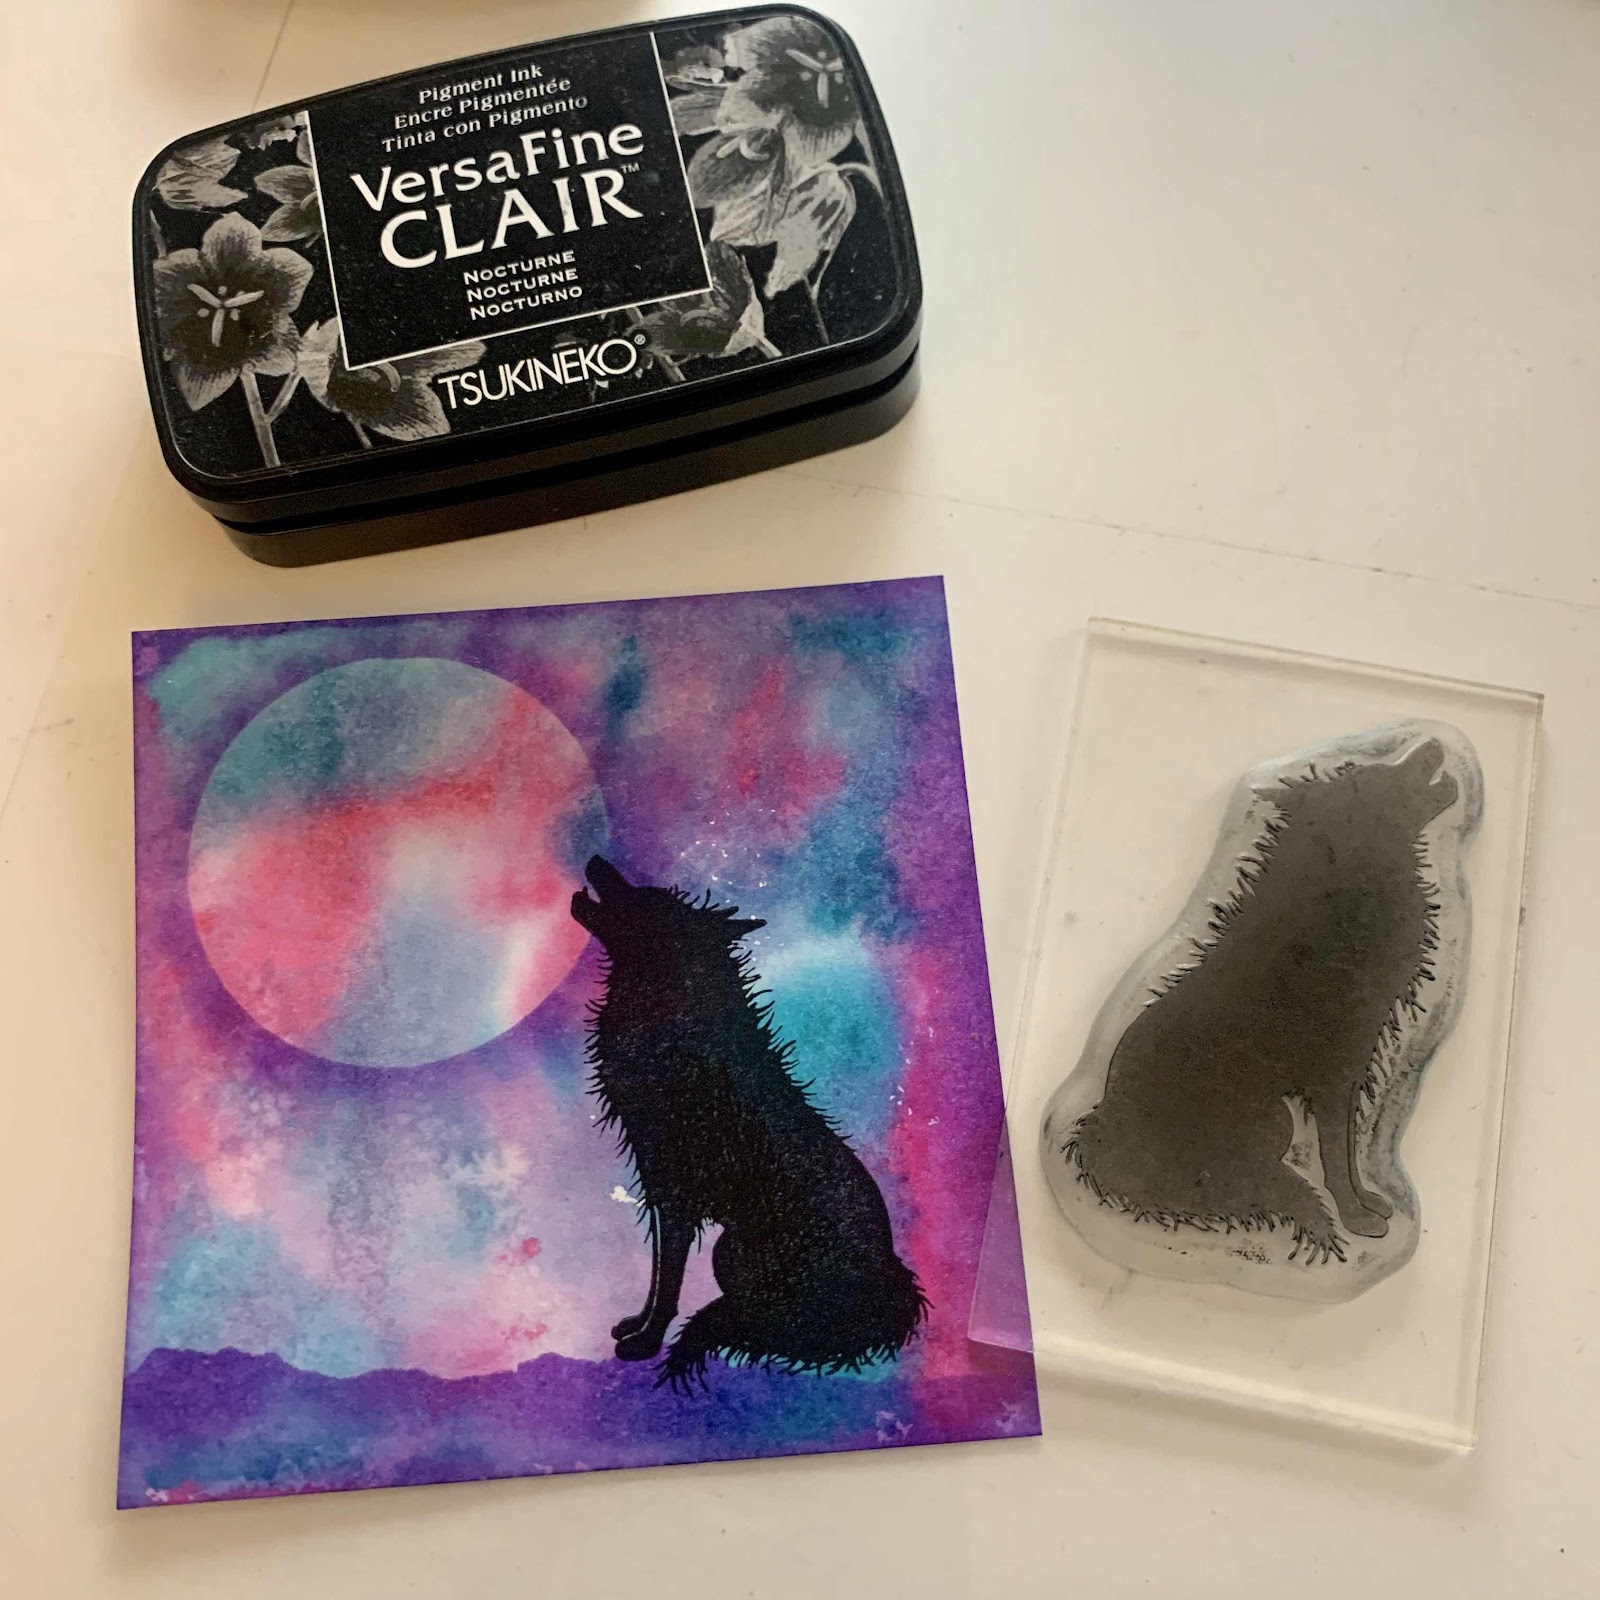
Dab your ink on the messy mat - for this I used Picked raspberry and peacock feathers.
Spritz with a mini mister and lay card in the ink.
If you find the ink hasn’t covered all the white card just lay it back in the ink.
Hi everyone!!
Today I'm going to show you how I made this fantasy fairy card. I'm afraid I'm a little obsessed with using the Lavinia stamps at the moment. I just love the fact you can make really quick striking cards.
Start off with a 4x4inch thick good quality card.
You will need a glass place mat or I highly recommend purchasing a messy mat from Wilco (this is a large thick plastic mat that you can wipe clean)
Dab your ink on the messy mat - for this I used Picked raspberry and peacock feathers.
Spritz with a mini mister and lay card in the ink.
If you find the ink hasn’t covered all the white card just lay it back in the ink.
Once satisfied use a piece of kitchen towel to dab off any excess ink.

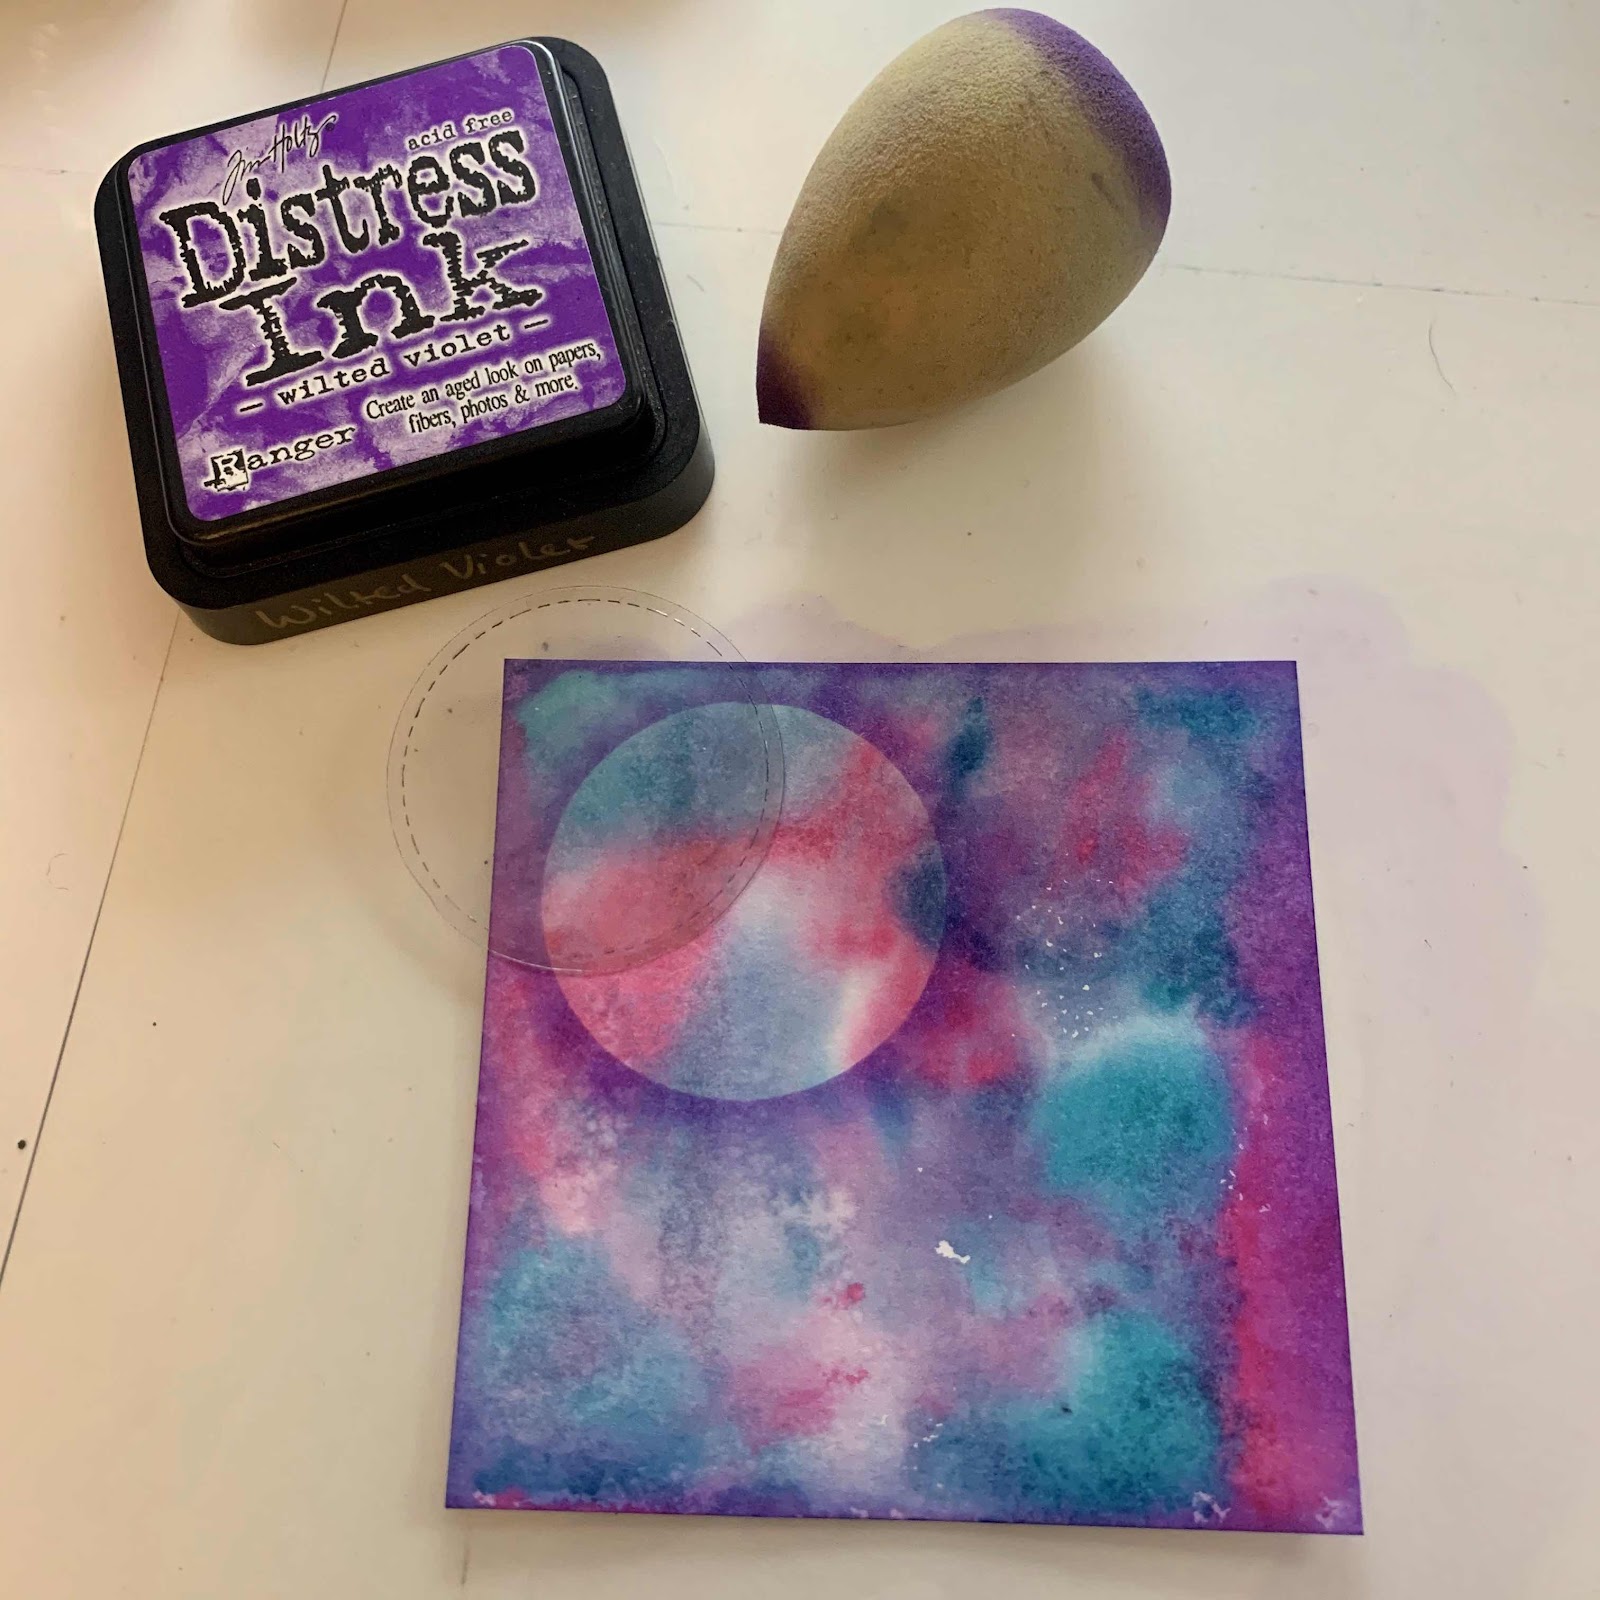
Using a circle mask flick the ink away from the mask with a sponge to create a moon affect. For this I used wilted violet.
Using a circle mask flick the ink away from the mask with a sponge to create a moon affect. For this I used wilted violet.
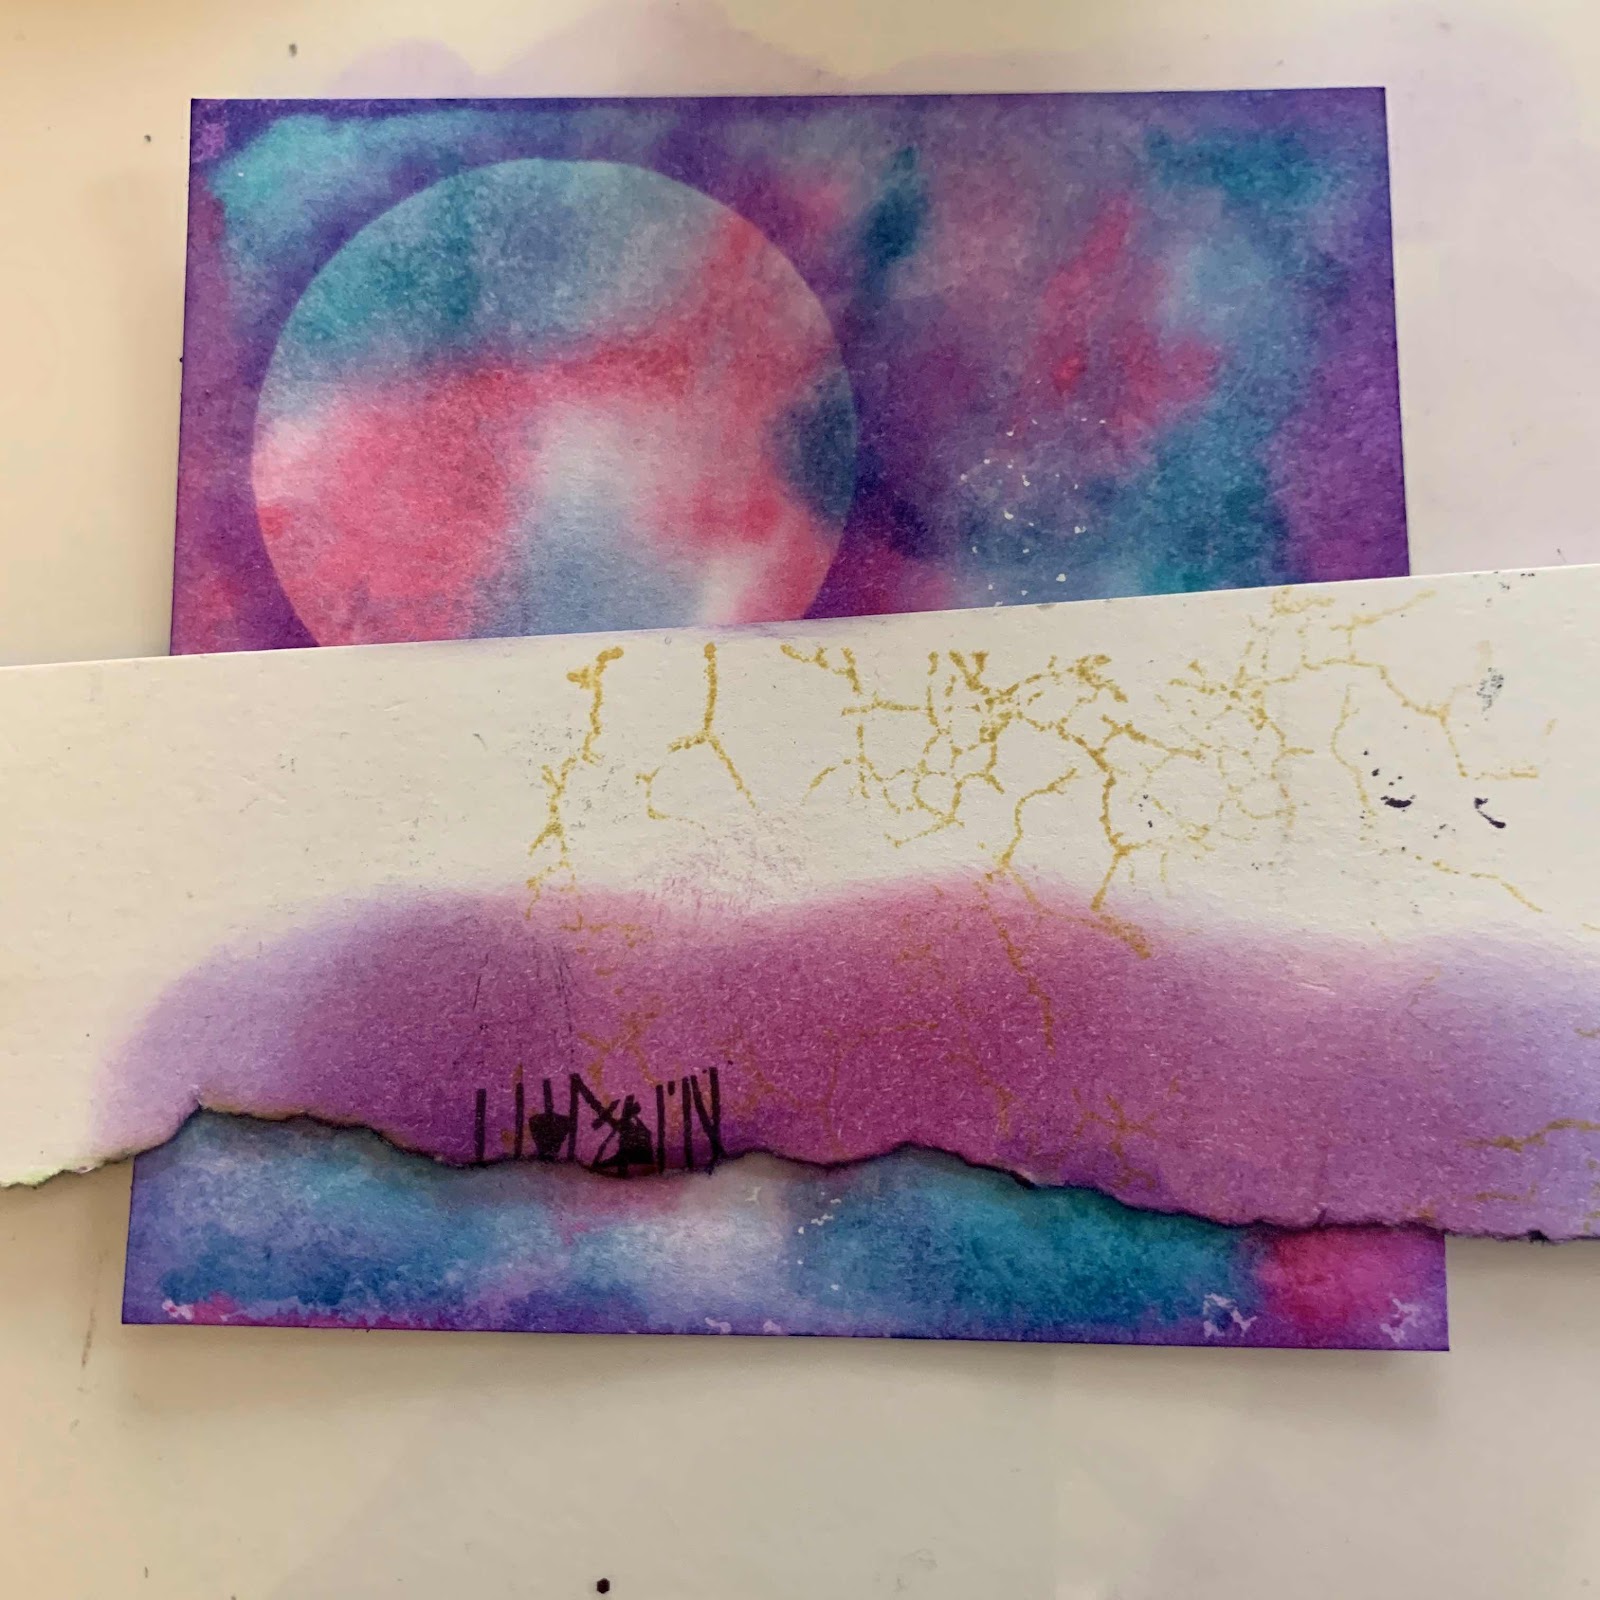
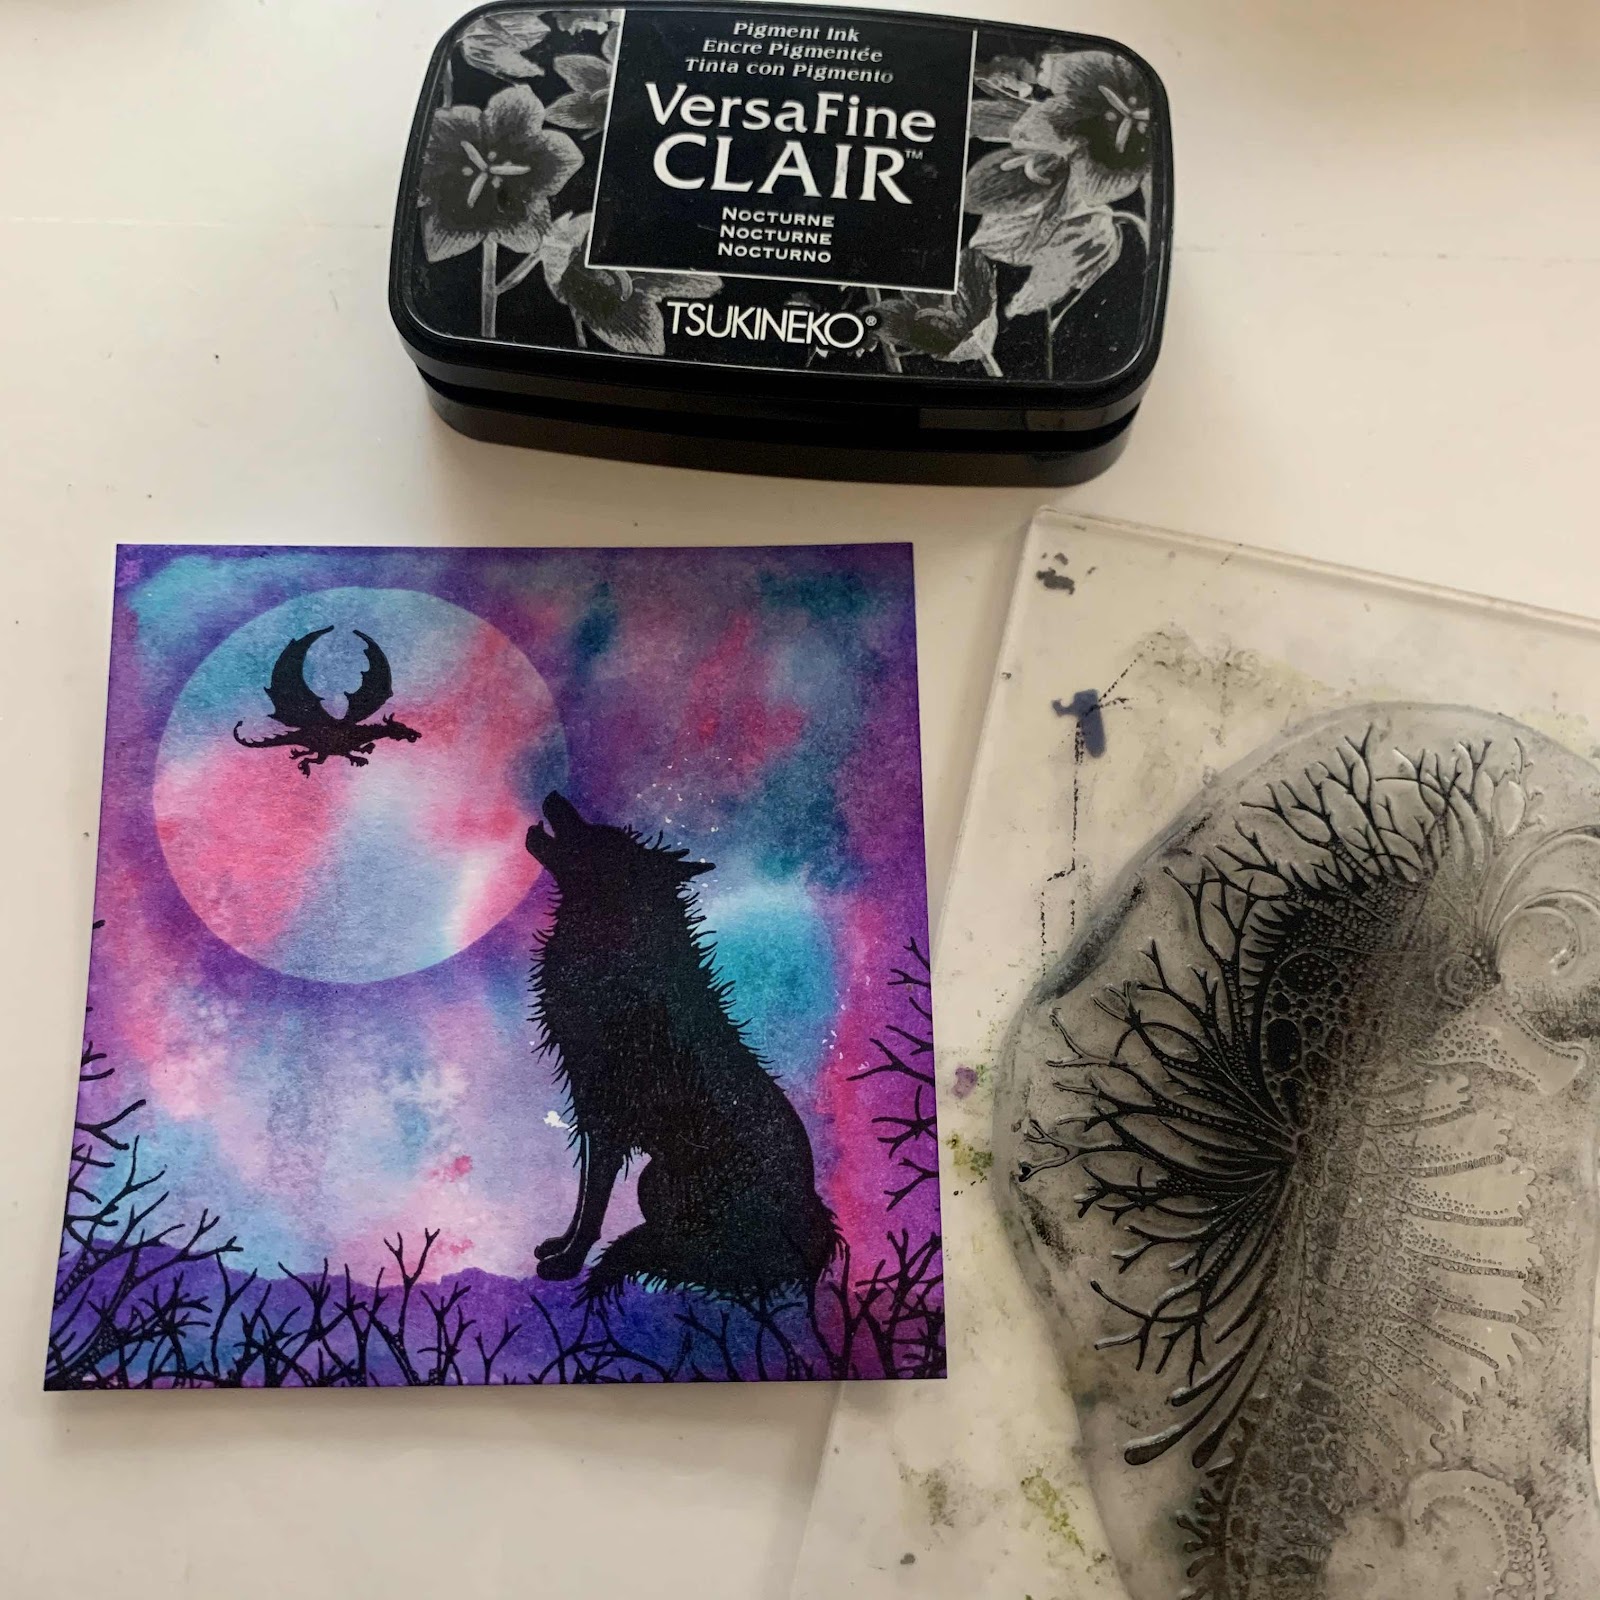
I like to use this cracked paper effect stamp to give the background abit of extra texture. Using the wilted violet ink pad just randomly stamp where you you mind like the distressed look. You don’t have to be neat with this and you can always stamp areas again if you feel it needs more crackle.

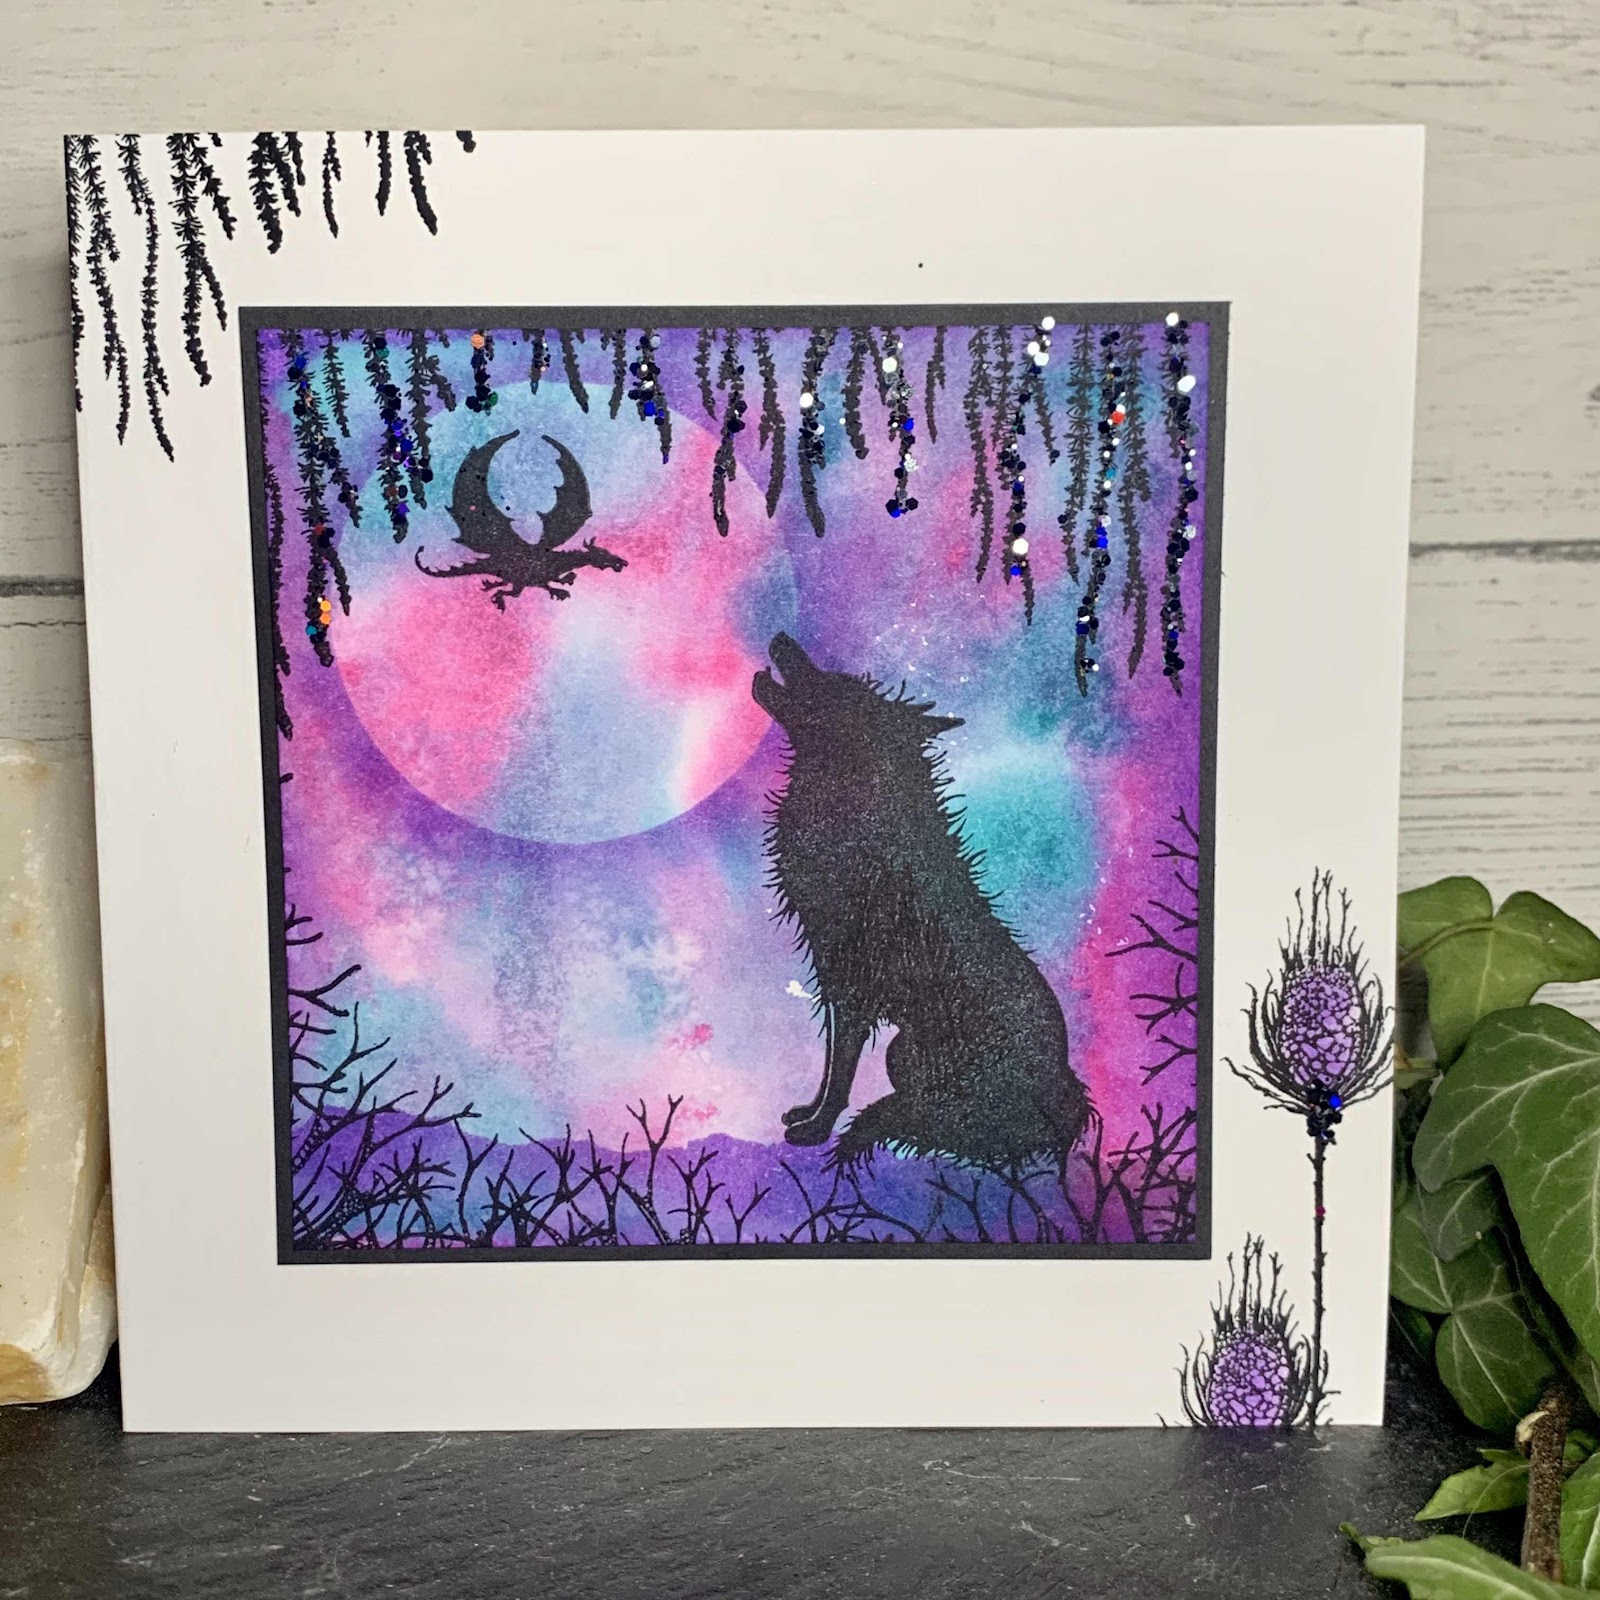
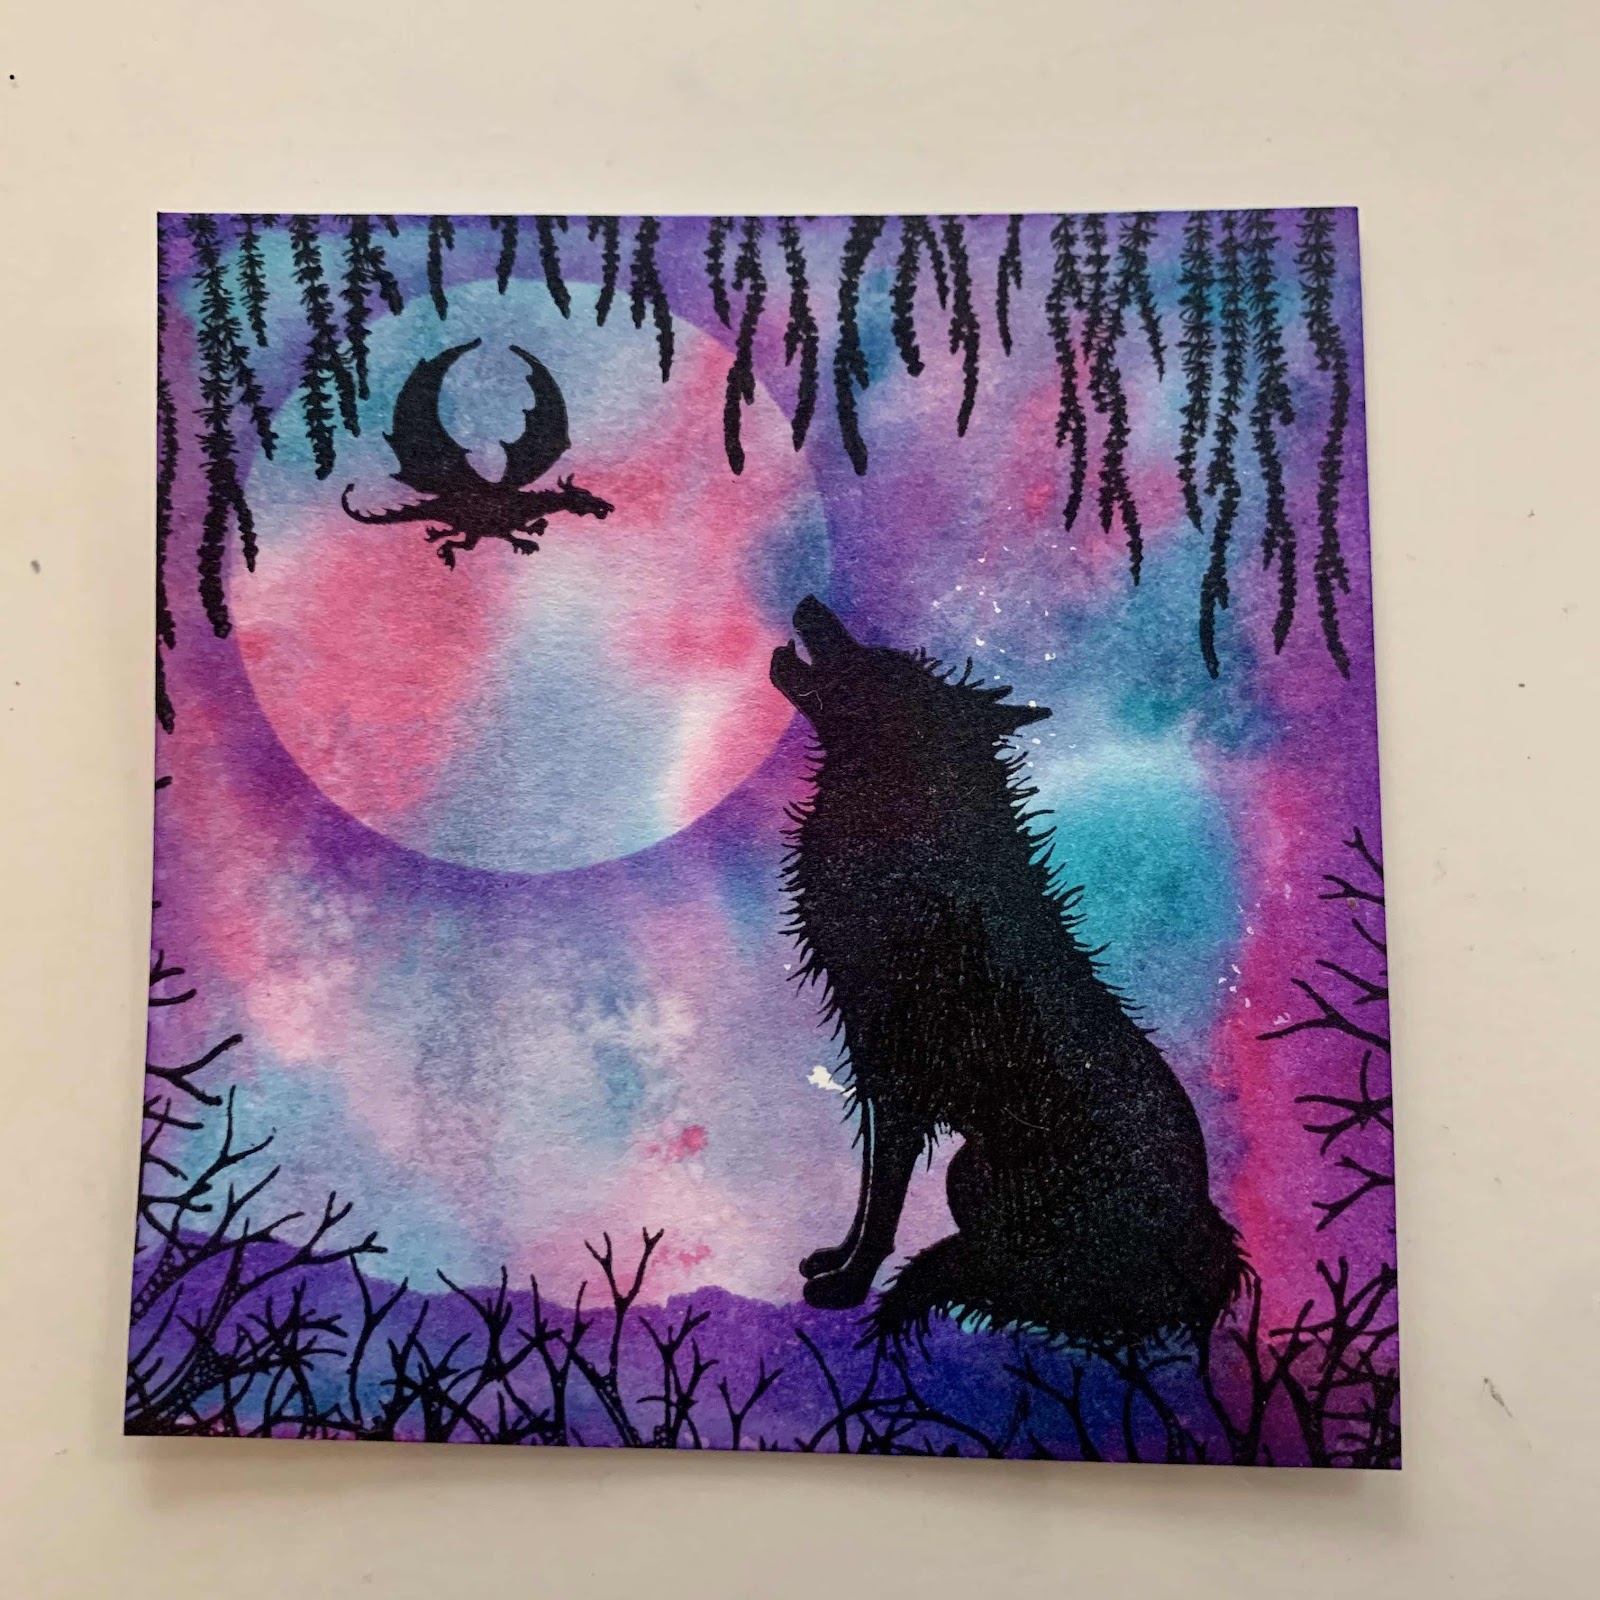
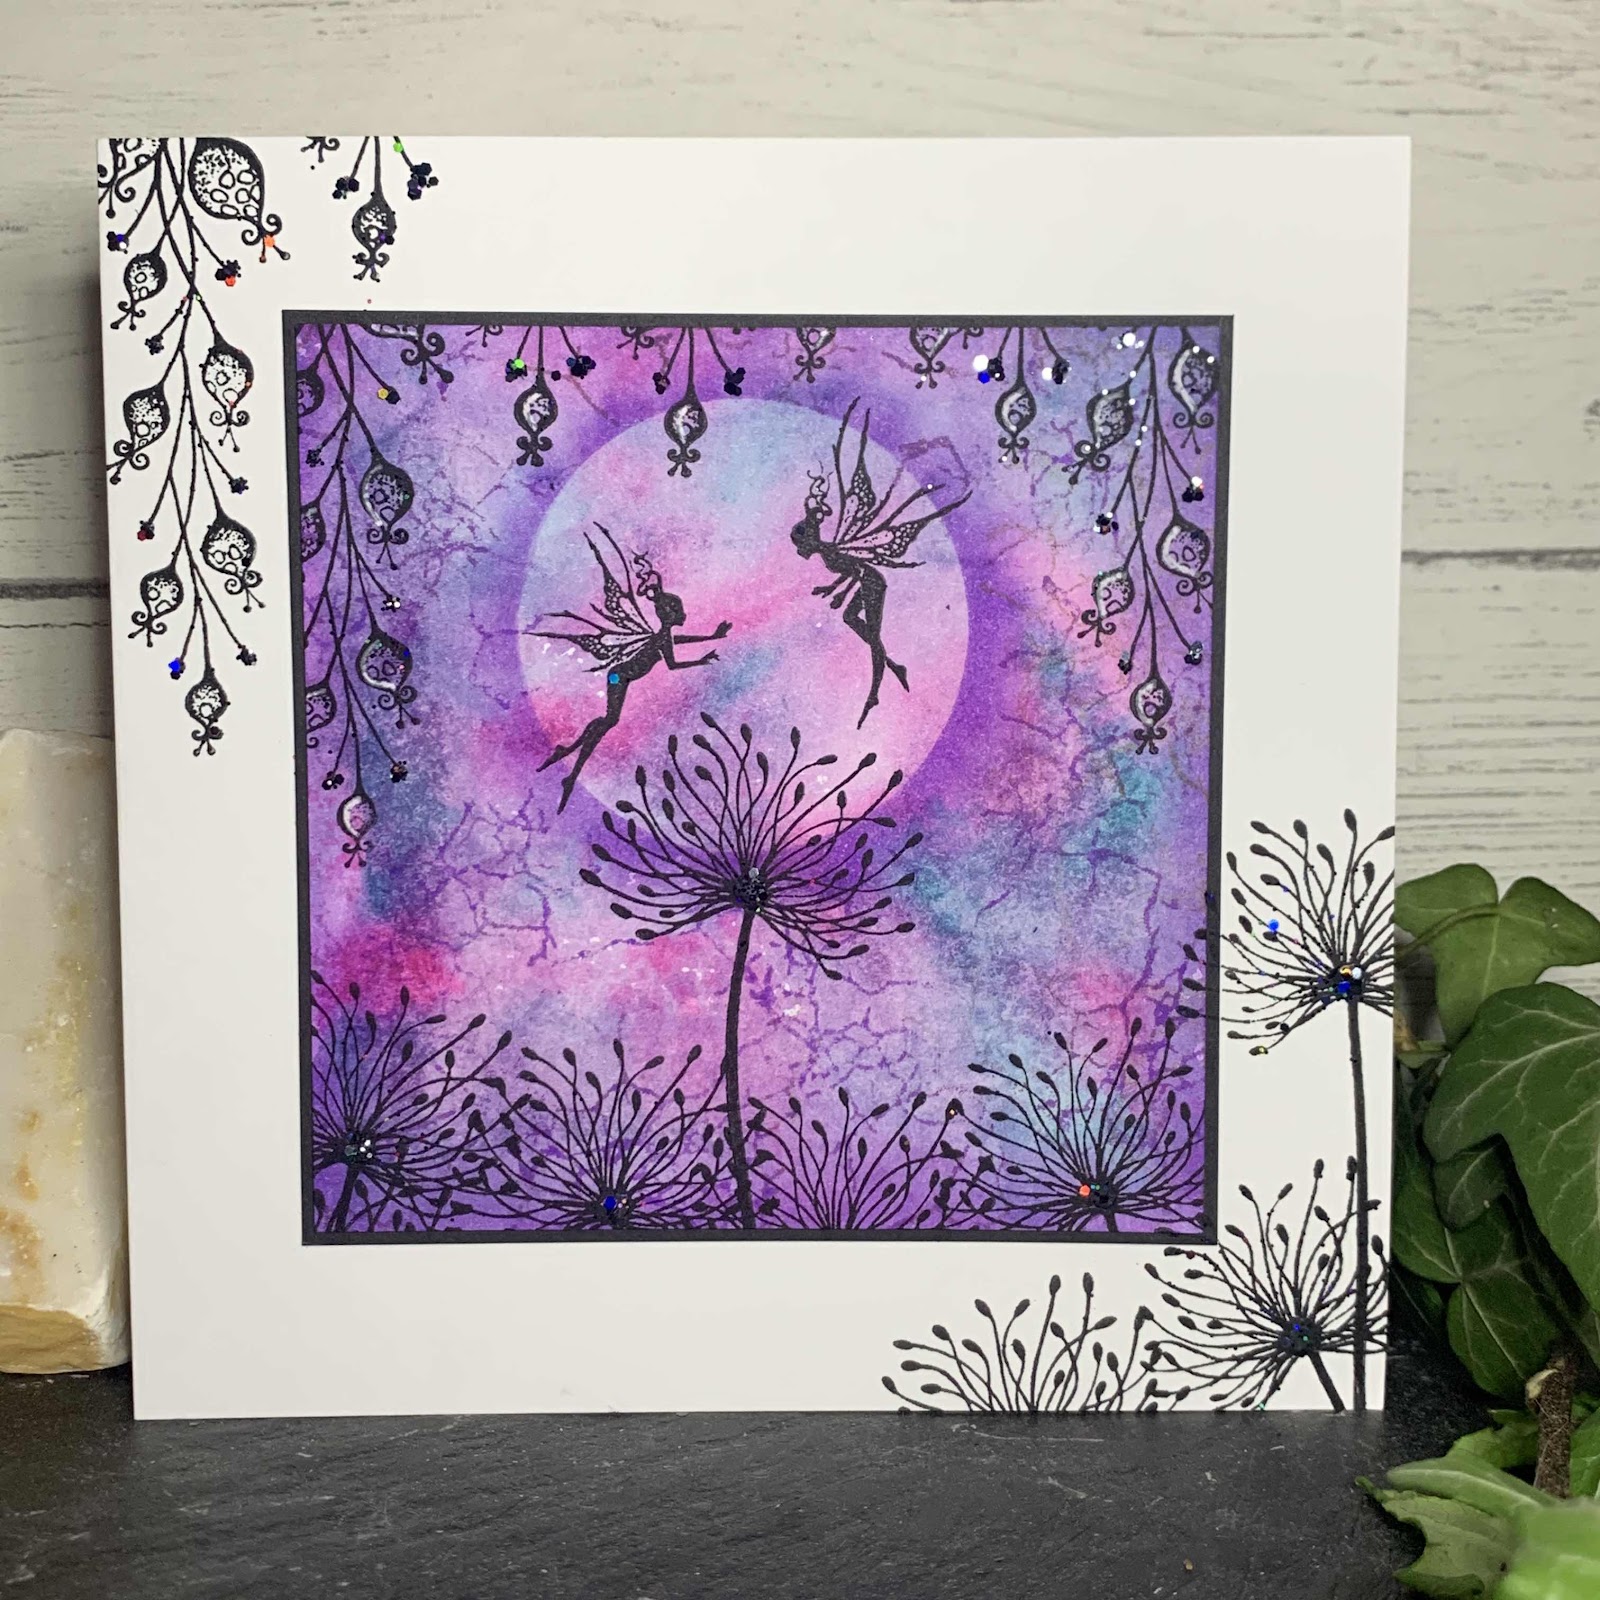
You can now stamp your main scene. For this I used black versafine Clair to stamp fairy foragers, dandelions and hanging lanterns.

Now mount your topper onto a piece of black card measuring just slightly bigger than your topper, then onto a pre-scored 6x6 cars blank.
You can now stamp your main scene. For this I used black versafine Clair to stamp fairy foragers, dandelions and hanging lanterns.
Now mount your topper onto a piece of black card measuring just slightly bigger than your topper, then onto a pre-scored 6x6 cars blank.
Stamp the hanging lanterns and dandelions on the corners and add abit of glitter to the centre of dandelions and a little on the lanterns.

Shopping list
Shopping list
Fairy foragers
Dandelions
Hanging lanterns
Distress inks
- Picked raspberry
-Peacock feathers
- Wilted violet
White card
Black card
6x6 Card blank
Black Versafine clair ink pad
Cosmic shimmer glue
Glitter
Water spray
I was able to purchase most of this list from a lovely little craft shop in Great Yarmouth, Norfolk. If your in the area make sure you pop into
Noble Crafts