Search This Blog

Wednesday 26 January 2022

Passion wagon - crafty individuals dogs


Hi Everyone!!!

Goodness I can't believe this is my 5th post this month!! Trying to be more organised this year, I say that every year though and it never happens.

Anyway made this really quick card last night using crafty individuals CI-591.


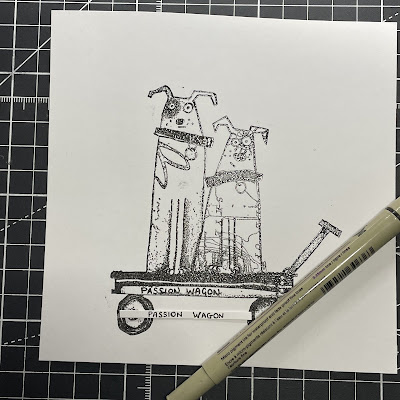
As valentine's day is just around the corner I wanted to rename to cart to passion wagon.

Using a thin strip of masking tape place over the existing wording on the cart. Ink the stamp up with black ink and carefully peel the masking tape of with a pair of tweezers.

Stamp the image on some white card and heat emboss with clear embossing powder.

I then wrote the words passion wagon on the cart. I decided I didn't like it as it wasn't very central, so I cut a thin strip of card out and tried again. I'll stick this down once the image has been coloured.

Colour the image with tri-blend pens. I recently bought another pro marker blender pen and used it on the smaller dogs tummy to lighten it and blend the colour out slightly. 

Don't forget to colour the little strip of card with passion wagon on.

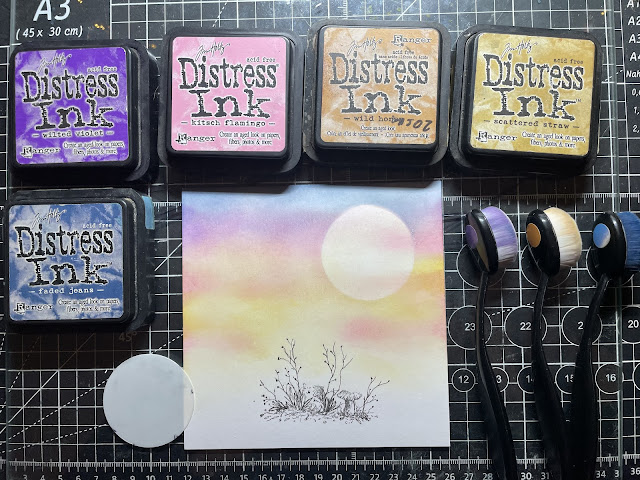
Create a mask by stamping the image a sheet of masking paper, cut is out and place over the image.

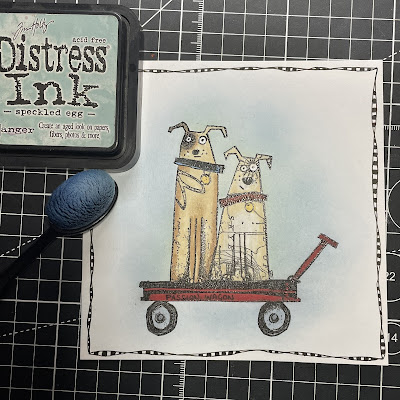
Apply some distress ink using a blending brush.

Draw a doodled border around the edge. 


Stamp the wording from Tim Holtz crazy talk set.

Using a stencil draw around a few hearts in random places and colour with a red pen. 
Add a few highlights with a white pen.


Stick the card onto a pre-folded 6x6 card blank and stick the little passion wagon strip in place.


Shopping list

CI-591 - Dogs stamp
Tim Holtz crazy talk stamp set
Heart stencil
Pens
Black ink pad
Embossing powder
White card
Black pen
White pen
Glue
Distress ink
Blending brush

Thanks for visiting!!

X- Dena -X


Tuesday 25 January 2022

Crafty Individuals - fairy on a toadstool

Morning Everyone!!

Hope your all keeping warm - I'm really not a fan of this cold weather!

I haven't really made many new pieces this month other than a few family/friends birthday cards and playing with the new Crafty Individuals stamps due to be launched on the craft store on Friday 4th Feb. Hope you can tune in at 10am and 2pm.

One of the recent cards I've been working on is this fairy toadstool card for one of the other CI design team members.


Ink the grassy section of CI-574. I'm only using this part of the stamp at the moment as I wanted some foliage at the foot of the shroom.


Draw in a few extra branches.


Lightly ink the sun area with distress inks. Then place a circular mask in place and build up the sky with a blending brush.
Remove the mask and drag some extra ink across the sun to create a more realistic cloudy scene.


Create a horizon line using shades of green.


Stamp the grasses from CI-495 along the bottom. Try to avoid inking the bird.


Stamp the tree from CI-361 around the top edges of the card.


Stamp and emboss the toadstools on a separate piece of card then cut them out.


Stamp and emboss the fairy from CI-579, then cut her out. You'll only need the fairy and her skirt.


Colour the toadstool and fairy. I used spectrum noir tri-blend pens.


Stick the large toadstool in place along with the fairy's skirt.


Curve the fairy's wings around a pencil.
Now stick the smaller toadstool and fairy in place using silicone glue to create a raised layered affect.


Randomly Stamp a few dragonflies from the fairy Rose set.
Add some glitter to the dragonflies and fairy's wings.


Mount your topper onto a piece of black card then onto a 6x6 card blank.


Shopping list

CI-574 Toadstool
CI-495  Wagtail - branches
White card
Black card
Black ink
Embossing powder
Distress ink 
Blending brushes
Spectrum tri-blend pens 
Heat gun
Glue

Thanks for visiting!!

X - Dena - X


Monday 17 January 2022

Lose yourself in the music - Visible image card

Hi Everyone!!!

I'm so behind with my blog posts - I've really struggled to catch up since Christmas. 

So today I'm going to share this really quick card I made using the Visible image - lost in the music stamp.


Stamp and emboss the image in black ink and clear embossing powder with a heat gun. 


Create a mask by stamping the image on masking sheet, cut out and place over the image. Make sure you keep it safe after use as you'll be able to use again in the future.


Apply distress inks to the background using a blending brush.


Randomly stamp a few musical notes in different colours.
Colour the image with Tri-blend pens.


Water colour the T-shirt with distress inks and try to fade the edges of the T-shirt into the background.


Mount the image onto black card and then onto your 6x6 white card blank.


Shopping list

- Blacking ink
- Clear embossing powder
- Glue 
- Tri-colour pens
- Distress inks
- White card
- Black card
- 6x6 card blank
- Masking sheet
- Heat gun
- Blending brushes

Thanks for visiting!!!

X- Dena - X


Sunday 2 January 2022

Visible image Sparkle in the rain

Hi Everyone!!

So this is my first card for the year. Couldn't wait to play with some of the new stamps I got for Christmas. I've had my eye on this set from Visible Image for a while now.


Cut a piece of card approx19.5x8.5cm.
Stamp and emboss the lady and words from Sparkle in the rain in black and clear embossing powder. 
Stamp the rain and puddles using the versamark inkpad and emboss with clear embossing powder. 


You wont be able to see the rain and puddles very clear at this point. Once embossed they should be transparent. This will act as a resist once you start inking your background.


I felt this image was crying out for a nice bright background. Carefully blend your selection of distress inks with a blending brush.


Using a fan brush flick drops of water over the background and dry with some kitchen towel. 


Add some white highlights to the writing with a white sakura pen.


Finally mount your background onto black card and secure on to a pre-folded DL card blank.


Shopping list

- Visible image stamp - Sparkle in the rain
- Black ink 
- VersaMark ink pad
- Clear embossing powder
- White card
- Black card
- Fan brush 
- Distress ink
- Blending brush 

Thanks for visiting 
X- Dena -X


Crafty Individuals Friends - Beach card

Hi Everyone - Happy New Year to you all!!

Hope you all had a good time whatever your plans. We had another quiet new year thanks to Covid. Spent the evening drinking, watching TV and then stood outside the front door to see the new year in and toast the moon!!

Anyway enough about my New Years, I have a couple of quick cards to share with you. Made this one a few days ago now using a couple of Crafty Individuals Stamps.


Stamp and emboss the jumping girls from CI-284 using black ink and clear embossing powder.
Cut it out leaving a light border around the edge then colour. I used distress inks as water colour paints. Dab the ink on a tile or messy mat and pick the ink up with wet brush.
Mount the image onto black card.


Cut a piece of card approx 12x17 cm. 
Using a strip of scrap card apply ink to the lower section of the card with stormy sky distress ink. Add some tea dye distress ink at the bottom of the card to represent sand.
Apply tumbled glass ink to the sky area. I also added a little kitsch flamingo to add a pop of colour. 
Darken the edges of the card with chipped sapphire.


Paint some sea foam to form the shore line with white Gesso. Try to apply the paint fairly thick to give a raised fluffy look. I also applied some paint to create some waves in the sea. 
Now if your as impatient as me you can dry the paint using a heat gun. 


Stamp and emboss friends from CI-464


Randomly stamp the words from CI-459 using stormy sky distress ink.


Apply some pinflair craft glaze over the gesso and areas of sea to create a glossy look.


Mount the background onto black card and then onto a 5x7 prefolded card blank. 
Right at the last minute I decided to add some sand. 


Shopping List

- Crafty individuals stamps - CI-459, CI-464 and CI-284
- Black versafine ink
- Wow ultrafine embossing powder
- Distress inks
- White Gesso
- Pinflair craft glaze
- Sand 
- Cosmic shimmer glue
- Trimmer 
- White card
- Black card

Thank you for visiting!

X- Dena -X