Search This Blog

Friday 20 January 2023

Simple Love/Valentines Day card

Evening everyone.

Hope your all managing to stay warm - it's so cold here in London, I've been sitting here with my little heated pad and wrist warmers on.

Anyway, I'm a little behind with Valentines cards (as usual) but hoping to make a few different styles over the next few days starting with this one.


Stamp and emboss Crafty Individuals 'Singing Merrily' music stamp onto cream card. 
Cut it down to a square.


Cut a piece of black card just slightly bigger than the stamped image to create a mount.
Cut a much larger piece of cream card measuring approx - 11.5cm squared.


Using a versamark ink pad, stamp the Crafty Individuals script and emboss with red embossing powder in opposite corners.
I didn't bother mounting the stamp on an acrylic block, instead I just held onto it carefully applying pressure roughly where I wanted the script. 


Using a VersaMark ink pad, drag the ink along the edge and emboss with a gold glitter embossing powder. 


Tie a piece of Jute string around the piece of card and finish with a small bow. 


Mount onto a piece of red card. 


Die Cut some funky hearts from the Tonic Beautiful Hearts set. 
I'd recommend die cutting them in red but as I don't have much red card at the moment and need to go craft shopping I just cut them out of white card.
As you can see I cut way more hearts than I actually needed for this one card but I do plan on using them on other cards.


I then coloured the hearts with Candied apple distress ink. Obviously if you used red card you wont need to do that.
I decided to add some depth so applied some aged Mahogany around the edges.


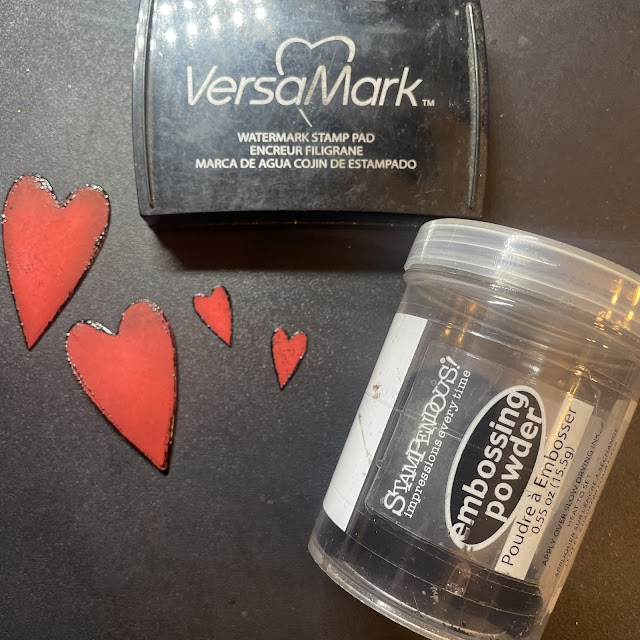
Drag the VersaMark ink pad around the edges of the heart and emboss with black embossing powder.


As you can see the black embossed lines around the hearts aren't perfect and there are specs of black dotted on the inside. This was actually intentional, I wanted them to look slightly rustic. 


Mount the background piece onto a pre-folded 6x6 card blank.


Stick the music topper in place using a silicone glue so it's slightly raised.


Finally stick the hearts in place.


I haven't stuck any words on this card so in theory it could be used for any romantic occasion.

Thanks for joining me.

X_Dena_X

Shopping List

Tonic - Beautiful Hearts
White card
Cream card
Red card
6x6 prefolded kraft card
Black VersaFine Clair ink
VersaMark ink pad
Wow ultrafine embossing powder
Black embossing powder
Red embossing powder
Gold glitter embossing powder
Silicone glue
Glue
Jute string


Tuesday 3 January 2023

Crafty Individuals December Launch

Hello!!!!

This is just a really quick post - I've only just noticed that I didn't share my samples from the last launch of Crafty Individuals stamps. So here they are.......
The newest stamps shown here are 2 new maps. I'm so pleased Crafty Individuals decided to launch these, they're defiantly a must have in your collection and are perfect for men's cards. My fav part of these stamps are the fact they have different elements to them, they have a little strip along the edge that looks like an old negative reel and some text on them. You'll probably notice I've used these parts of the stamps allot in my samples as borders - in face I got a little bit carried away - woopsie!!!

The new maps can be found Here -

Here are some other stamps that goes so well with the maps that I've used in my samples below.


Thanks for stopping by.

X - Dena - X


Crafty Individuals Fairy Card


Happy New year to you all!!!

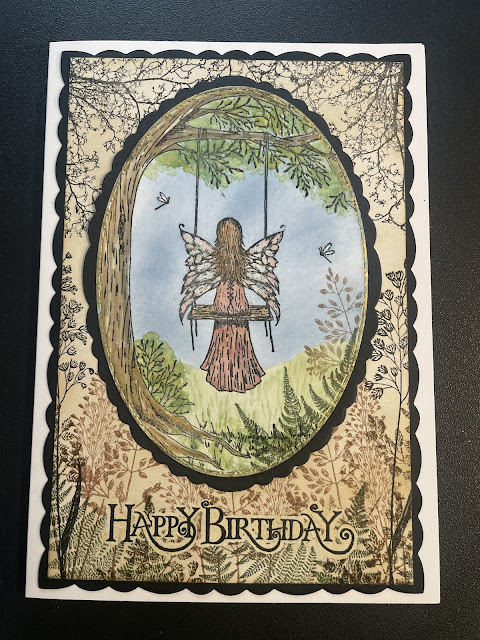
I hope you all had a lovely Christmas and New Year. It was so nice to have a little break but I was itching to get back to my desk. This is my first make of the year - a card that I made for my brothers girlfriend. 


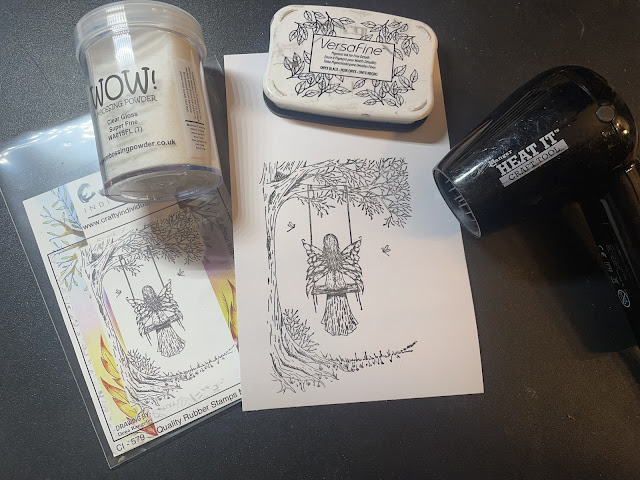
Stamp the fairy in black ink and emboss with clear ultra fine embossing powder.


Die cut image with an oval nesting die.


Apply a thin layer of drawing gum over the fairy and dragonflies with a synthetic brush. 
I didn't bother doing the tree as it'll be coloured a darker brown.


Place the crafty Individuals stencil in place and apply some blue distress ink to the sky area. 
Now the great thing about this stencil is you also have the matching opposite side. So, place the matching horizon line over the sky area and apply green ink to the lower section to create a grassy area. 


Using a piece of kitchen towel dab the area covered in masking gum to remove any unwanted ink to prevent smudging. 
Carefully remove the masking gum either with your finger or a glue eraser. 
Colour the image - for this I used spectrum noir tri blend pens.
I used a small amount of ink to the edge of the wings then blended the colour into the centre with a blender pen.
Using a black fine liner pen draw in a few extra lines along the left hand side to extend the bark lines.


Dab some different shades of green onto a tile/messy mat and using a watery brush add some colour to the leaves. 
With a slightly dryer brush add some texture to the grass area.


Stamp a few ferns and grasses along the bottom right hand side.


Draw a line of quickie glue around the edge, place the foil over the glue line and rub with finger nail. The foil should then stick to the glue. 
Apply some stickles glitter glue to the wings on the fairy and dragonflies.


Die cut a decorative border for your topper. 
I'm afraid I don't know the make of this die as I don't seem to have the original packaging but you could use any decorative nesting die or just another plain oval. 


Take a 5x7 pre folded card blank and die cut a decorative rectangle to fit in black card.


Now cut a piece of white card slightly smaller than your black mount.


Using a blending brush apply some brushed corduroy distress ink to the whole piece of card.  


Lay the fairy topper roughly where you plan to stick it - but don't stick it in place just yet!
You can then stamp and emboss the Happy Birthday sentiment. 


Using a very fine brush apply a thin layer of drawing gum around the sentiment so it has a little 'halo' around it.


Stamp The trees, ferns and grasses in a selection of black, brown and green ink. 


Use a piece of kitchen towel and dab any excess ink off the masking fluid. This is really important this time round as the ink will smudge all over the background when you remove the masking fluid and leave a mess.
Carefully remove the masking fluid. 
You should now have a plain halo effect around the sentiment making it pop slightly and prevent it getting lost amongst the grasses. 


Mount all your pieces onto your card blank using your desired glue.
On this card I actually tried out a new glue which I now love and will be using on future projects. I used Collall all purpose clear glue. Its great for mounting lots of layers as it gives you a little wiggle time to help line up all your layers properly. However I wouldn't recommend using this on smaller die cut pieces as it is a little stringy.


Thank you so much for joining me. Below is a list of all the items I used along with a few links. 

Hope to see you back here again soon

X - Dena - X


Shopping list

Crafty Individuals products:

White card
5x7 card blank
Black card
Oval nesting Die
Decorative oval nesting die
Decorative rectangle nesting die
Paper trimmer
Distress Inks
Blending brush
Paintbrush
Glue 
Die cutting machine
Black, brown and green ink
Clear embossing powder
Heat gun
Kitchen roll
Masking gum and synthetic brush 
Stickles
Foil 
Quickie glue pen