Search This Blog

Wednesday 31 March 2021

A little birdie told me it's your birthday

Hi Everyone. 

Another post from me today. On a bit of a roll!!

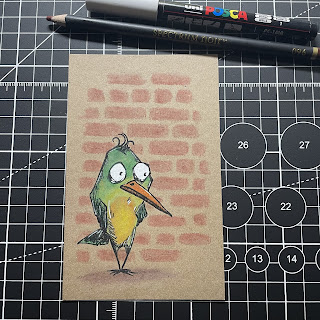
I haven't made a card from Kraft card in a while and I could hear the Tim Holtz crazy birds squawking from my stash of stamps so thought it was time they came back out to play.


Cut a piece of Kraft card to approx. 21x15.5cm and fold in half.
Cut another piece to approx. 13.5x8.5cm.

Stamp the bird slightly to one side in staz on ink.  


I then coloured the bird with spectrum noir coloured pencils, these blend so lovely and seem to work so well on Kraft card. If you don't like the way they blend you can use the spectrum noir pencil blending solution - but I didn't need to on this. 
Using a brick work stencil and pencil colour in a few bricks leaving areas around the edge blank.

Then add some white highlights to the bird.


Using the border from crafty individuals stamp set CI-361 - stamp all around the edge. This stamp is a definite must have and can be used in so many ways. 


Go over the barbed wire with a sparkle gelly roll sparkle pen.


This creates a lovely shimmer.


Stamp your desired wording from the Tim Holtz crazy talk collection. 
Cut each word out and carefully position and stick in place.

Using a fine liner black pen I drew around the edges of the wording to make it stand out a little more. 


Mount onto your folded card blank.

I then used glossy accents on the eyes and applied the clear glaze gelly roll pen to the birds beak. 


Leave to dry.


Thank you so much for joining me.

x - Dena - x

Shopping list

- Kraft card
- Timmer
- Staz on black in pad
- Glue 
- Scissors
- Spectrum Noir colouring pencils
- Gelly roll clear glaze
- Gelly roll sparkle
- White posca pen
- Tim Holtz crazy birds set
- Tim Holtz crazy talk set


Faith cat

Hi Everyone!!!

I seem to have a bit of a build up of cards that I've taken step by step photos of but haven't created the blog post for them. This is another really quick make using the sweet poppy stencil that I recently purchased from Craft stash.


Start by cutting a piece of card to fit a pre-folded 6x6 card blank leaving a border around the edge.

Dab your desired colours randomly on a glass mat/piece of acetate and spritz with water. 
Place your card in the ink and press to pick up the ink.

If your card has areas without ink just pop it back to pick up some more ink in the areas required.
You can also wipe it off and repeat this process. If doing this a couple of times you may want to dry the card with a heat gun to prevent in the ink looking like a muddy mess. 
I will try to do a video on how I create these backgrounds at some point!


Make sure your card is completely dry - at this point the card might look very warped. This can be easily fixed by placing under something heavy for a while.

Secure the stencil with your card behind it. 
Ink through the stencil with black versafine clair using a sponge applicator.


Remove the stencil carefully and clean.
Use the heat gun to dry the black ink to prevent smudging.

Using the Lavina coral stencil ink through using dusty concord. I only did this around the edge. 


Ink around the edge with black versafine clair.

Mount the topper onto your pre-folded card blank.

I then added some super sparkly glitter - Lisa Horton - magical mermaid tails in lilac. This is such a beautiful glitter, containing several different sized specs. For this process I dotted some glue around the card and picked up some of the larger specs from a pile I'd poured onto some paper using the little gem pick up tool.


Now you have your completed card.


Thanks for visiting 

x - Dena - x

Shopping list

- Pre-folded card blanks 
- White card
- Trimmer
- Distress inks
- Black versafine clair
- Glass mat/acetate
- Heat gun
- Applicator
- Glue
- Gem pick up tool
- Lavinia Coral stencil 
- Sweet poppy faith cat
- Lisa Horton Meramids tails glitter


Saxonphonist card using visible image stencil

Afternoon everyone!

Hope your all keeping safe and well.
Thought I'd share this really quick card using the the Saxophonist stencil from visible image.


Cut a piece of card to fit on a pre-folded 6x6 card blank.
Select the colours of distress inks you'd like to use. For these cards i used the following:
- Squeezed lemonade
- Wild honey
- Candied apple
- Cracked pistachio
- Peacock Feathers
Dab them randomly on a glass mat and spritz with water.
Place your piece of card in the ink and press down all over.
If the ink hasn't covered the complete card you can go in again and pick up some more ink. I often dry the card with a heat gun in between adding layers of ink. this creates a lovely effect and prevent your card topper going muddy where all the inks are mixing.


If you need to add more ink just wipe your mat down and repeat the step.


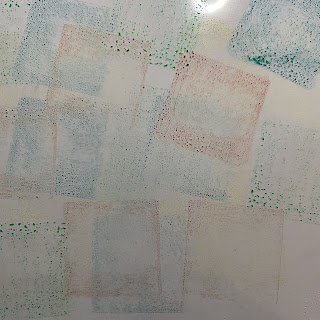
I decided to batch make some of these backgrounds - here's just a few of the inky back grounds in different colours.


Now tape your piece of card in position and ink through using an applicator sponge with black versafine clair ink.


Carefully peel the stencil away. This is what you should be left with.


You can now mount your topper onto a pre-folded 6x6 card blank. 


Sorry this was just a real quick post.
Thank you for visiting!!

x - Dena - x

Shopping List 
- Pre-folded 6x6 card 
- White card
- Paper trimmer
- Glue 
- Versafine Clair black ink pad
- Distress inks in various colours
- Glass mat/acetate 
- Water spritzer 


Friday 26 March 2021

Copper etching with Crafty individuals rubber stamps


 Hi Everyone.

This will be my first blog post on something other than cards but I wanted to give you a little insight as to how I etch stamped images into copper.

Some of you may already know that nearly all the items I make are made from dirty old copper pipe - with the exception of bangles, book marks and larger items. 

I slice the pipe open with metal snips, open it up with pliers and then hammer it flat with a nylon hammer. I know it would be so much easier to just use copper sheet, I just love the idea of making items from recycled materials. 

Once the copper has been flattened, cut to shape. For this particular design I only cut it roughly to size but would normally make sure it’s the correct size and straight lines. 

I sanded the copper - being careful not to put fingerprints on it as this can effect the etching process.

Now it’s time to stamp your image. For this I’m using the crafty individual’s collection of stamps. It’s important to use high quality stamps for this process. Clear stamps just don’t leave a very good impression so ideally needs to be made from good quality rubber. 

I stamped the image using staz on ink.

Close up of the stamped ferns. 

Using a sharpie I run the pen along the side edges to prevent the solution eating away at them - again being careful not to touch the main surface. 

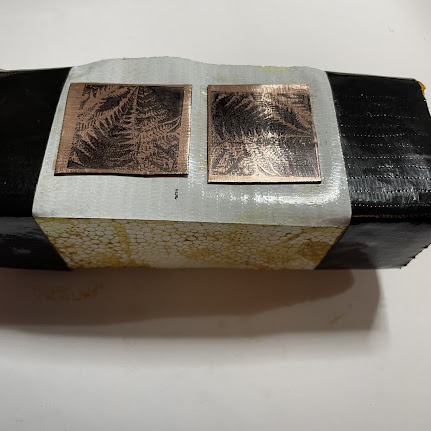
Stick the pieces of copper to some duck tape and attach to a piece of polystyrene. 

Pour some ferric chloride solution into a glass dish. 

You will need to prepare your surface area and wear protective gloves when handling this. 

Before placing the copper in I heat it up with a heat gun to help accelerate the etching process.

Place the copper in the solution. The polystyrene needs to float in the solution so the particles fall to the bottom of the dish.

Everything I’ve read on this process people always say you should only leave it in for a certain amount of time and take it out. There’s been times when I’ve left my pieces in for a several hours before I’ve got the depth I’m happy with. Just keep checking by lifting it up and once your happy with the depth place in a mix of water and baking soda to neutralise and scrub.

I then darkened the background areas and cut the copper closer to the design.


The edges were filed down and I punched some holes in them with my mighty punch, then placed in the jewellery tumbler for a final polish. 

These are just a few recently etched pieces all of which are now available on my etsy page.


This is one of the largest pieces I’ve etched. I wanted to do something different with this magnificent lion so decided to mount him onto a painted wooden plaque. 


Thank you 

x - Dena - x

Stamps used


Monday 22 March 2021

Vintage Bluebell card using Crafty Individuals CI-572


Hi Everyone!

Well I couldn't resist doing another using this gorgeous bluebell stamp. This time I've gone for more of a vintage look.


Cut out a piece of card just slightly bigger than the stamp.

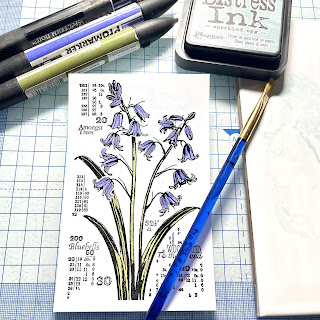
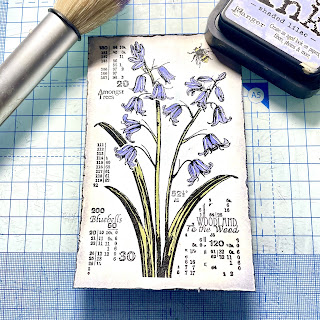
Stamp and emboss the bluebells stamp.

Watercolour the area around the bluebells using speckled egg distress ink by dabbing the ink on a tile and applying with water and a paintbrush.

Colour the stamped image - for this I used promarkers and spectrum noir pens.

Using a sponge applicator ink the edges with tea dye distress ink.

Stamp and emboss the little bumblebee from CI-488 and colour its body.

I went over the wings with the spectrum noir sparkle pen to add abit of shimmer.

Add some white highlights to the bluebells.

Distress the edges by running the blade of a pair a scissors along the edge of the card. I normally use the Tim Holtz distressing tool, however I seem to of misplaced it!

Ink the edges with shaded lilac. This didn't really turn out as I was hoping - it was more of a dirty lilac look, but I was still pleased with it.

To create the back ground cut out a piece of white card to fit on a 5x7 folded card blank that will leave a slight white border around the edge. 

Apply brushed corduroy around the edges - fading the colour into the centre.

Randomly stamp the CI-436 script stamp in Brushed corduroy.

Stamp a selection of grasses and leaves from CI-207. I stamped the grasses in black and the ferns in green to bring in another colour.

Stamp a couple more bees around the top section and colour.


Add some foiling around the edge of the topper and background card using a quickie glue pen.
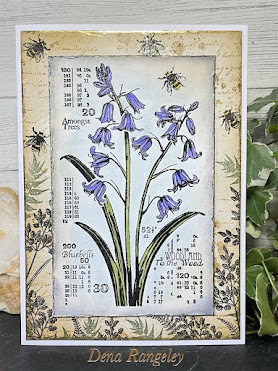

Finally I mounted my card onto a pre folded 5x7 card blank and then decided to gloss the bees with a sakura glaze pen.


Thank you for visiting!

x - Dena - x

Shopping List

- White card
- 5x7 pre folded card blank
- Distress inks
- Promarkers
- Glue
- Embossing powder 
- Heat gun
- Foil
- Quickie glue pen
- Sakura clear glaze
- Spectrum noir sparkle pen
- Black and green ink pads