Search This Blog

Monday 14 June 2021

Skull phone case - Crafty individuals

Good Morning!

Last night I decided I needed abit of a change for my phone. For those of you who's followed my blog or on social media will have probably seen other phone case inserts I've made. They're super easy to make and its a great way of customizing your phone to your taste.

So anyone that knows me will know that I'm totally obsessed with skulls. I have so many skull themed items around the room and often have something skull related on so of course this stamp from Crafty individuals was just a must for me.


You'll need a clear phone case to fit your phone, these are really cheap to buy.
Draw around your phone with a really sharp pencil and cut it out. Check to see if it fits in the case. You may need to trim it down slightly. 
While it's in the case draw around the camera hole. Take the insert out and extend the lines you've just drawn for the camera hole to make it slightly bigger. If you don't do this the insert will show through the hole.
Stamp and emboss CI-529


Create a mask by stamping the image on a masking sheet and cut it out. Make sure you keep this safe as it can be re-used. 


Place the mask over your stamped image, then stamp the crow - CI-500. Remove the skull mask and sprinkle embossing powder over the crow and emboss with a heat gun.
You'll also need to create another mask for this image so you can create and nice inky background.


Make sure both masks are placed over the image and start building your inky background.
I started off by applying faded jeans then chipped sapphire around the edge. I felt it needed to be slightly darker so I went round the edge with versafine clair black.


Colour the image. For this I used a selection of water colour pens to add some soft grey tones to the crow, cross and skull. I then used the spectrum noir tri-bled pens to colour the roses and leaves to really make them pop.

I decided it needed something else so stamped a couple of little birds from CI-209


You can now place this in your phone holder and pop your phone in.


Thank you for visiting.

X - Dena - X


Sunday 13 June 2021

Boat card using crafty individuals stamps

Good Evening!!

Hope you've all had a lovely weekend and been able to enjoy this lovely weather.
Just a quick post tonight for this simple boat card.


I don't have many men's cards in my stash so thought I'd make a couple up at the same time.
I started off by cutting a piece of card that'll fit on a pre-folded 5x7 card blank.
Dab speckled egg and faded jeans distress ink pad randomly on the glass mat, then spritz with water.
Randomly pick up some of the ink on the card then dry with a heat gun. Spritz the glass mat again and pick up some more ink. Dry it once more with the heat gun. 
I like to dry the ink in-between layers as it creates a lovely layered effect.


Stamp and emboss CI-559 (the boat) with black ink. I tend to use versafine ink and wow detail embossing powder.
Then using faded jeans distress ink - stamp Counting down background stamp randomly around the boat. If you read my previous post you'll already know that this just has to be my fav stamp at the moment. Its so useful and goes particularly well with beach themed stamps as it actually contains a tide table. 


Colour the boat - for this I used spectrum noir tri blend pens. I added some orange and red tones to the bottom of the boat to make it look slightly rusty. 

Stamp the birds from CI-272 in black.


I decided to add a few smaller birds flying in the distance, so I stamped the small bird from CI-209.


Finally I mounted the topper onto a pre-folded 5x7 card blank.


Thanks for visiting

X - Dena - X


Thursday 10 June 2021

Wanted burglar cat (crafty individuals)


Afternoon everyone!

Hope your all enjoying this lovely weather.

I could hear allot of scratching coming from my box of Crafty Individuals stamps, the burglar cats we're desperate to come out and play. Seeing as there rather naughty burglars I decided to make a wanted card - inspired by a sample card made by Isa C. Crafts 

Stamp and emboss the cat from CI-571, then cut out the one with stripes. You can snip the tail off as you wont see when your card is complete.
Cut out a mount for the cat to sit on and colour with antique linen distress ink.


Colour the cat in - for this I used the spectrum noir tri-blend pens.


Cut a piece of card to fit on a pre-folded 5x7 card.
Using a brayer apply you oxide. I went for a rough/old look here.


Stamp the new counting down numbers background stamp with brown distress oxide. 
This stamp will soon be available on the crafty individuals website - I will post a link to it as soon as it becomes available.


Stamp, emboss and cut out the woodware wanted stamp. 
Using your desired applicator colour with brushed corduroy distress ink. 


Stamp and emboss the burglar cats words from CI-570. Before inking this stamp I masked off the words 'and albert'. Once stamped I added a little dash after the name Syd and cut each of the words out. Colour each piece with brushed corduroy distress ink using an applicator of your choice.


You can now start piecing your card together. I used pinflair glue to stick the wanted section down so it was slightly raised from the rest of the card.


Finally stick some googly eyes on the cat.


Thank you for joining me.
X - Dena - X


Wednesday 9 June 2021

New launch of crafty individuals stamps

Hi Everyone!!!

Its been a while since my last blog post, so thought I'd pop by and share some of the samples I made for the new launch of crafty individuals. These were launched on the craft store on 4th June but will soon be available from the Crafty Individuals website. I wont be listing instructions for these samples just a brief description.

I have a couple of favs from this collection- one of which is the counting down background stamp. You’ll notice I’ve used this on most of these cards, although it might only be lightly stamped. I think this is one stamp I'll be using allot!

Another one of my favs would have to be the seagull. He’s a really cheeky chap that’ll go so well with so many stamps. 

Here I stamped him on a piece of card coloured with watercolours and distress inks and mounted onto a piece of MDF to make a little wall hanging.


I kept this next card really simple - I don't really use background papers much as I prefer to create my own backgrounds. However so many of the papers from The Seaside background paper book work so well with this stamp. I've used it on a couple of cards and will be be making a few more up very soon.


As you can see I've used another background paper from the same pack on this card but inked the edges. I also used the 'of the sea' boat stamp along with another seagull from CI-397.


Anyone for a lovely Shrewsbury biscuit? Really must have ago at making some actually as they sound lovely. Some of the other crafty individuals design team members shared a couple of recipes on our group chat so I'm looking forward to giving that ago. They're such a lovely bunch and you really must check out their blogs- I'll see if I can find a way of sharing links to them very soon.
Anyway made this coaster by stamping the Shrewsbury biscuit stamp along with the daisies from CI-226. Coloured with watercolour pens and distress inks. I then foiled the edges and placed in a plastic coaster blank.


I've really enjoyed making wooden plaques lately as you can see from this post I've made a few. Again this was stamped onto white card, then mounted on some dusky pink and burgundy card and applied to the mdf. 


For this card I fussy cut the cups of tea out and thought I'd use 2 together as it would be great for sending to friends whom you share cups of tea with. For the back ground I randomly stamped the text from the teacup stamp in distress ink. 
Friends stamp from CI-464


Next up is this super cute little Robin stamp. This is so versatile and can actually be coloured in to make it look like a blue tit or even a sparrow. This one has also been mounted onto mdf and stamped with CI-556.


For this next card I just had to mix the Robin with the new toadstool stamp, so I stamped and fussy cut both images, drew the twigs at the bottom of the toadstools then created a scenic background. I also used CI-207 and CI-361


Slightly bolder look with this one. Here you can see the counting down background stamp much clearer.


And now for a slightly vintage themed card. I always think it's amazing how different the image can look. For this one I also used the grasses from CI-207 and butterflies from CI-437.


The following stamps we're re-launched alongside the new ones. 

Created an inky background and stamped counting down lightly in the background.
Also used - Hare CI-508
Wild flowers/grasses CI-206 CI-207
Branches from tree CI-361
Words CI-464


I recently ordered this gorgeous Starry frame border die made by crafty individuals and couldn't wait to use it. I snipped it about abit and placed it behind each corner. 


Can you spot the counting down background stamp again on card?
Used wolf CI-528
 The barbed wire is from the same set as the tree branches CI-361
I stamped and embossed the barbed wire with silver embossing powder to give it a more realistic look. I also added some foiling to the edges.


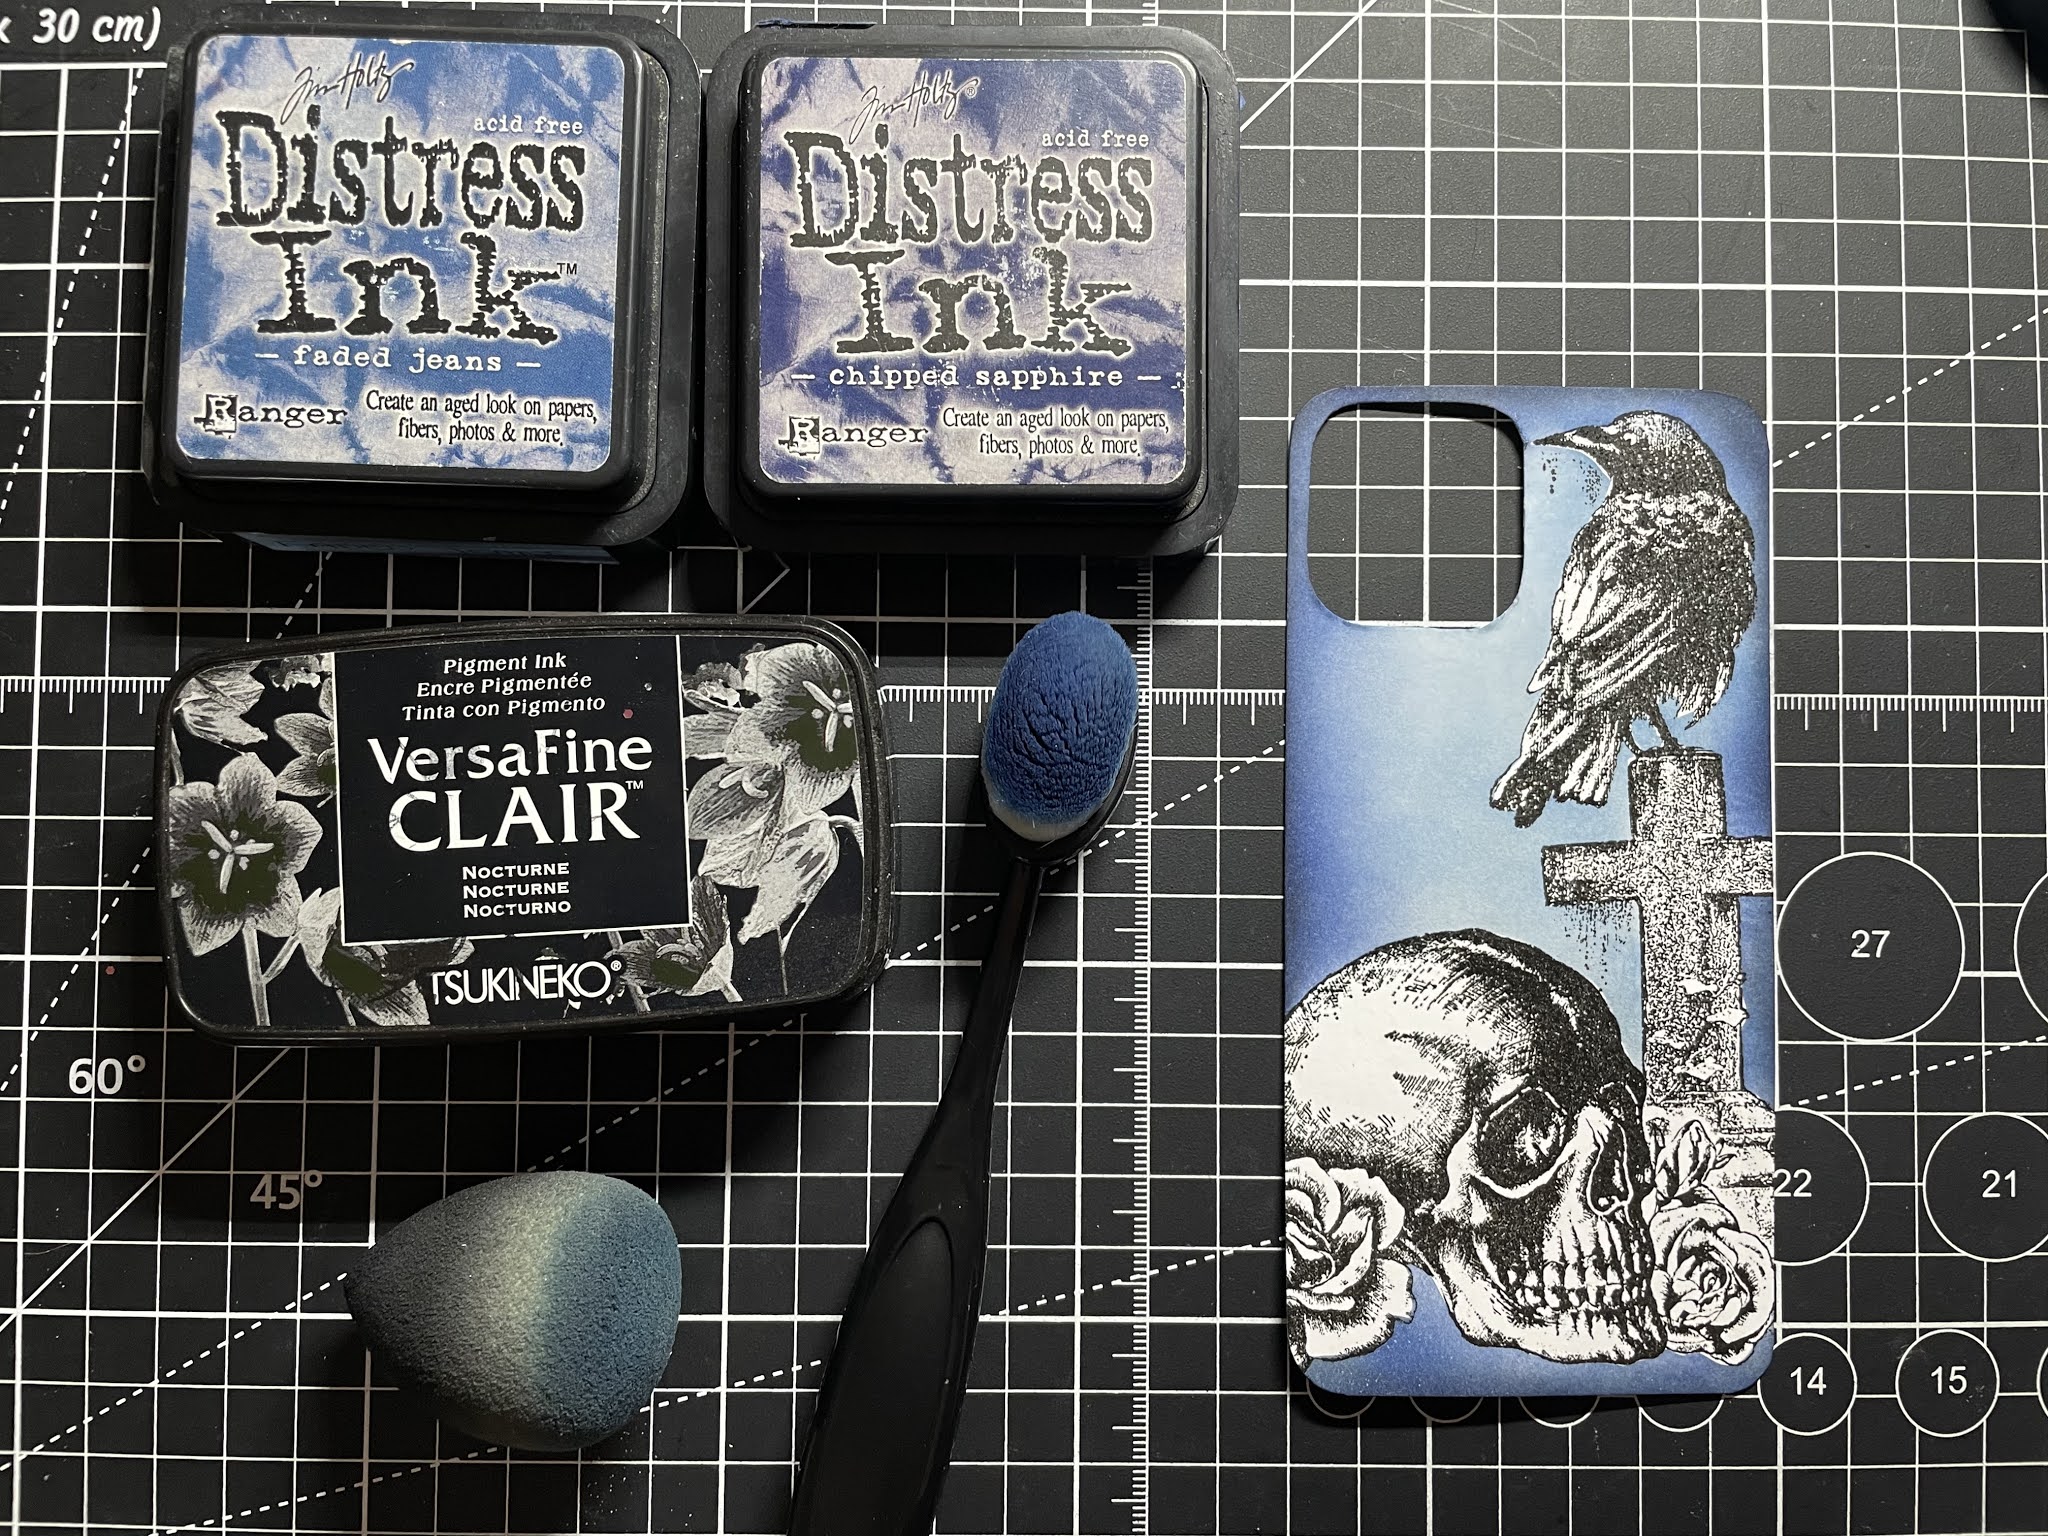
Of course I just had to make an insert for the phone case using the wolf. This is so simple to do just cut a piece of card to fit inside a clear phone case and stamp away! I added a few glitter specs for the stars.


The final stamp in the re-launch is this beautiful Kingfisher Stamp.
I absolutely love kingfishers but have never been lucky enough to see one.
For this card I also used Dawn reflections stamp
Grasses from CI-495
Tree branches CI-361


For this card I used the same stamps as mentioned above but decided to play about with stamping on Kraft card.

Thank you for joining me and I look forward to seeing some of your makes with all the new stamps. If your not already on our Facebook group make sure you join and share all your lovely makes using the crafty individuals stamps.