Search This Blog

Saturday, 18 April 2020

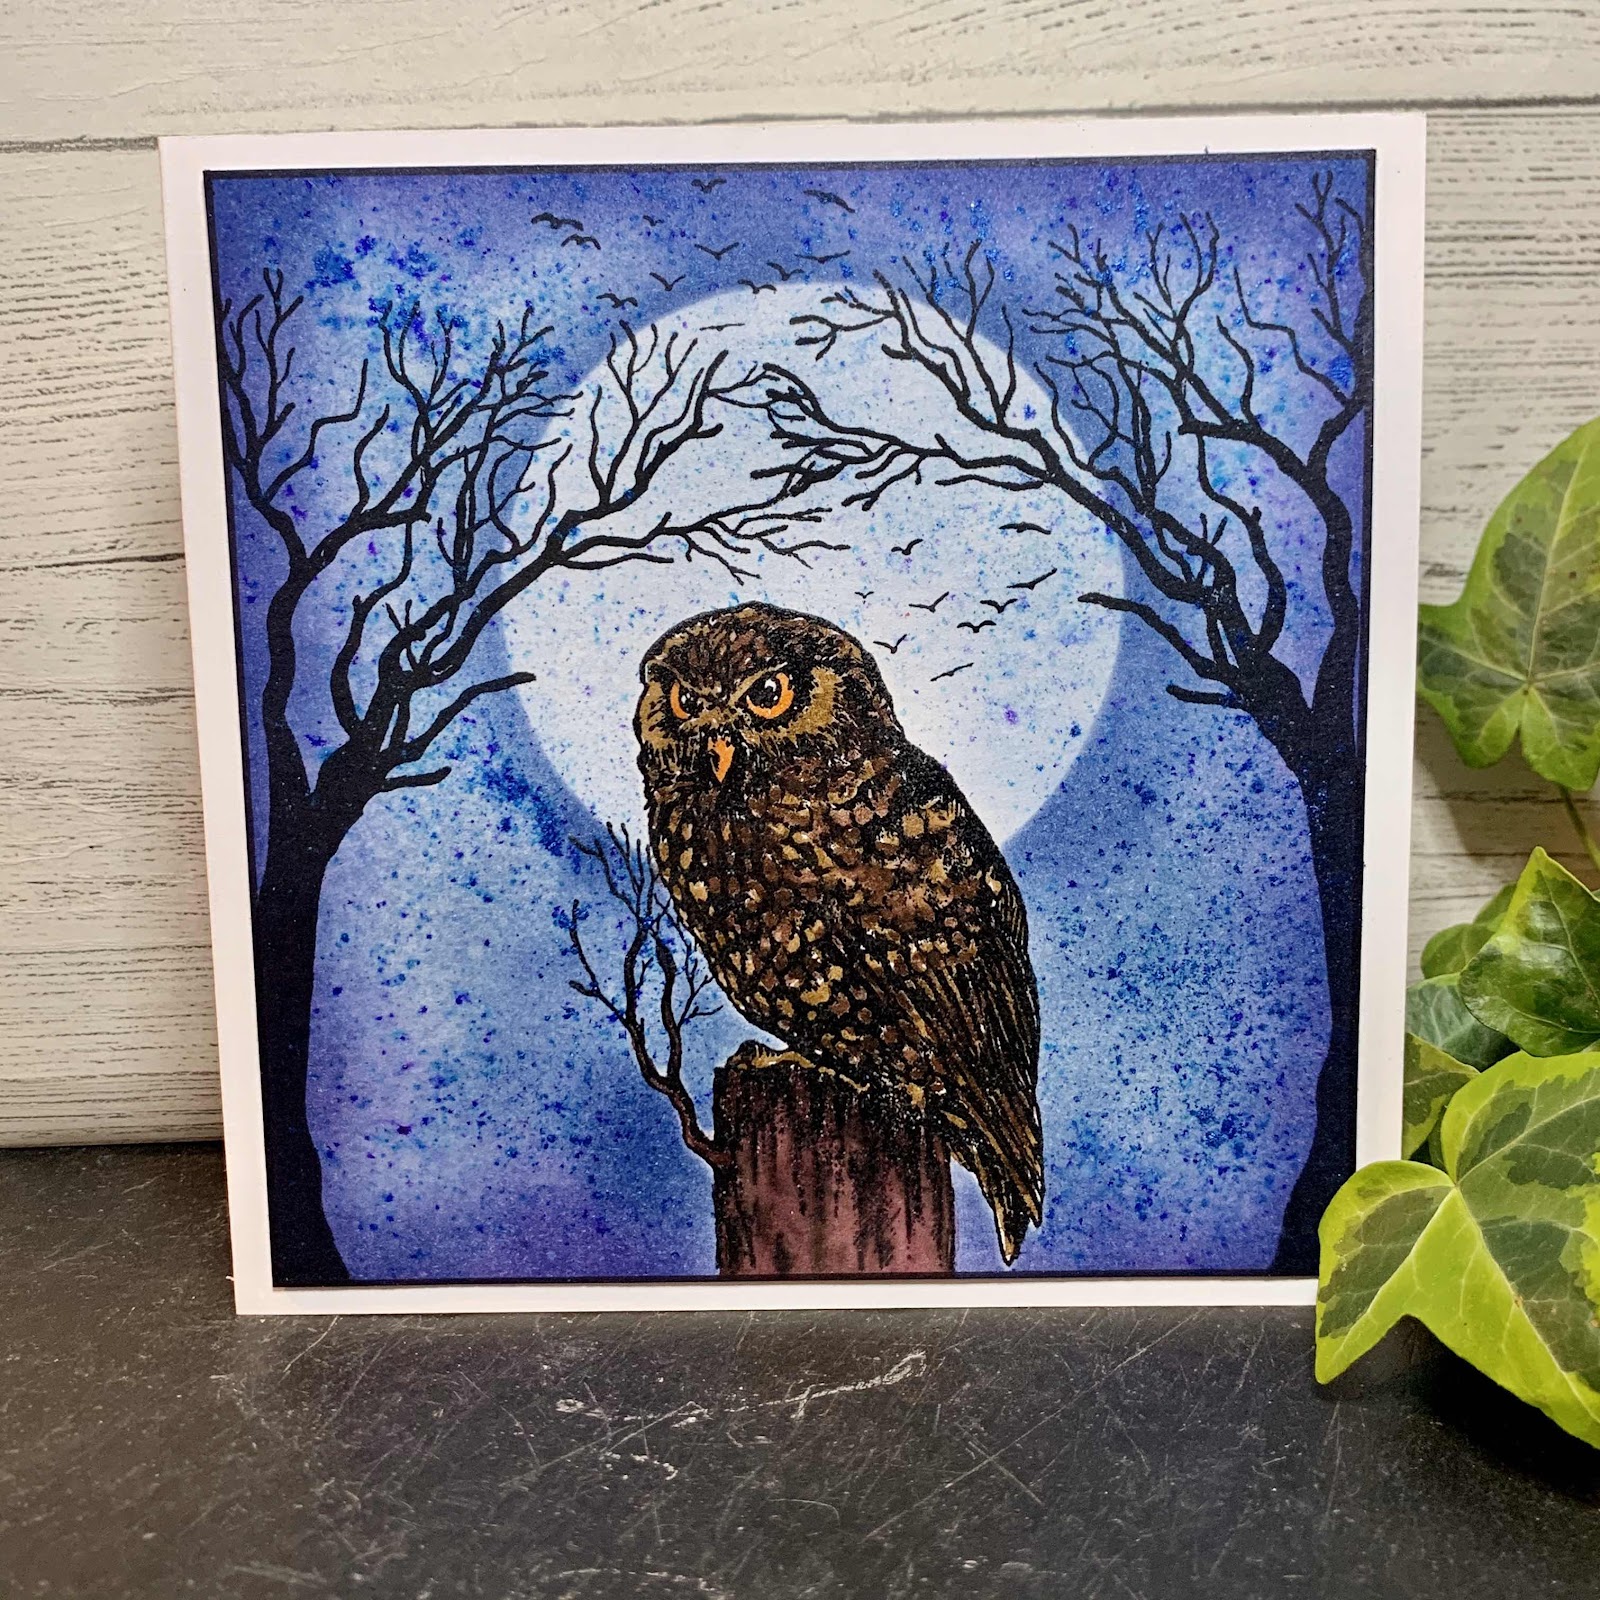
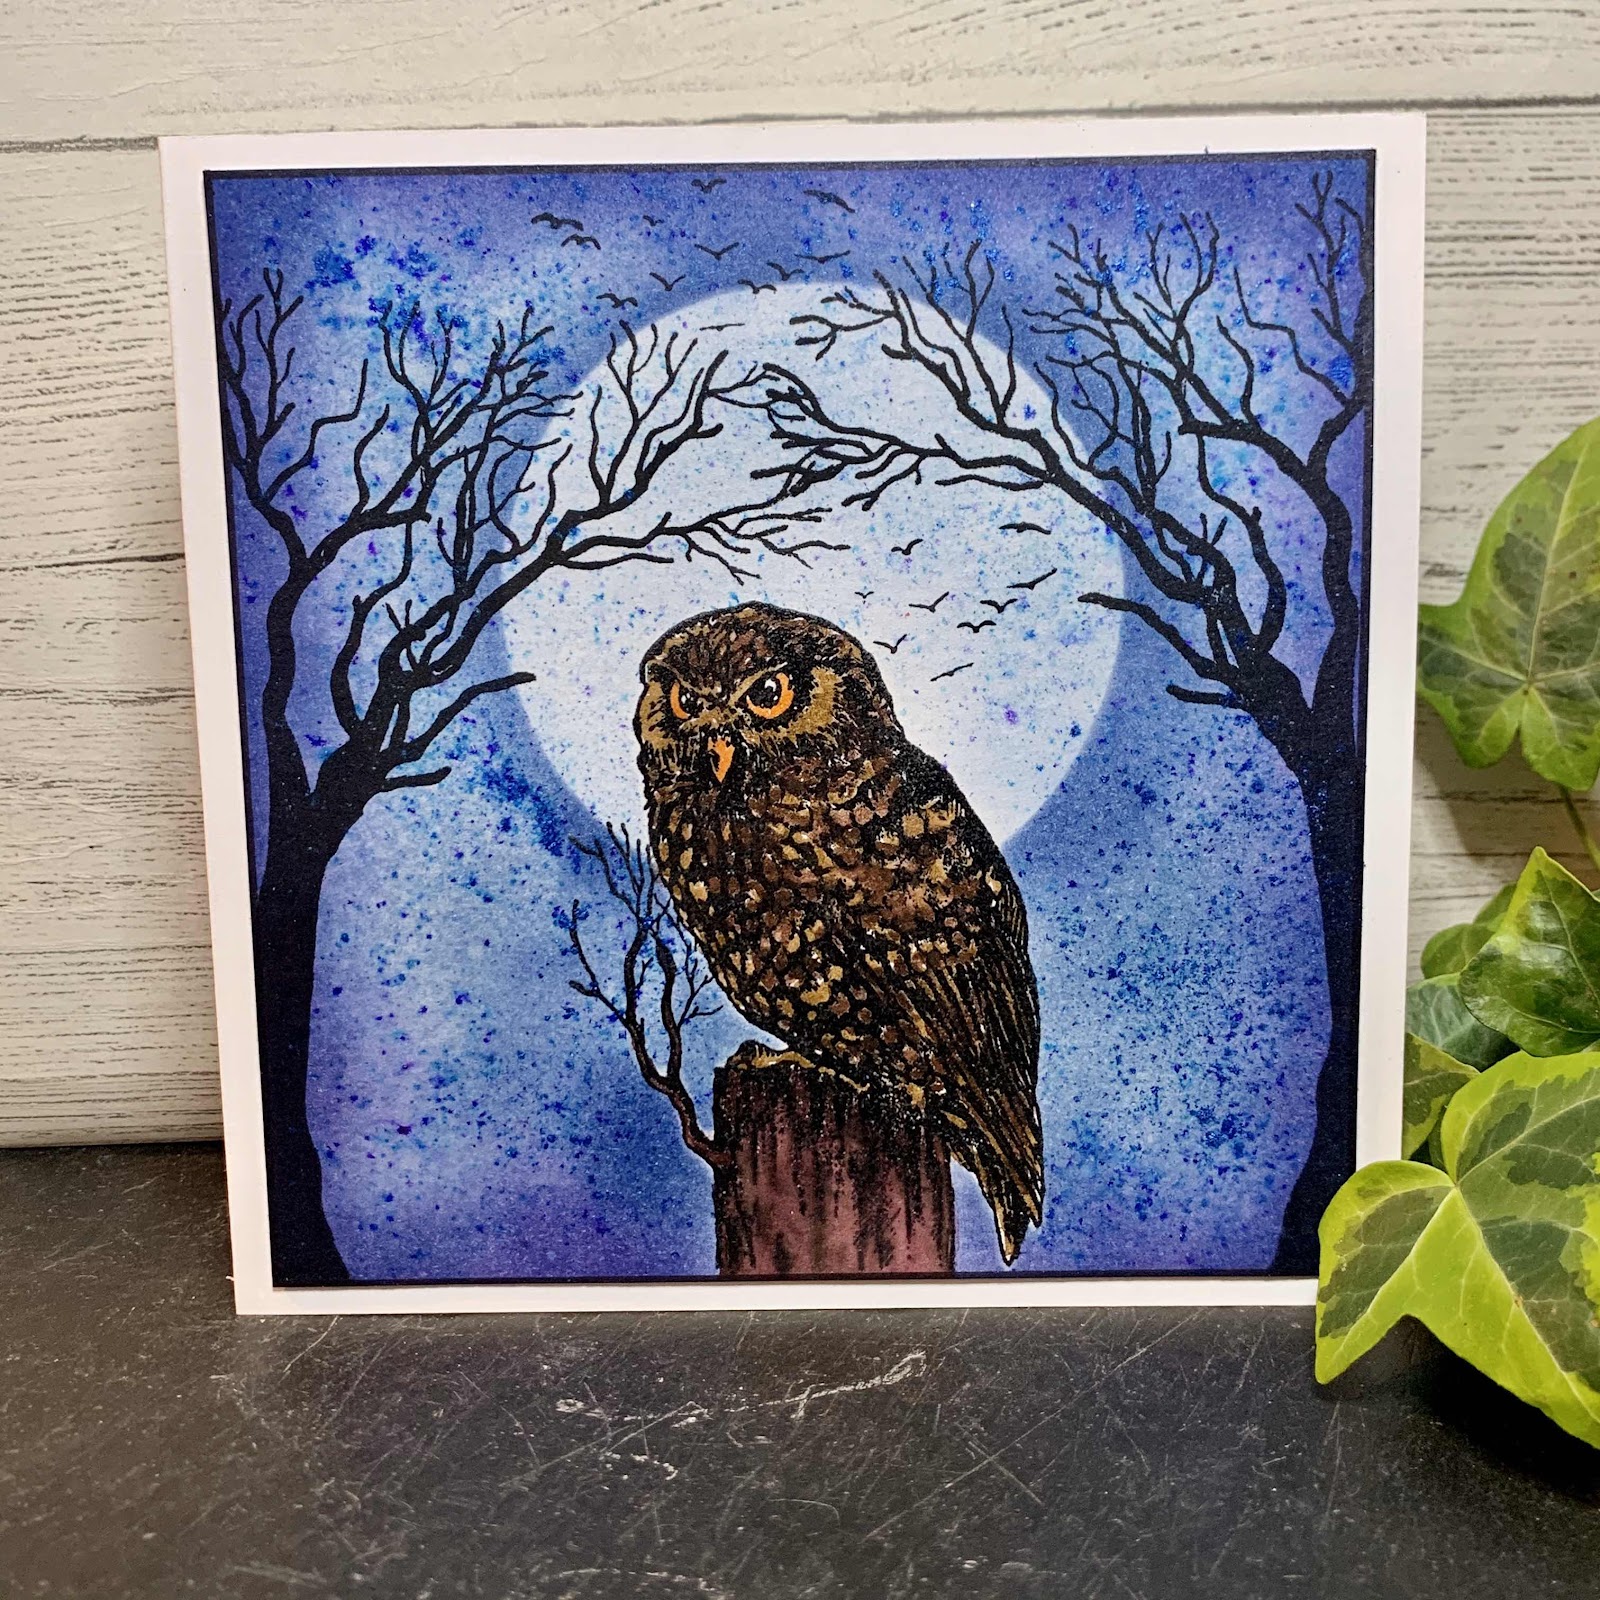
Owl card using crafty individuals stamp


Hi Everyone 

Hope you’re all keeping safe and well!! 
As I seem to have some extra time on my hands thought I’d try create some blog posts. 

I started off by stamping and embossing the owl in the centre of a piece of card measuring approximately 14cm square so it’ll fit onto a 6x6 card.
You will also need to stamp out another owl on some scrap card and cut it out - this is to mask your owl while you create your inky background. You’ll also need a largish circle for the moon. 
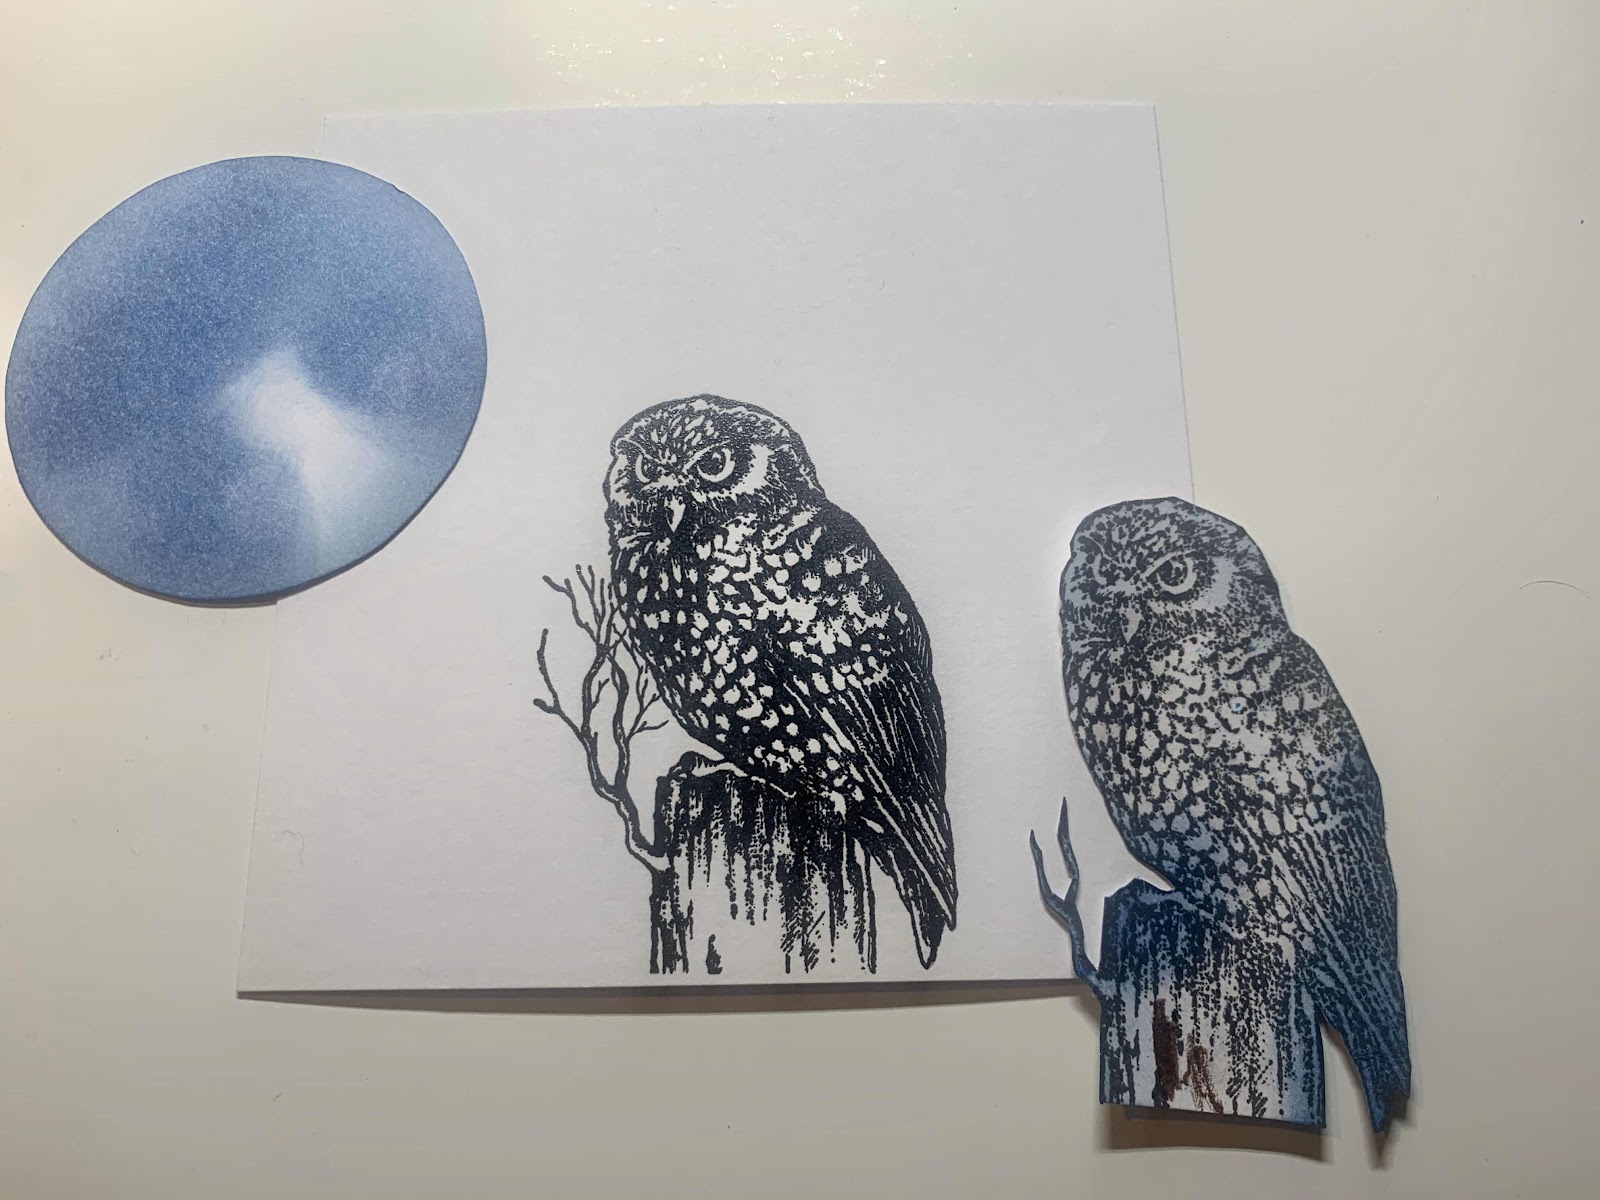


Place your owl mask over the stamped image and lightly ink a blue background. For this I used Tim Holtz distress inks. 
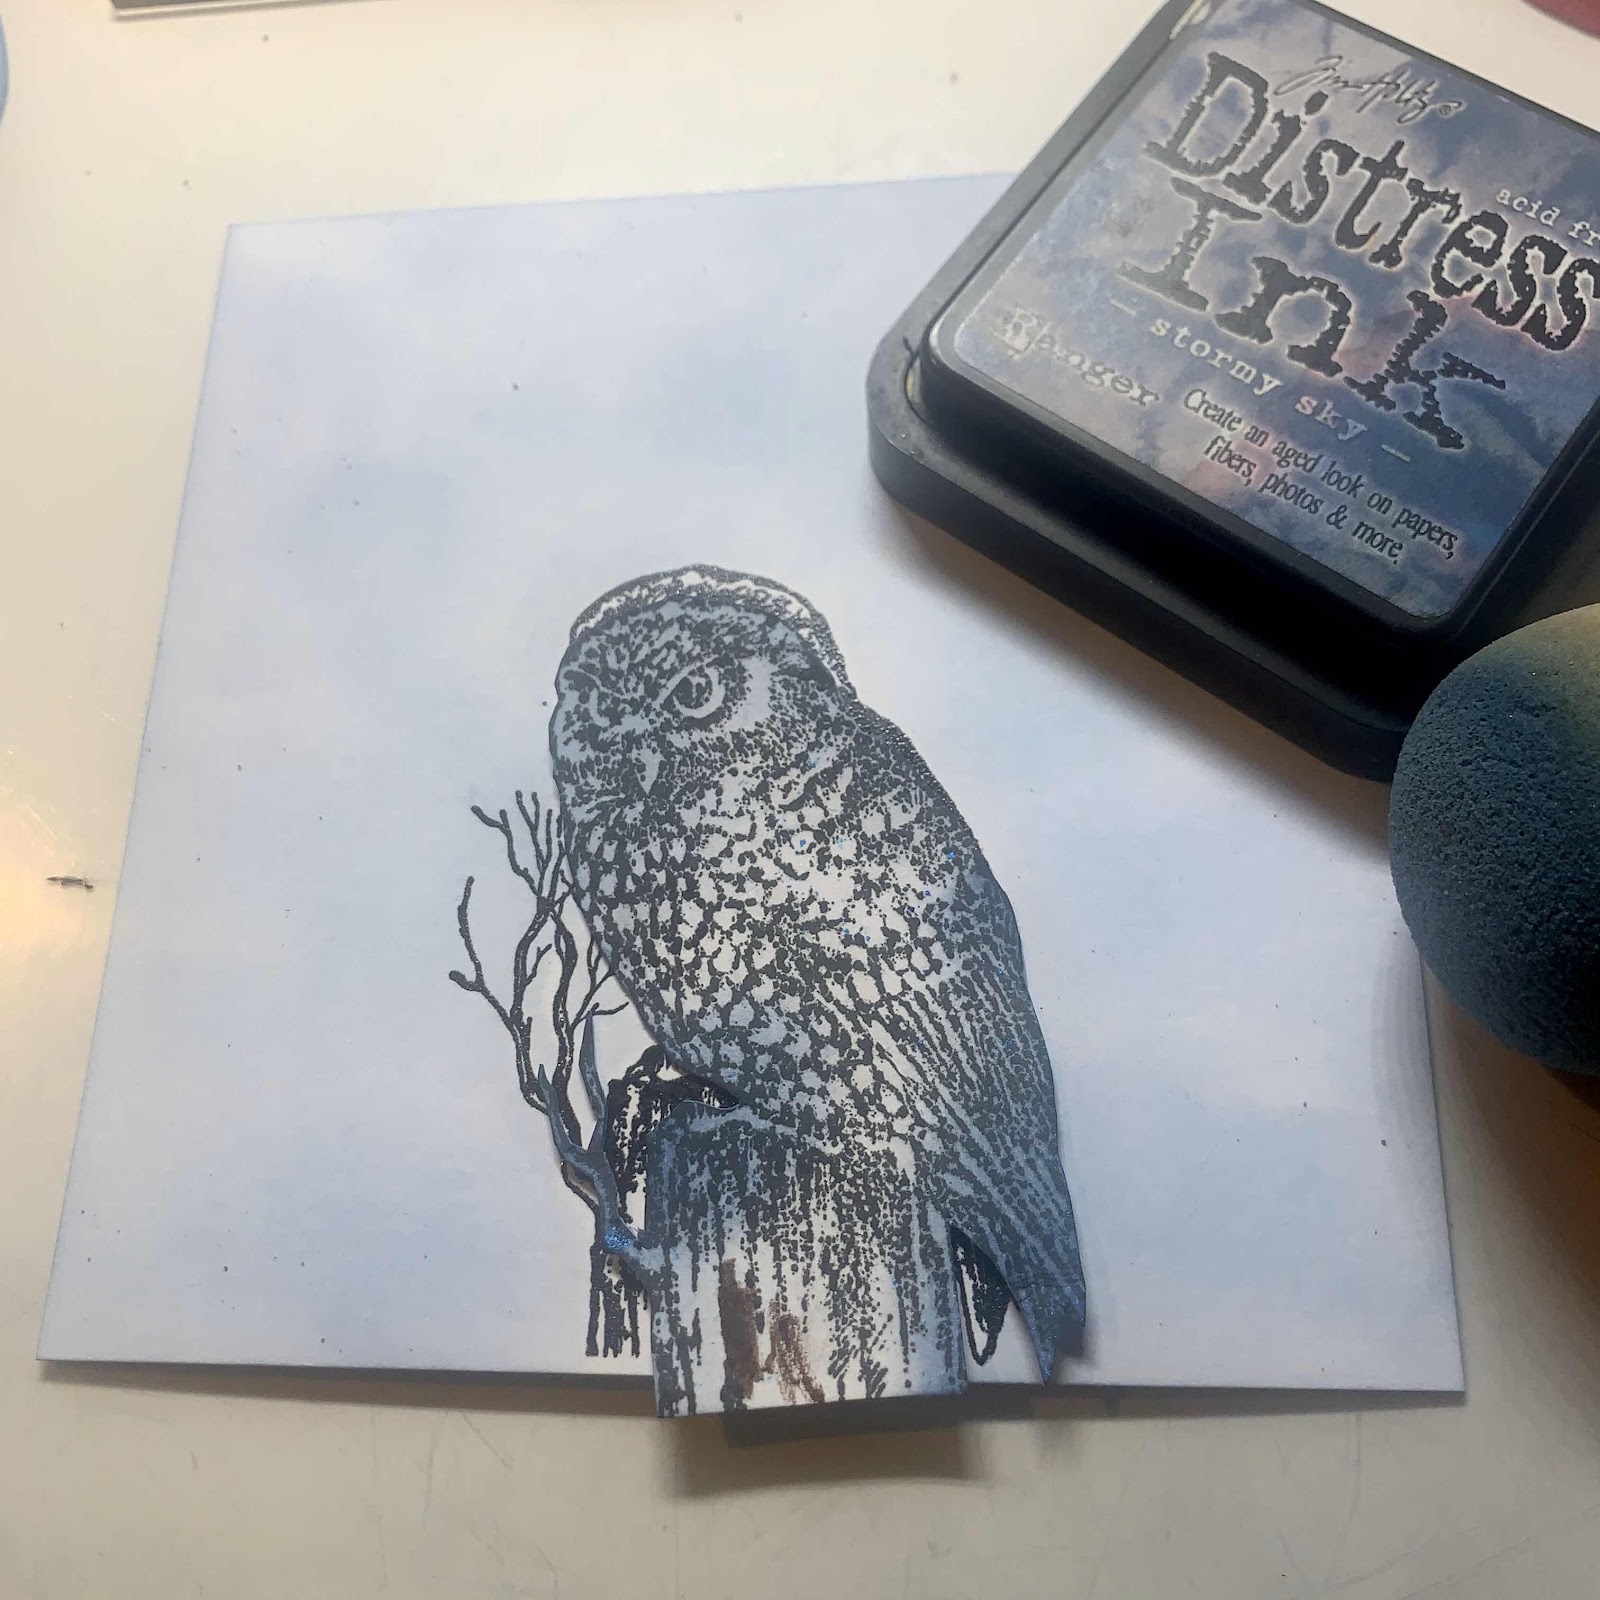


Now with your owl mask still in place position the moon in the centre of the card. Using the same colour apply slightly more ink to darken the blue sky. 
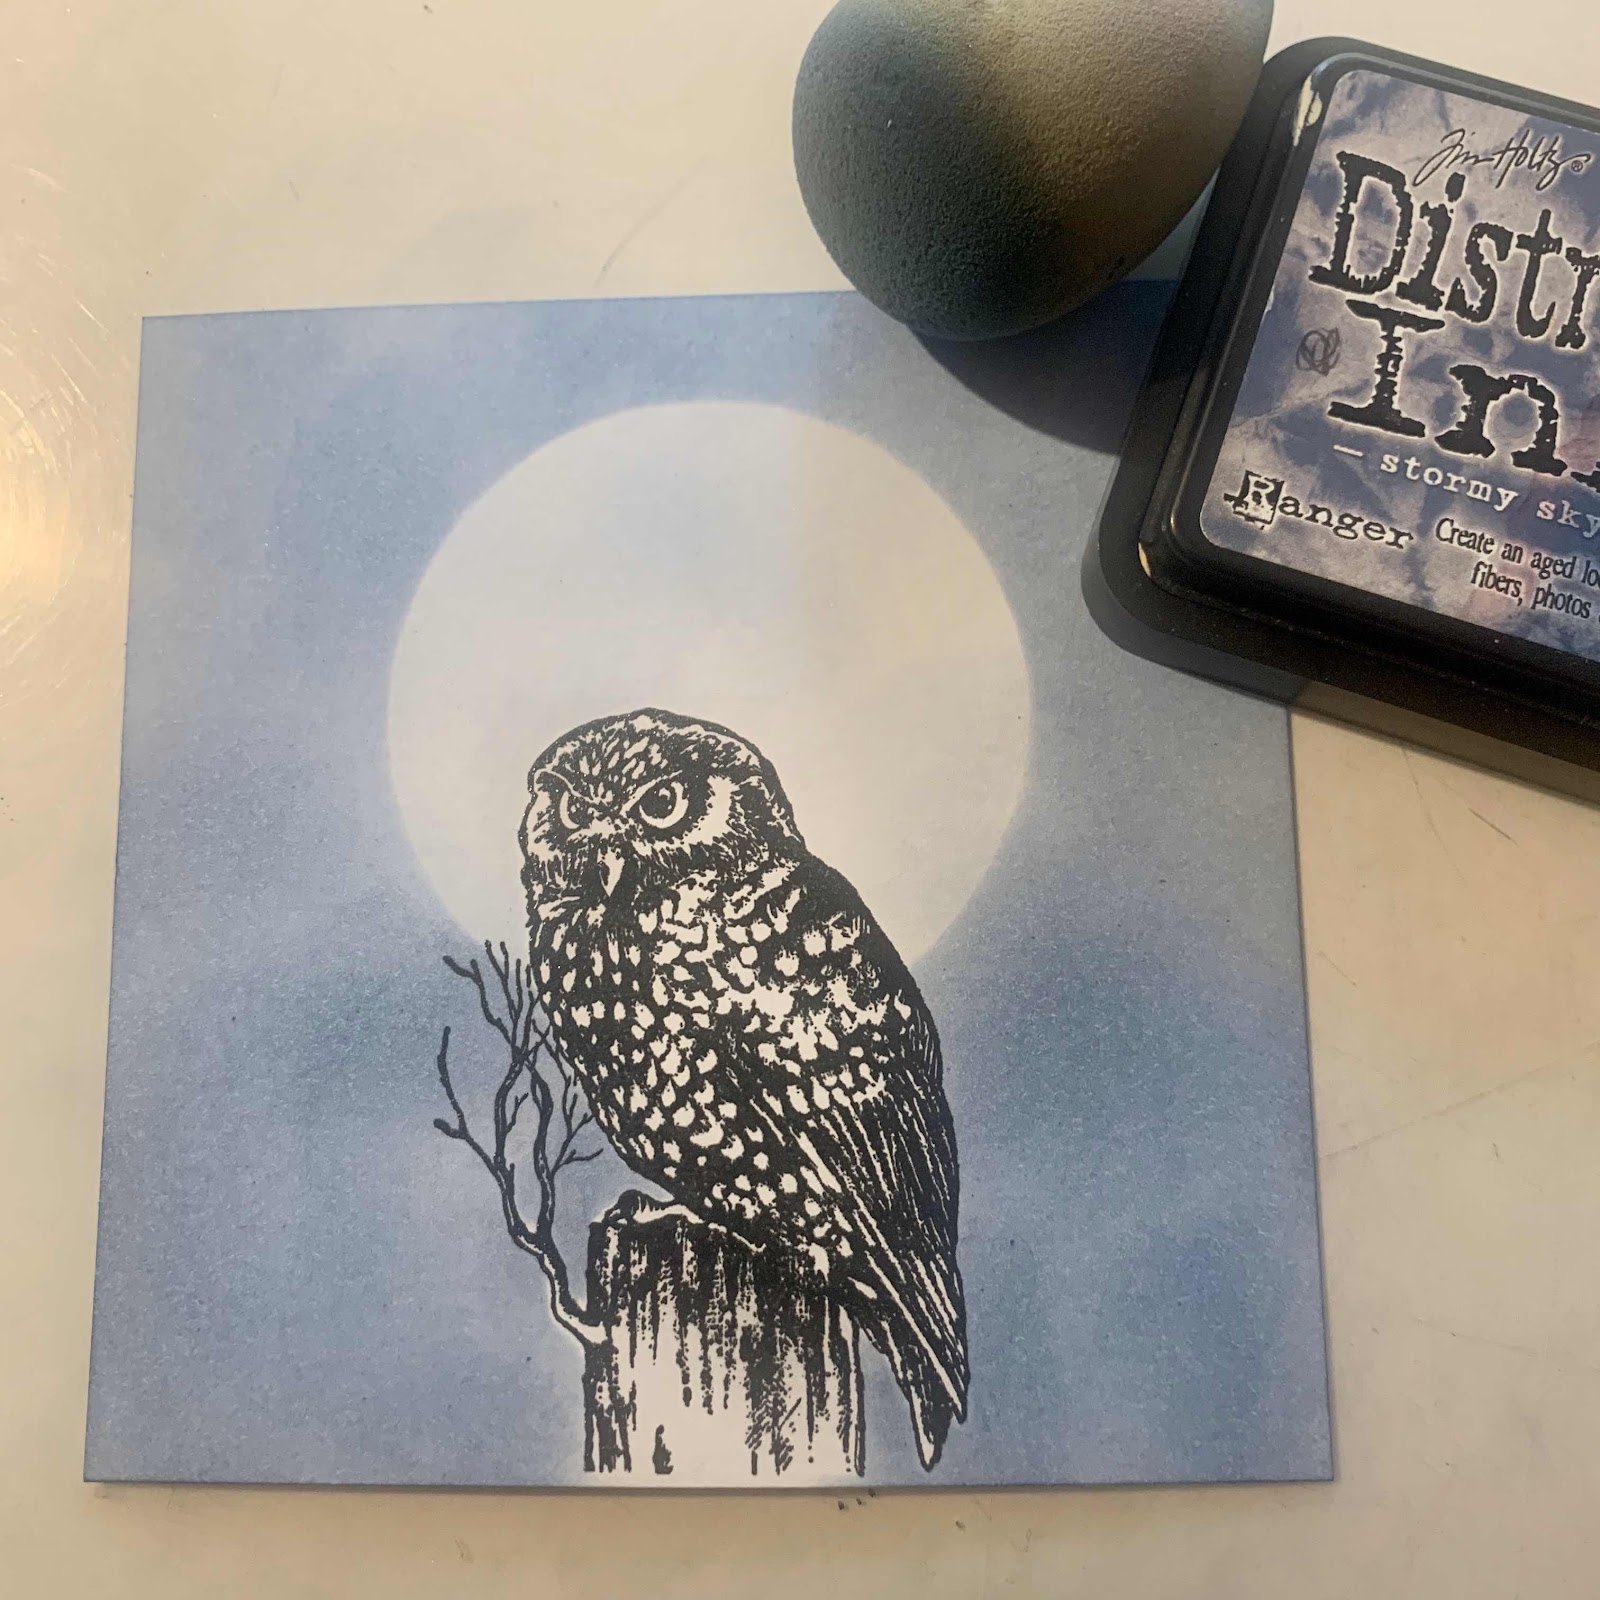


Using a fine mist - spray the whole background (again making sure your owl mask is in place)

While the card is wet carefully tap midnight blue pixie powder over the sky area and a small amount over the moon. 
If you find the powder hasn’t reacted with the water lightly a spray some more water. 
Dab off any excess with kitchen roll. 
You can then dry the card with your heat gun this also helps to straighten the card slightly. 
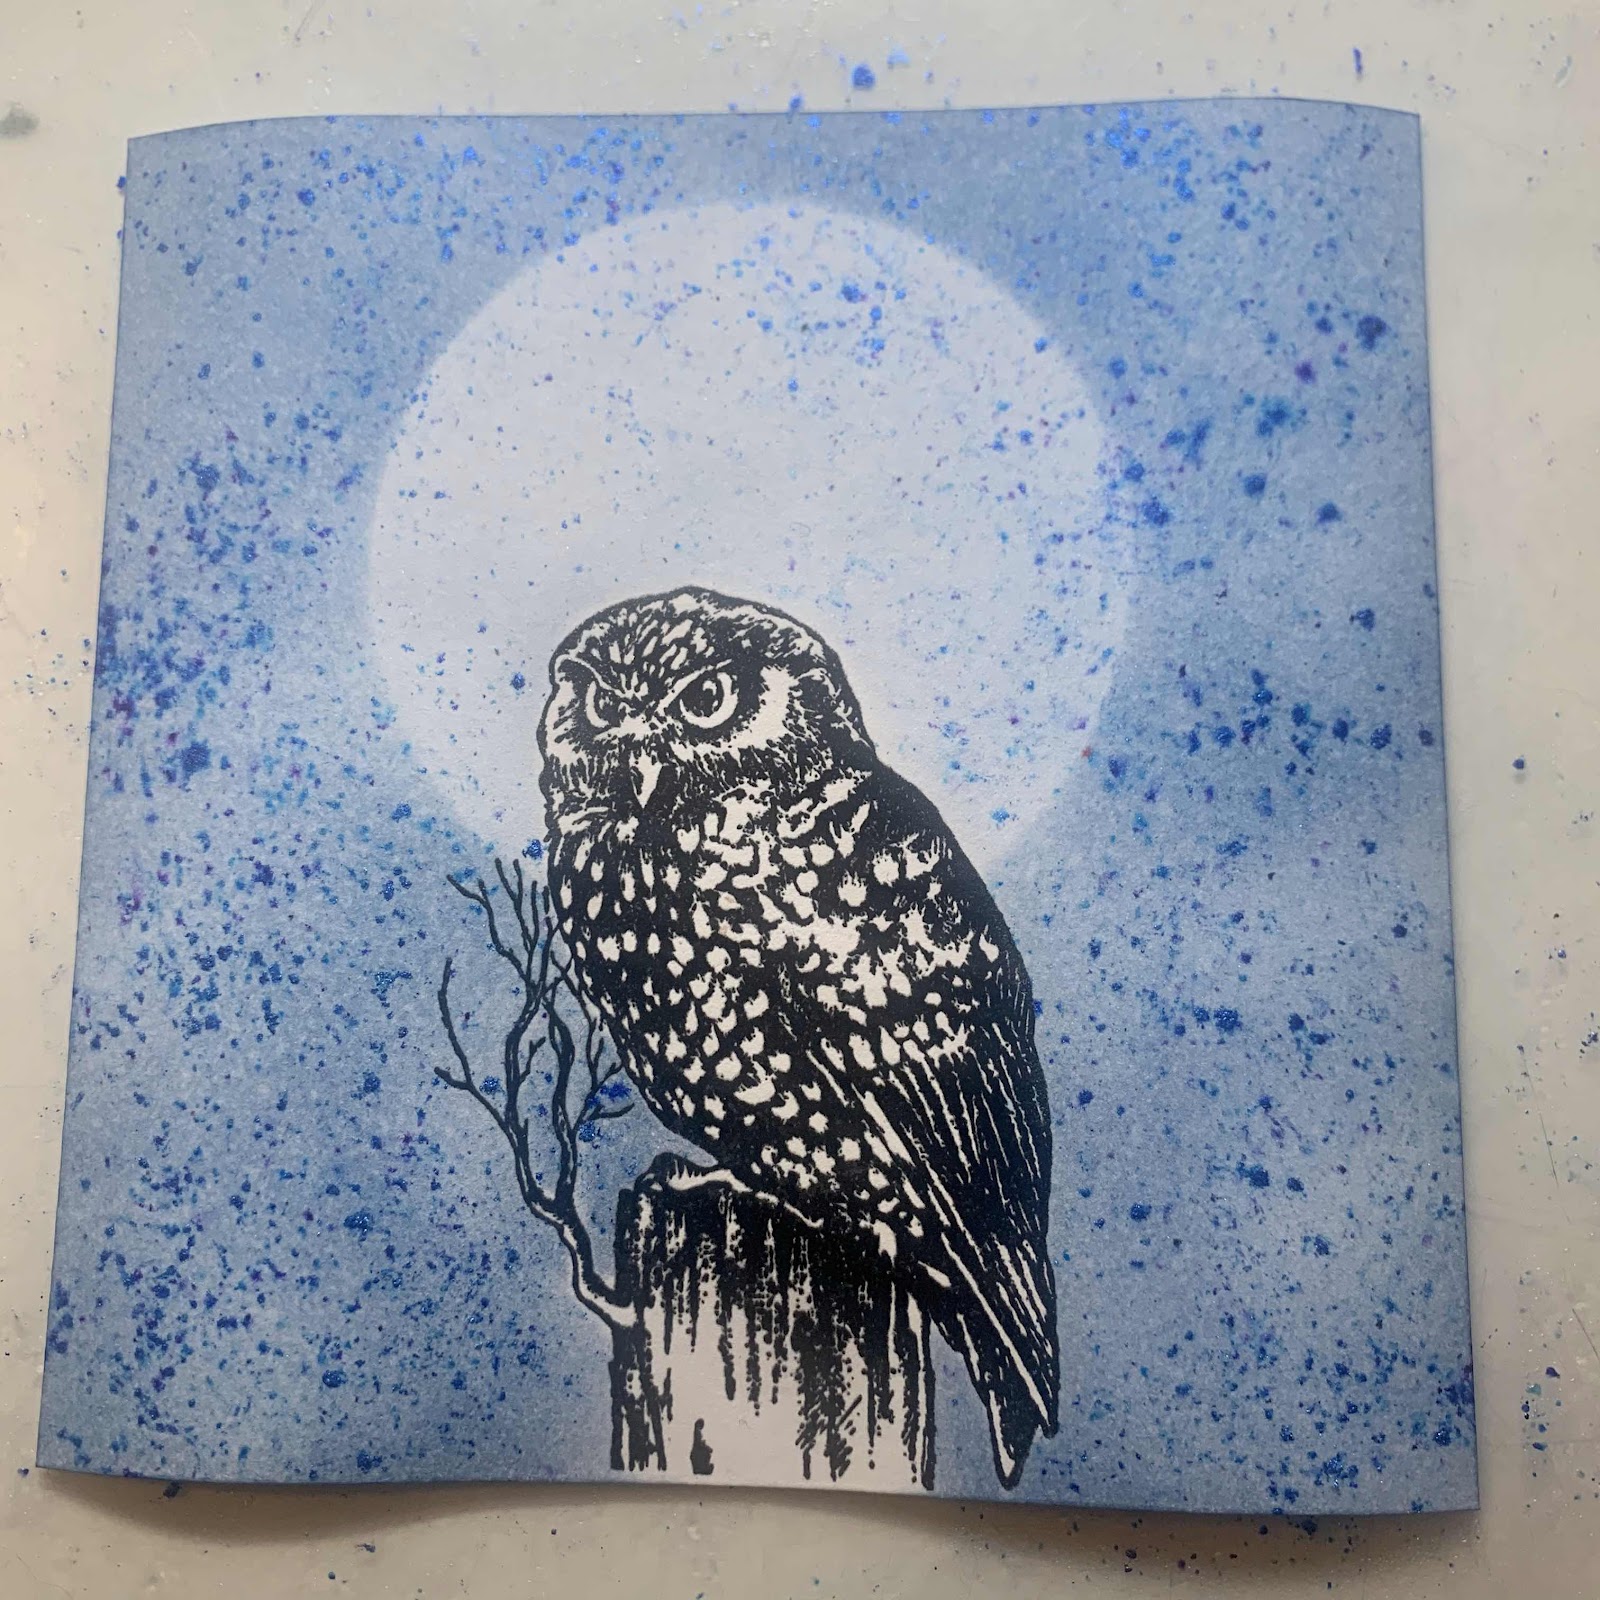


Using a slightly darker shade of blue - ink around the edge of the card. 
Then place the moon back in place and drag the ink from the centre of the moon and flick outwards to create a darker halo. 


I wanted to add a little bit more colour so went round the border again with wilted violet. 
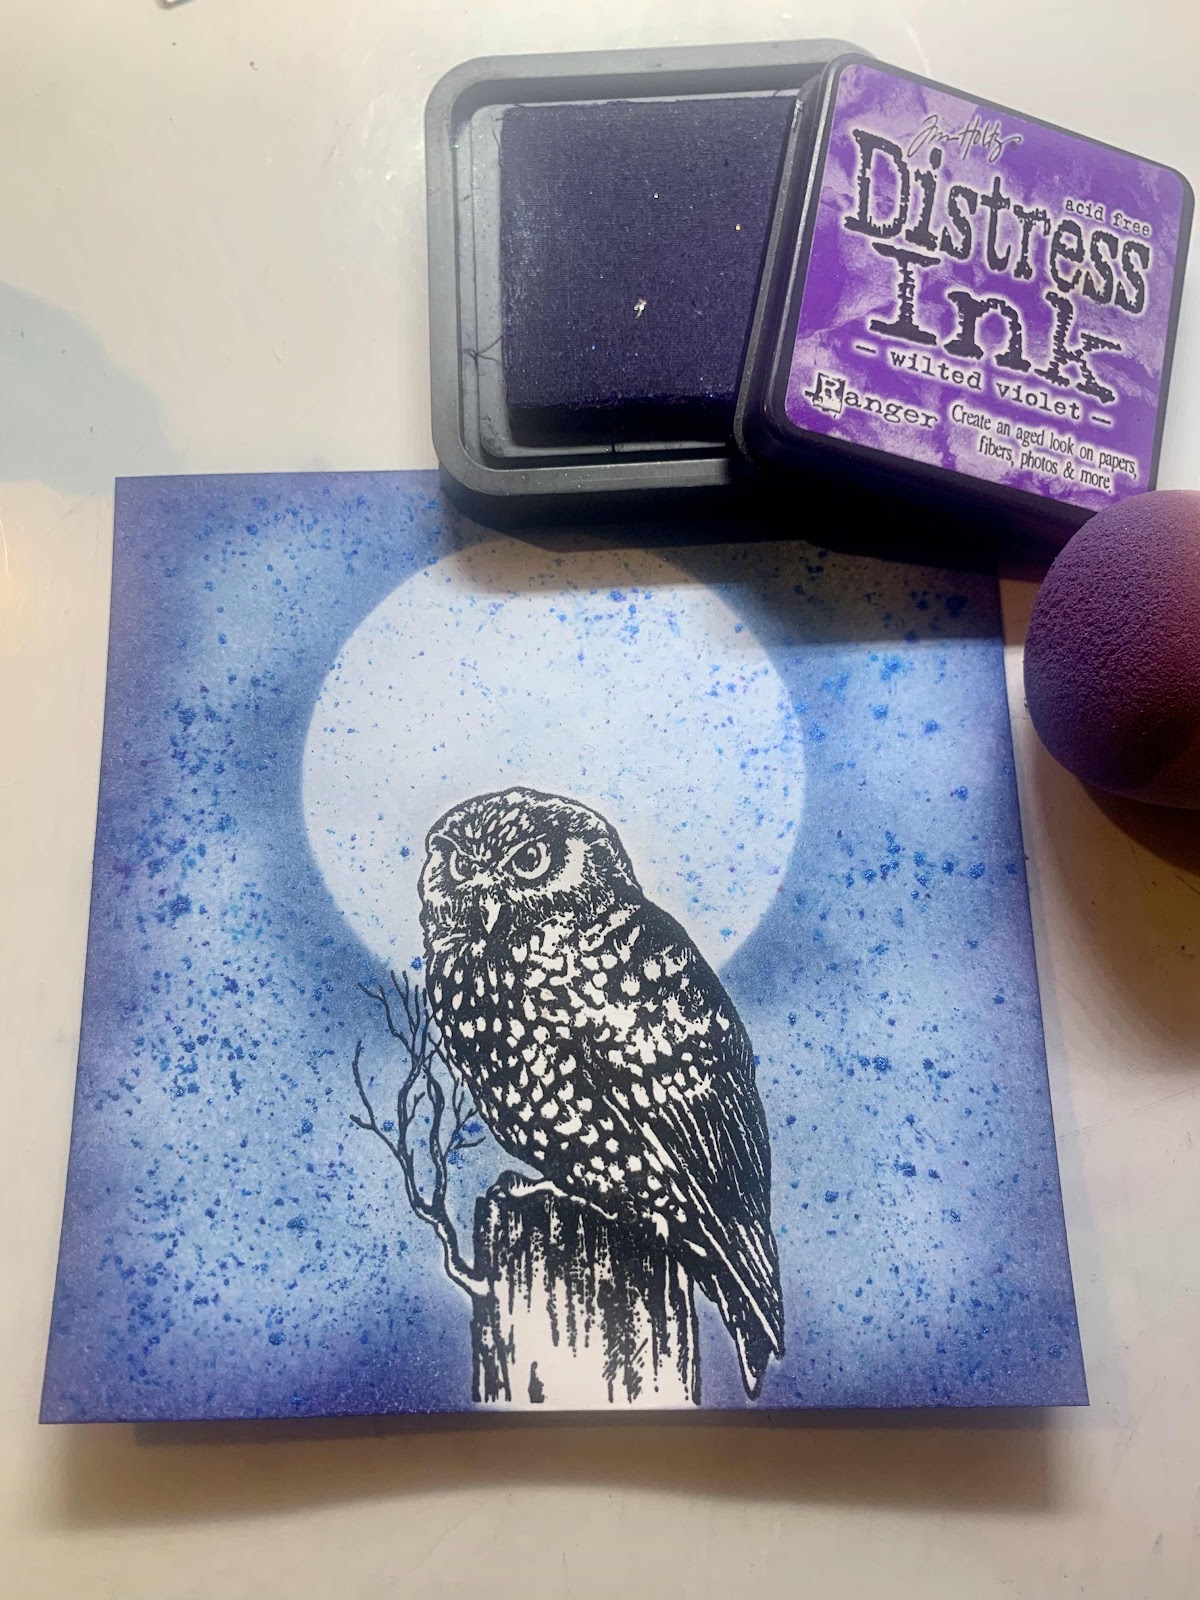


Now time to colour your owl. 
For this I used the Arteza watercolour pens. 

I then stamped the trees in the background. For this I used the tonic stamping platform. I haven’t been using it that long (in fact I actually borrowed this one from my mum to see how I get on with it before I buy) 
This is really good if you need to go over the image to touch it up. Sometimes it’s really hard to get a nice clear stamped image when working with pixie powders. 
I stamped this tree twice. 


Now stamp the tree the other side again using the stamping platform. 
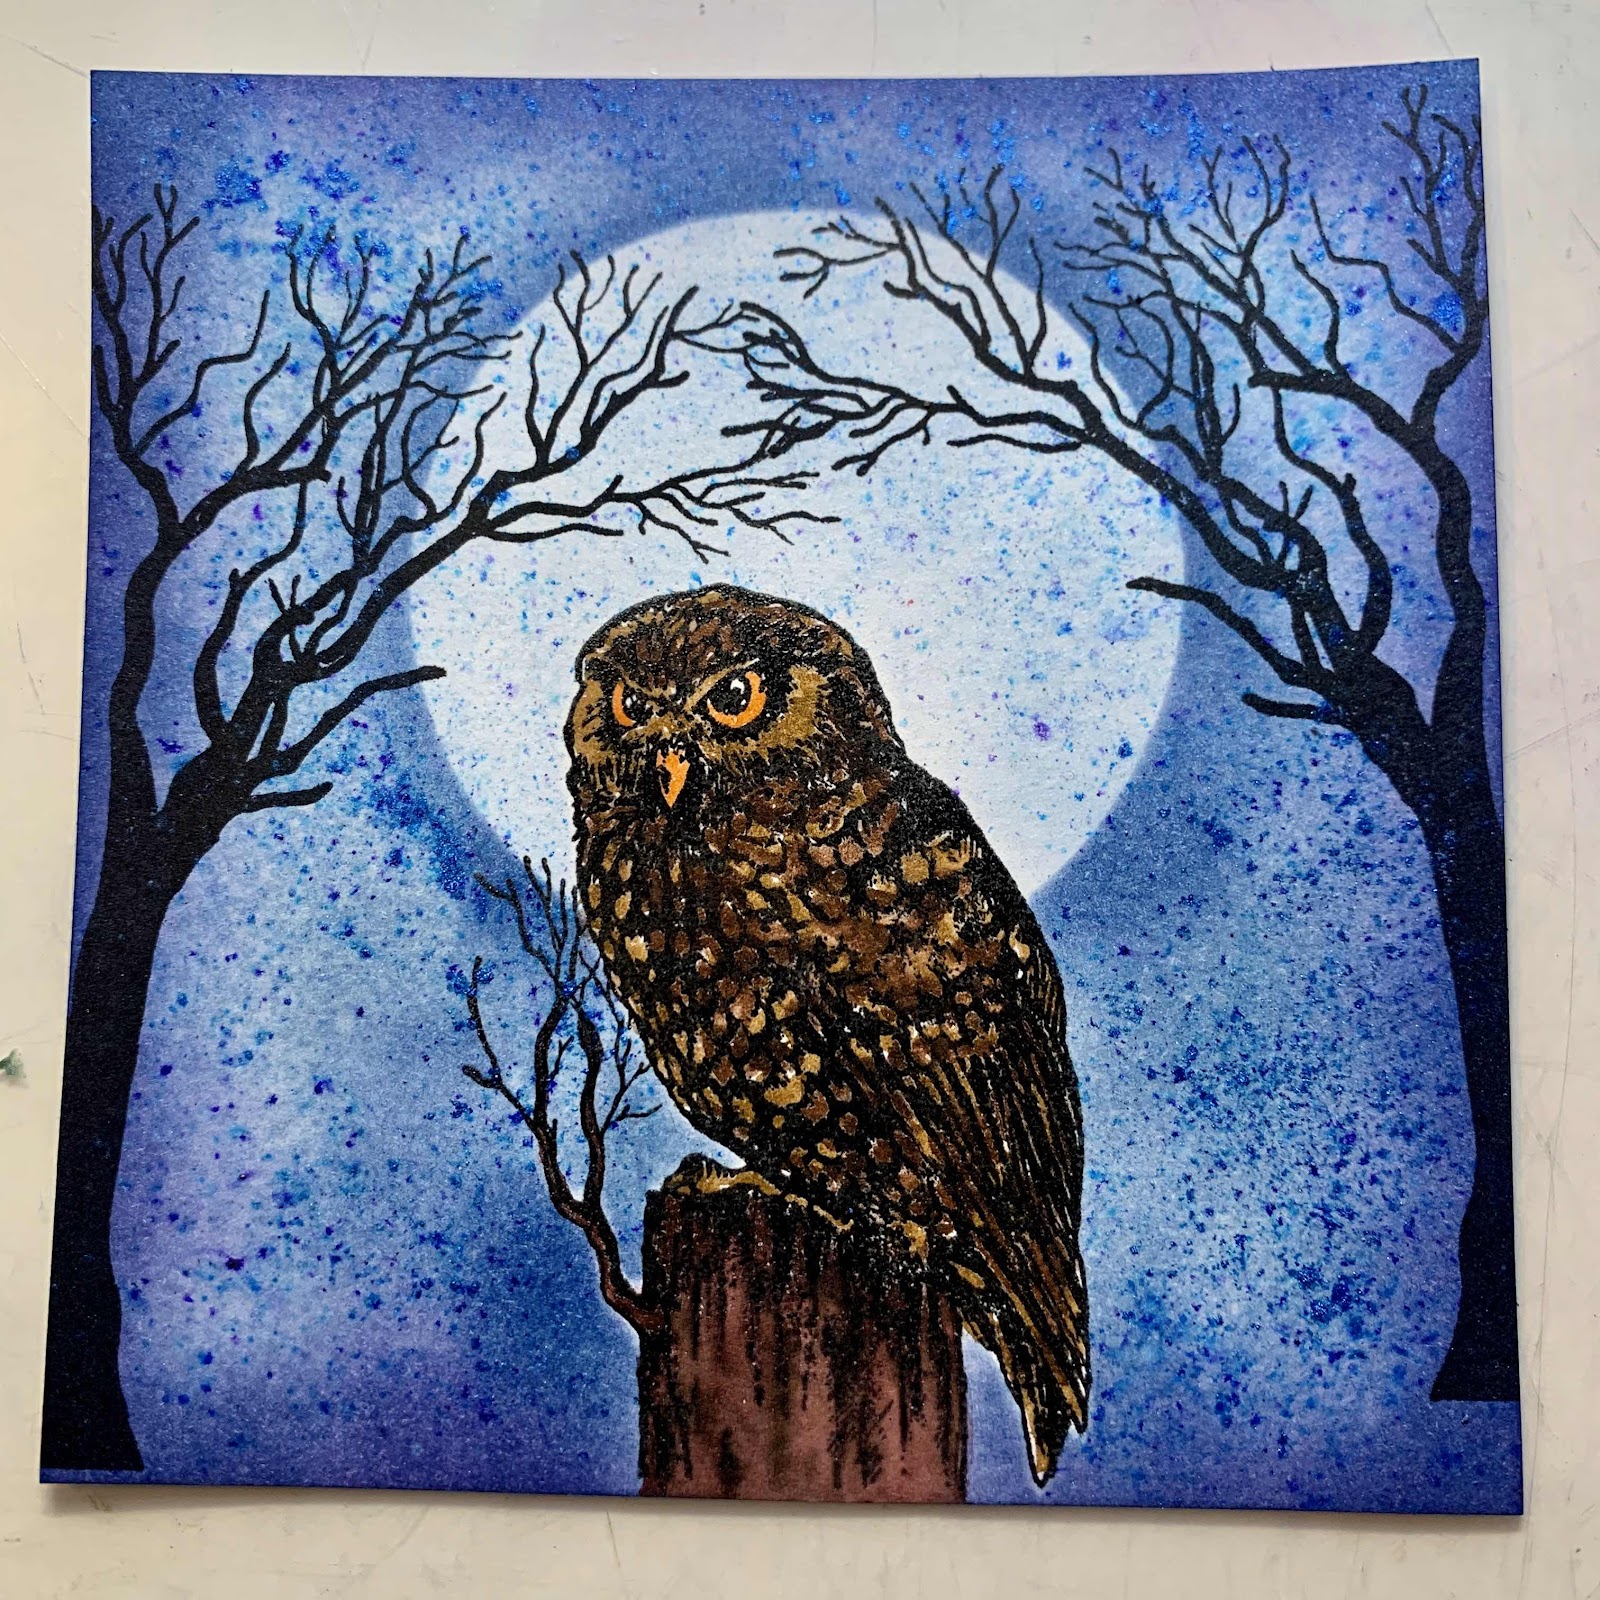


As you can see the trees aren’t quite as tall as I wanted them so I touched up the area at the bottom with a dry paint brush and the same ink pad I used to stamp the image. Just dab the ink in that area to create the filled in shape you require. 


Stamp the birds in the background. 

Now I’ve almost run out of black card so I’m being a little tight here - using a ruler and sharpie, draw a thickish line around the edge. 


Now mount onto a pre scored 6x6 card. 

And you card is complete! 


Shopping list

Set of free stamps from creative magazine issue 83 - made by crafty individuals. 
Black ink pad - VersaFine Clair 
Wow embossing powder
Distress inks
Watercolour pens 
Cosmic shimmer pixie powder - midnight blue 
Card 
Glue 
Paint brush 
Sharpie and ruler

Thanks for taking the time to read my post. 

Monday, 30 September 2019

Miniature fairy card

Fantasy fairy card

Hi everyone!!
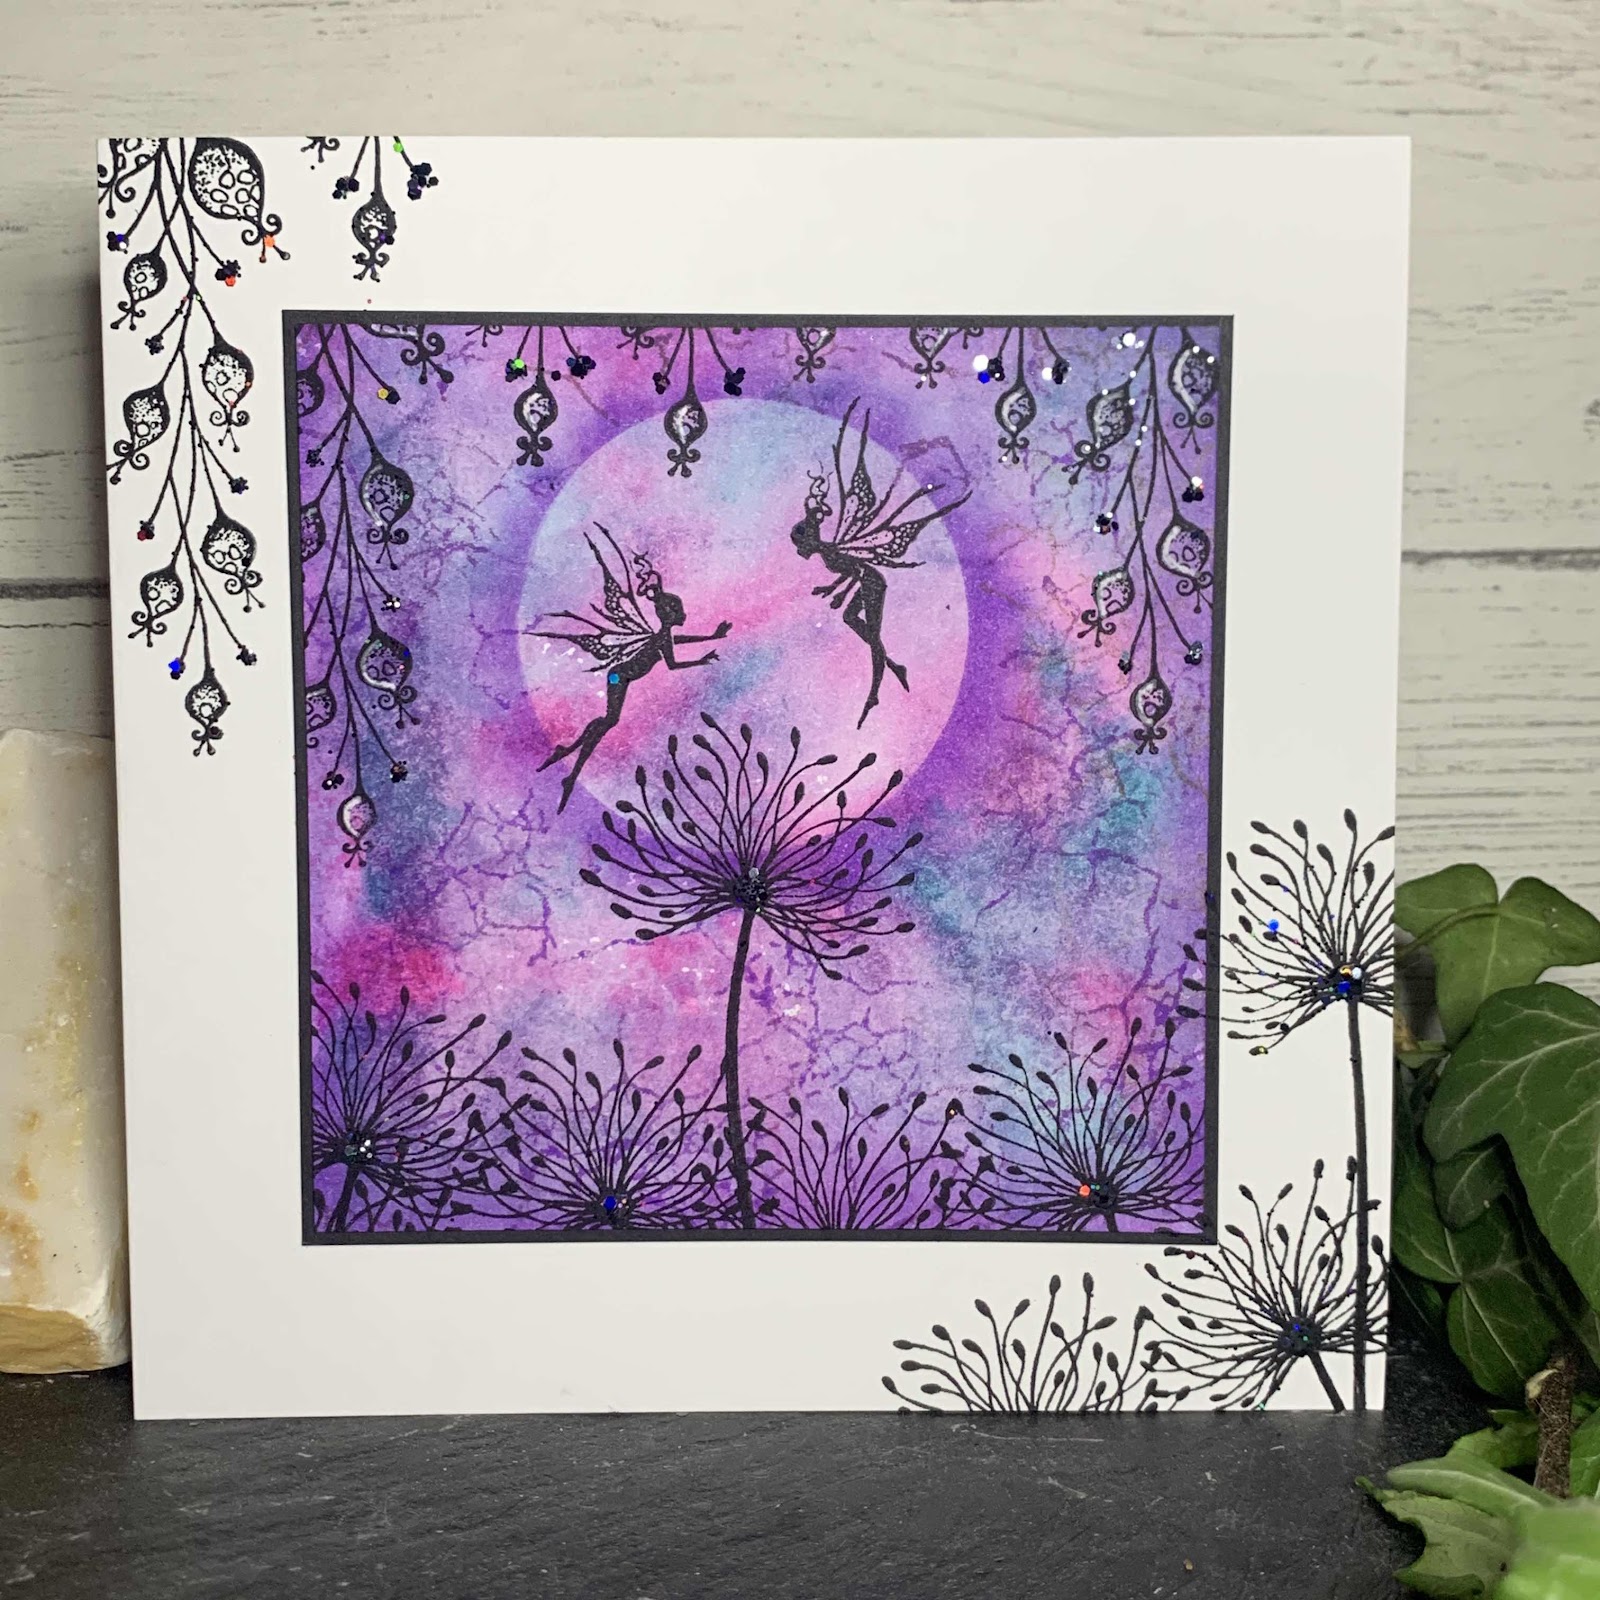
Today I'm going to show you how I made this fantasy fairy card. I'm afraid I'm a little obsessed with using the Lavinia stamps at the moment. I just love the fact you can make really quick striking cards.


Start off with a 4x4inch thick good quality card.
You will need a glass place mat or I highly recommend purchasing a messy mat from Wilco (this is a large thick plastic mat that you can wipe clean)
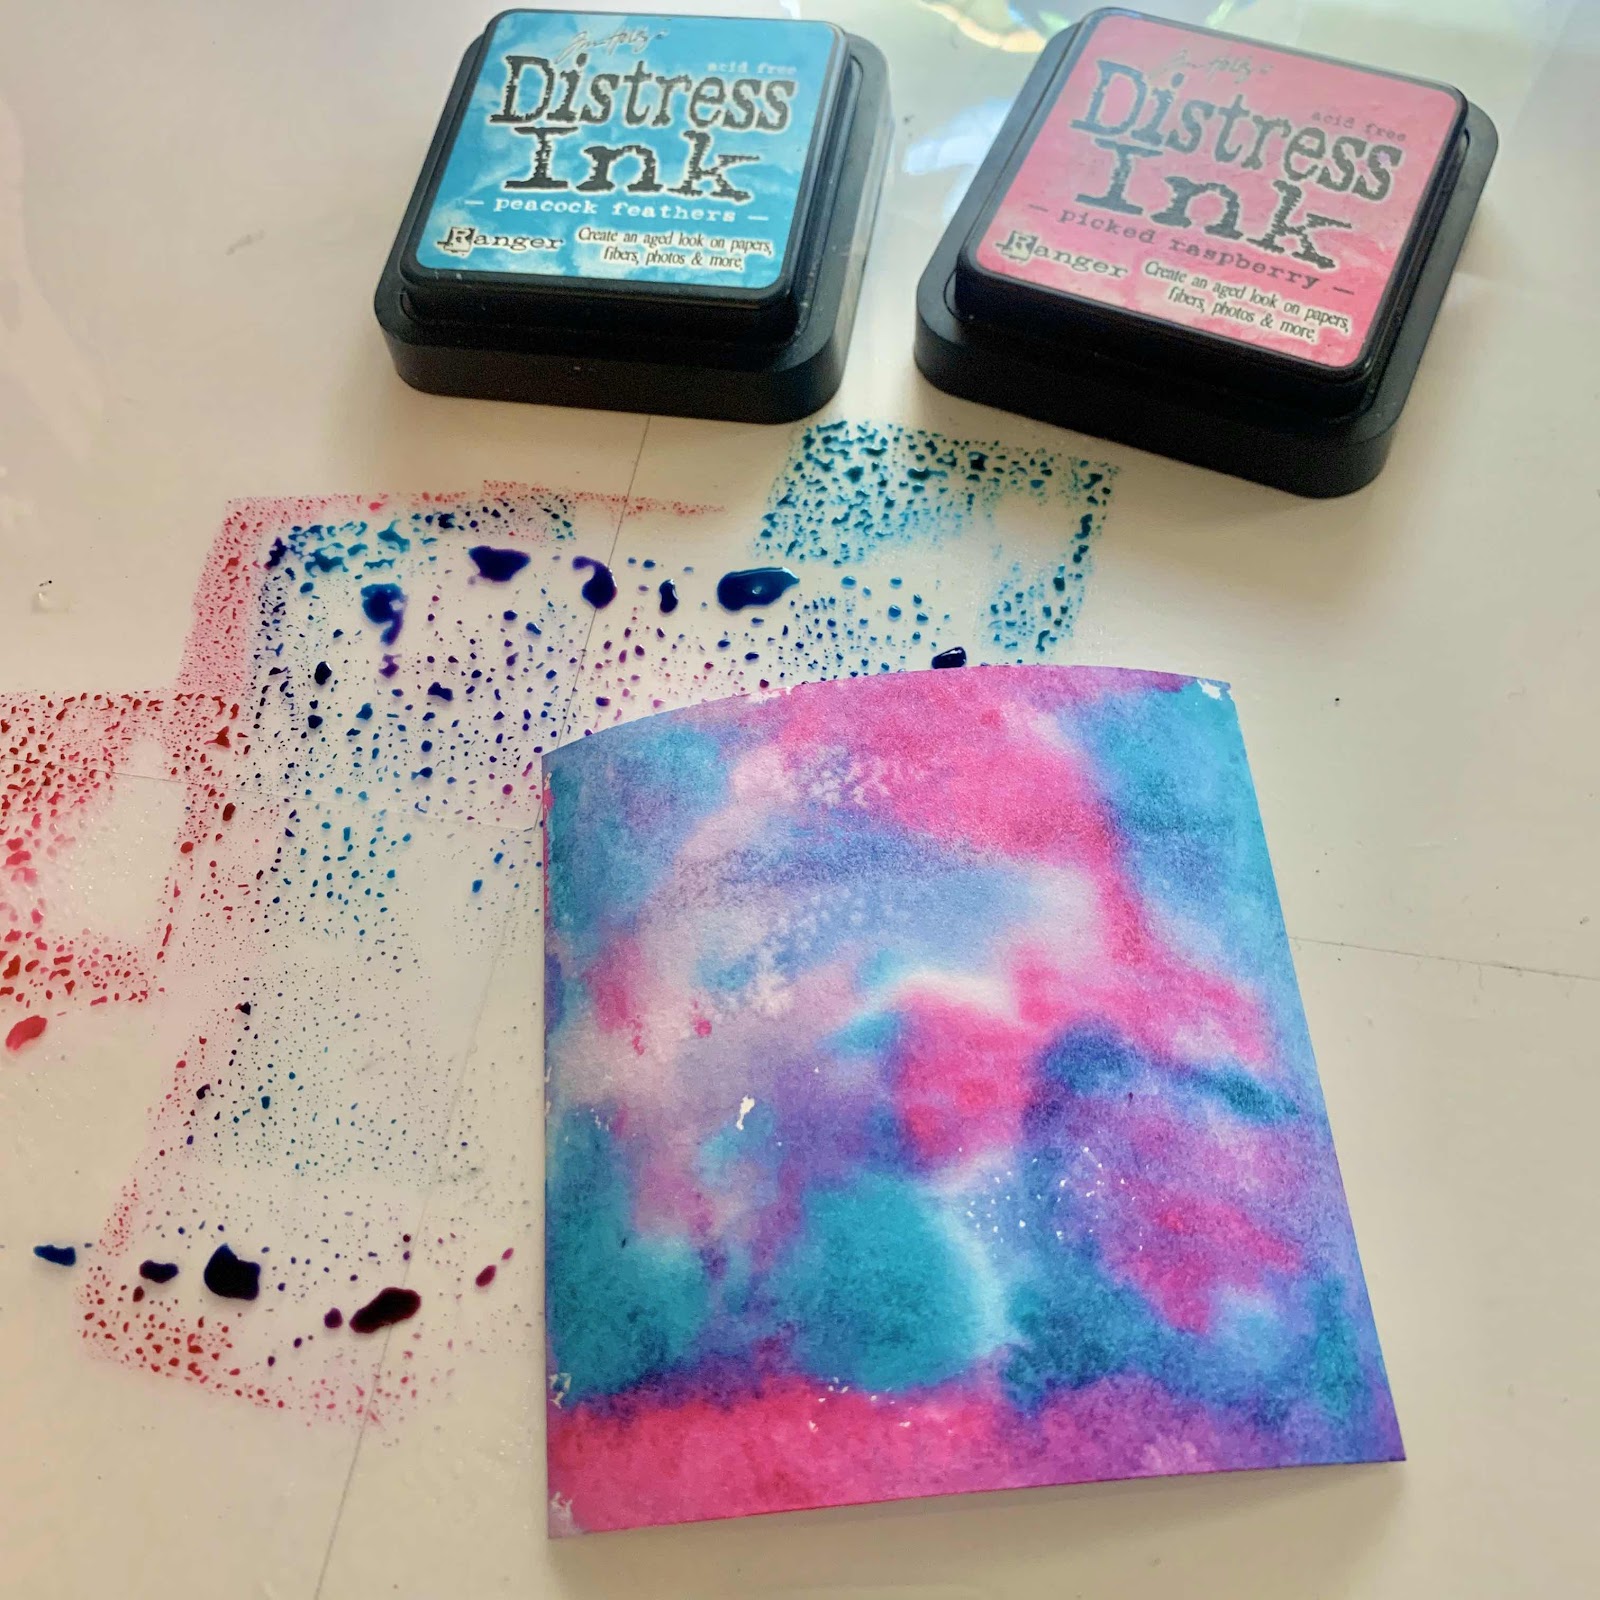
Dab your ink on the messy mat - for this I used Picked raspberry and peacock feathers.
Spritz with a mini mister and lay card in the ink.
If you find the ink hasn’t covered all the white card just lay it back in the ink. 
Once satisfied use a piece of kitchen towel to dab off any excess ink. 


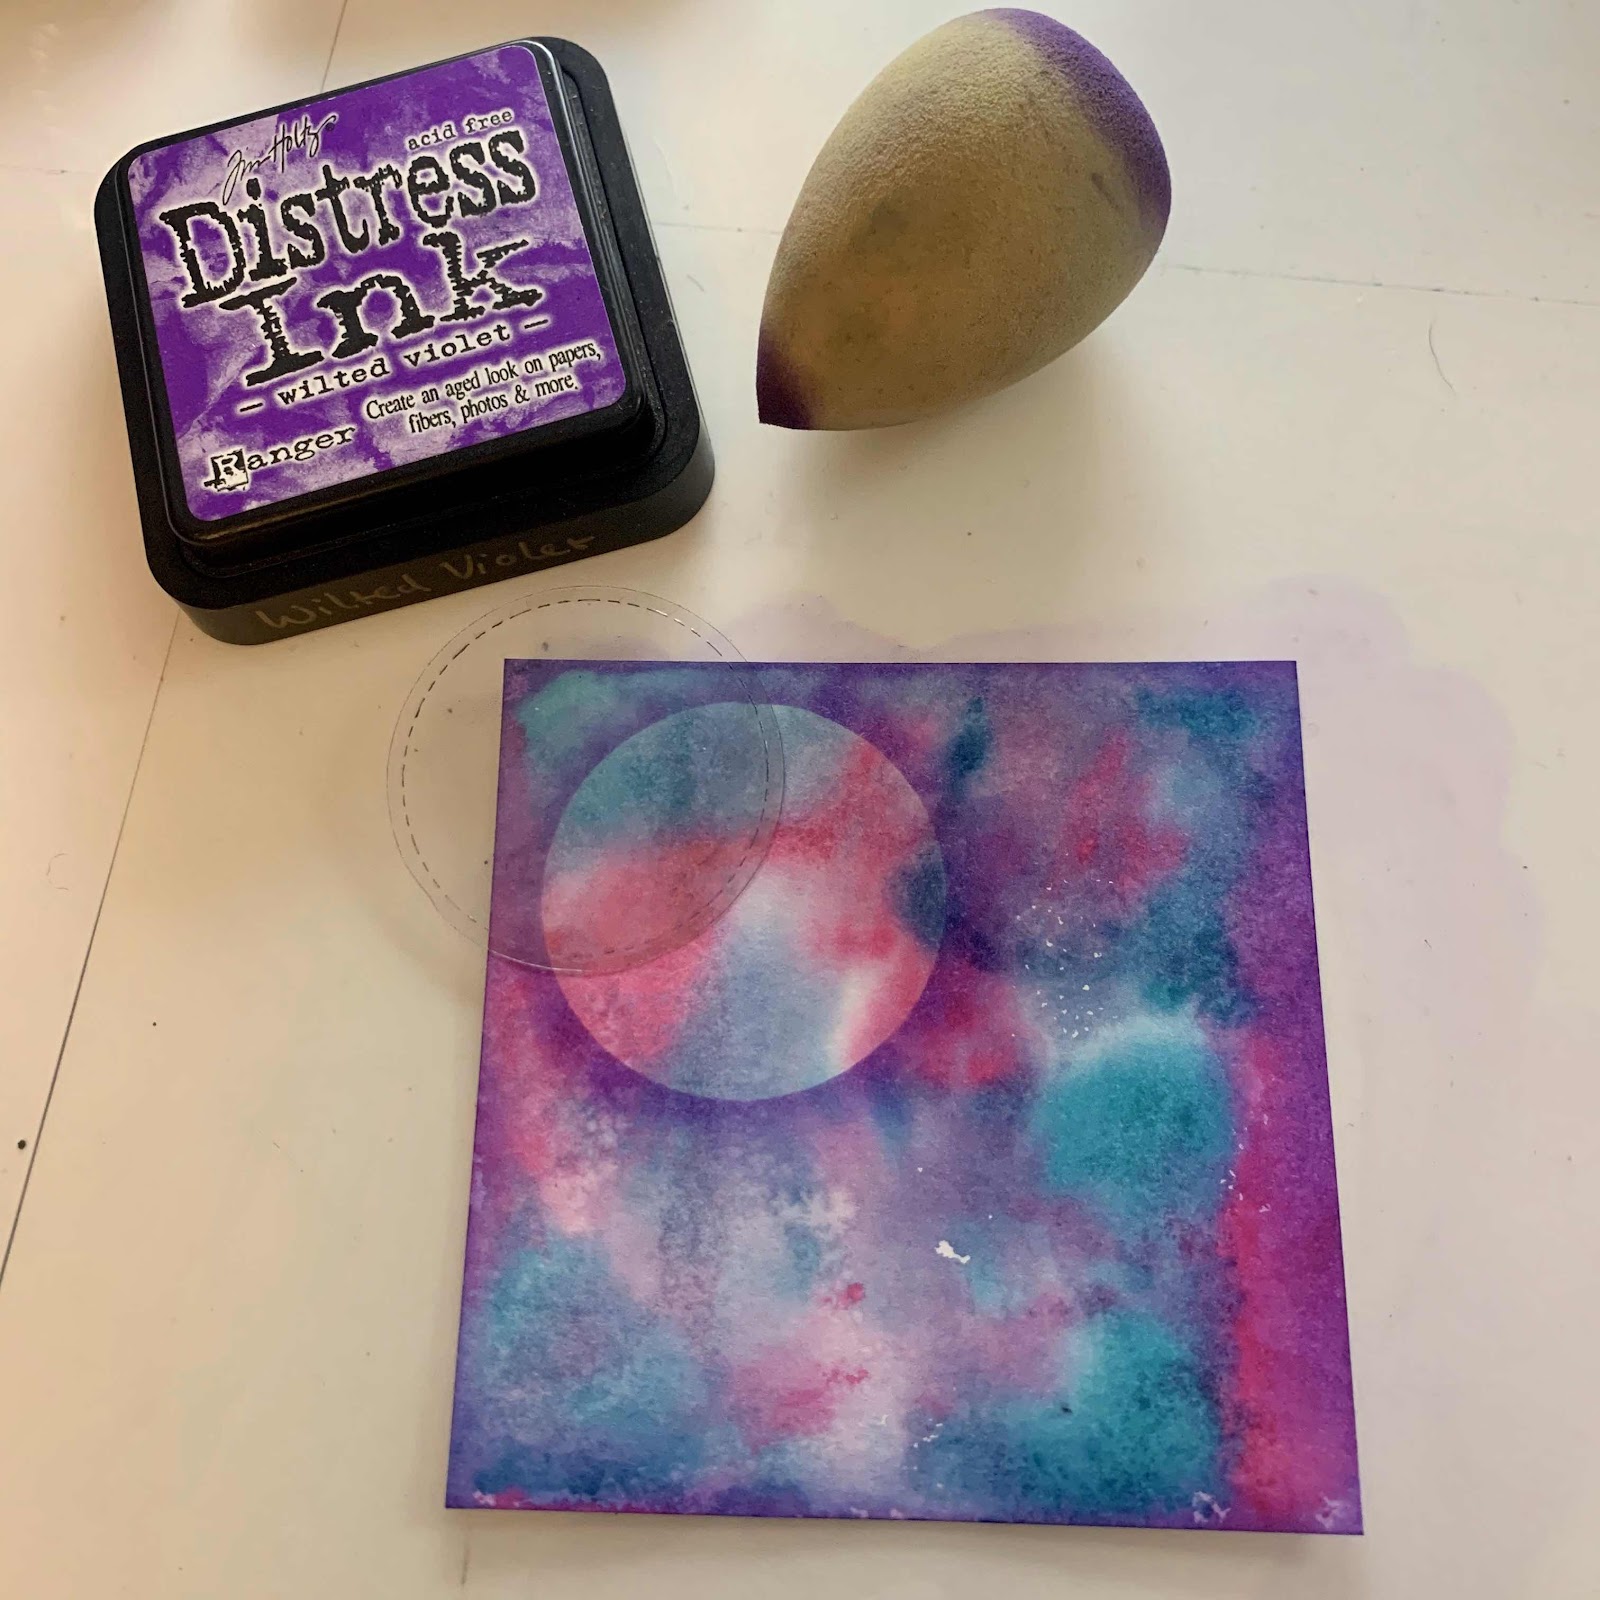
Using a circle mask flick the ink away from the mask with a sponge to create a moon affect. For this I used wilted violet. 
I like to use this cracked paper effect stamp to give the background abit of extra texture. Using the wilted violet ink pad just randomly stamp where you you mind like the distressed look. You don’t have to be neat with this and you can always stamp areas again if you feel it needs more crackle. 


You can now stamp your main scene. For this I used black versafine Clair to stamp fairy foragers, dandelions and hanging lanterns. 


Now mount your topper onto a piece of black card measuring just slightly bigger than your topper, then onto a pre-scored 6x6 cars blank. 
Stamp the hanging lanterns and dandelions on the corners and add abit of glitter to the centre of dandelions and a little on the lanterns. 


Shopping list

Fairy foragers 
Dandelions 
Hanging lanterns

Distress inks 

- Picked raspberry

-Peacock feathers

- Wilted violet


White card

Black card

6x6 Card blank

Black Versafine clair ink pad

Cosmic shimmer glue

Glitter

Water spray 


I was able to purchase most of this list from a lovely little craft shop in Great Yarmouth, Norfolk. If your in the area make sure you pop into  

Noble Crafts


Sunday, 29 September 2019

Lavinia wolf card

Lavinia Stamped Maka wolf card


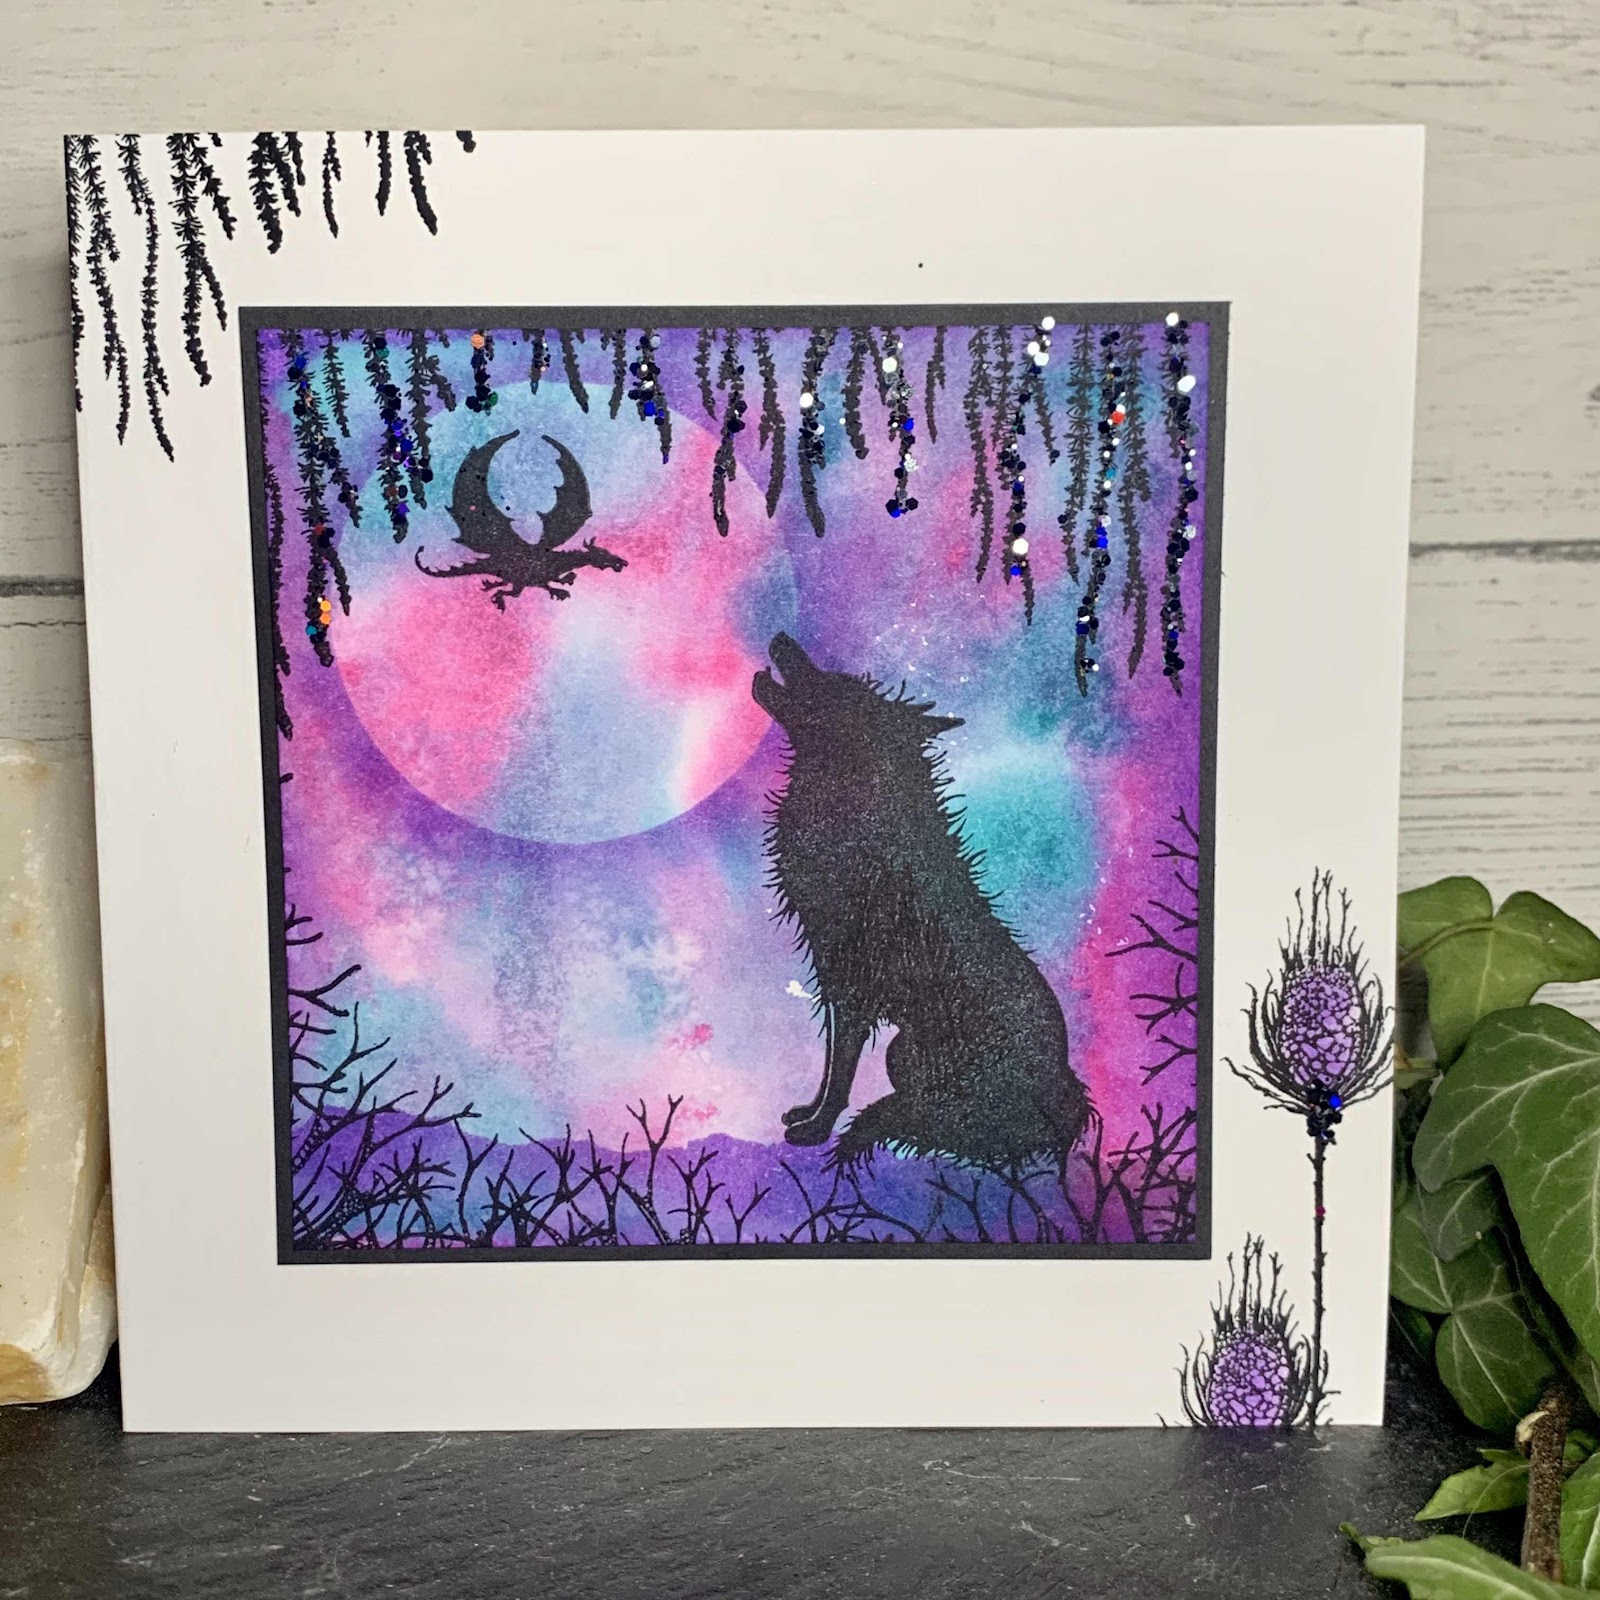
Manged to get a couple of inky backgrounds done this evening. I decided to use the lovely Maka wolf on this one.


I started off by dabbing ink on the messy mat using picked raspberry and peacock feathers.
Spritz with a fine mist of water. 


Take a piece of card measuring 4x4 inches (I would recommend using a good quality thick card - i.e 300gsm) 
Lay the piece of card in the ink and push down to spread the ink around. 
Lift to check. If there are areas where the ink hasn't covered lay the card back into the ink and repeat until you're happy with the coverage. 
Once your satisfied use a piece of kitchen towel to remove any excess watery ink.


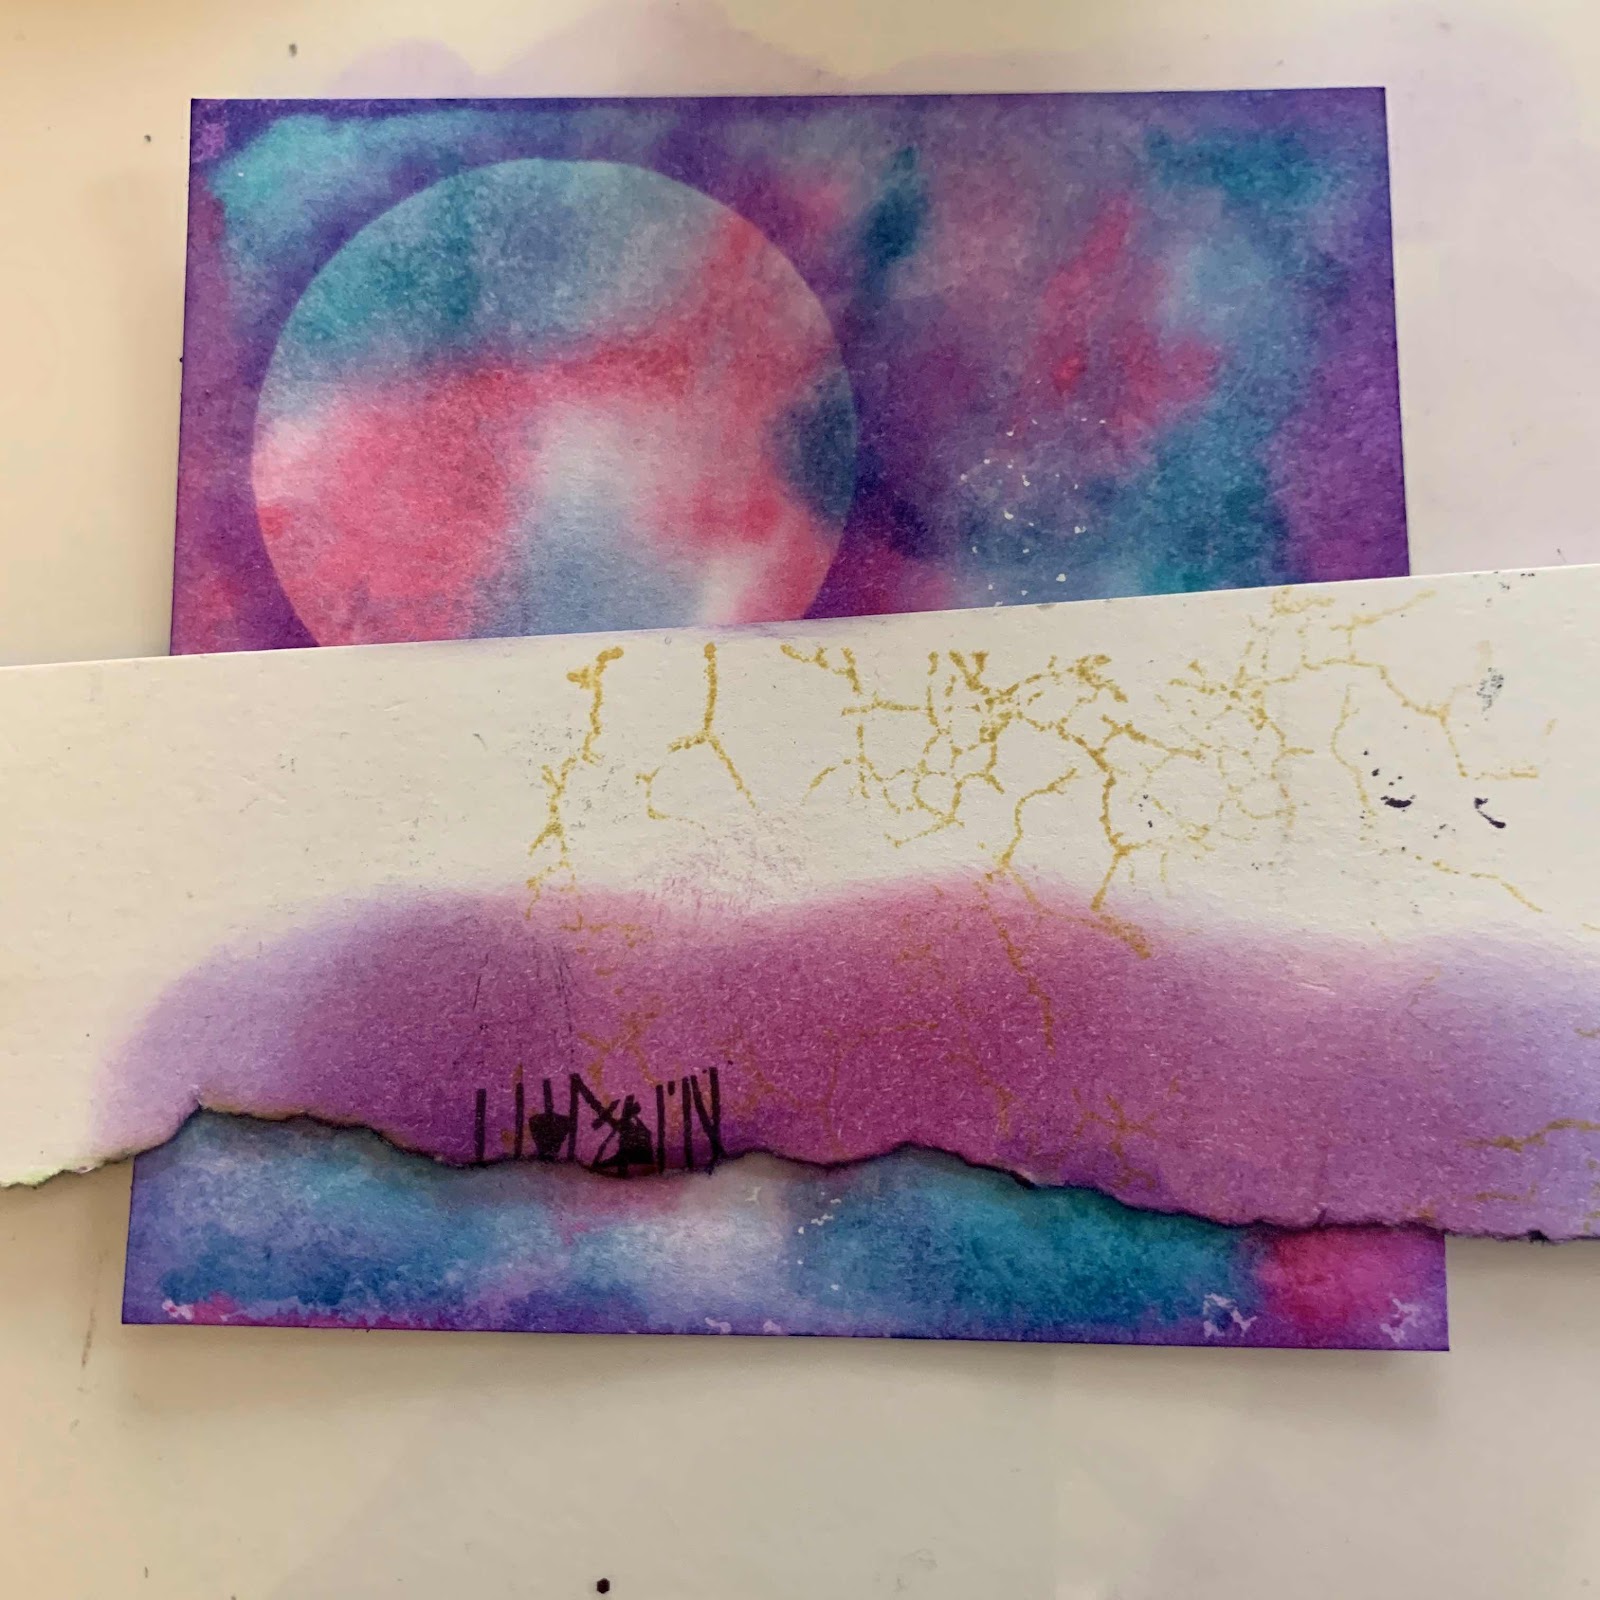
Cut out a circle that can be used a mask. Hold in place and using your sprong and wilted violet drag the ink away from the mask to give a moon affect.


Create another mask by tearing a piece of scrap card. This is to create your horizon line. Again drag the ink down away from your mask. 
Ink around the edge of the card to give it abit more definition.


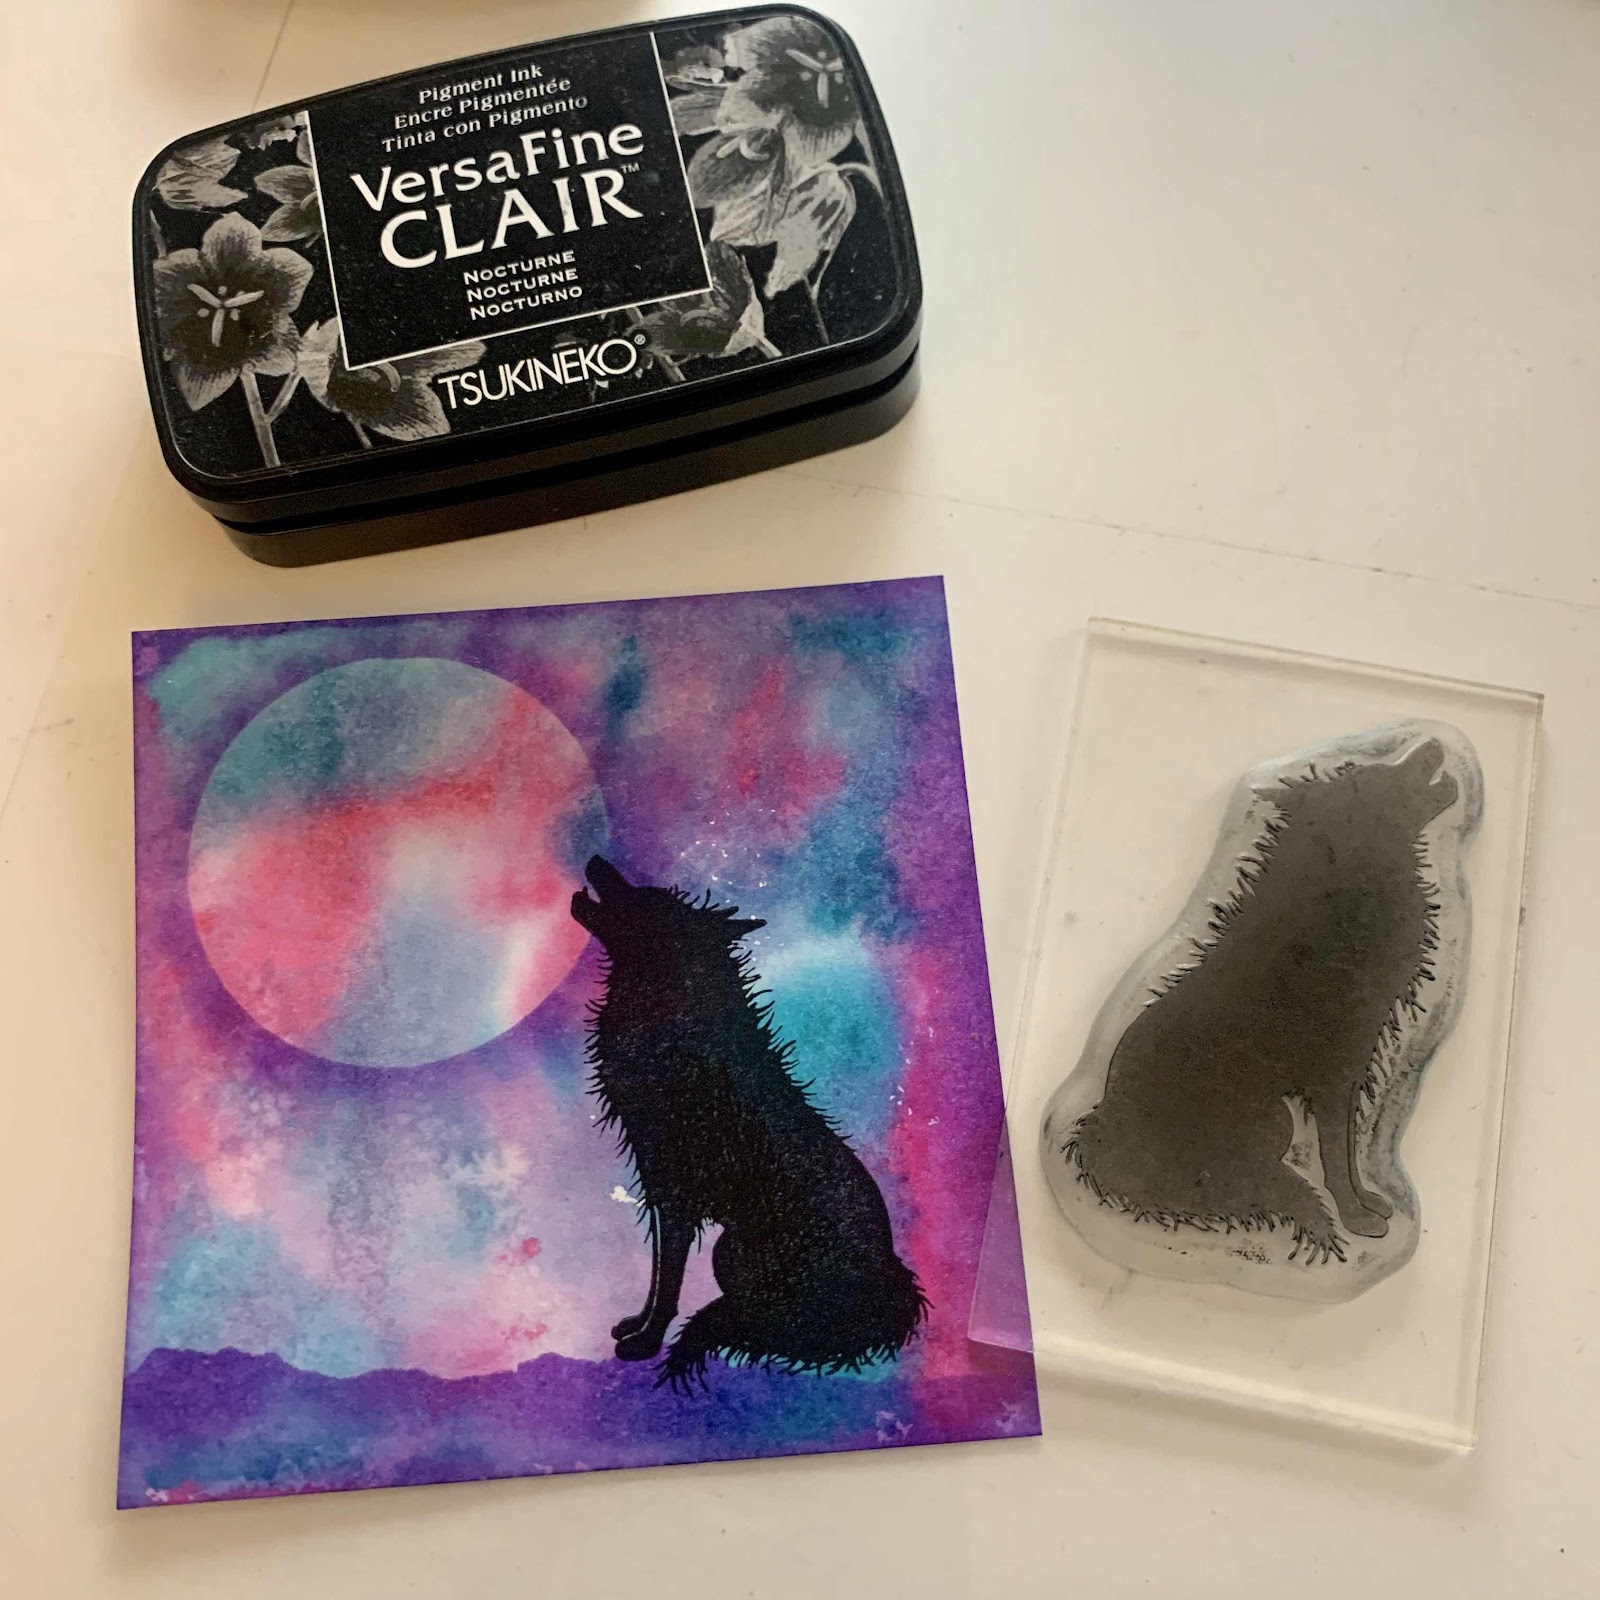
You can now start stamping. For this I used black VersaFine Claire - Has to be the best ink pad!!!
Start by stamping Maka.


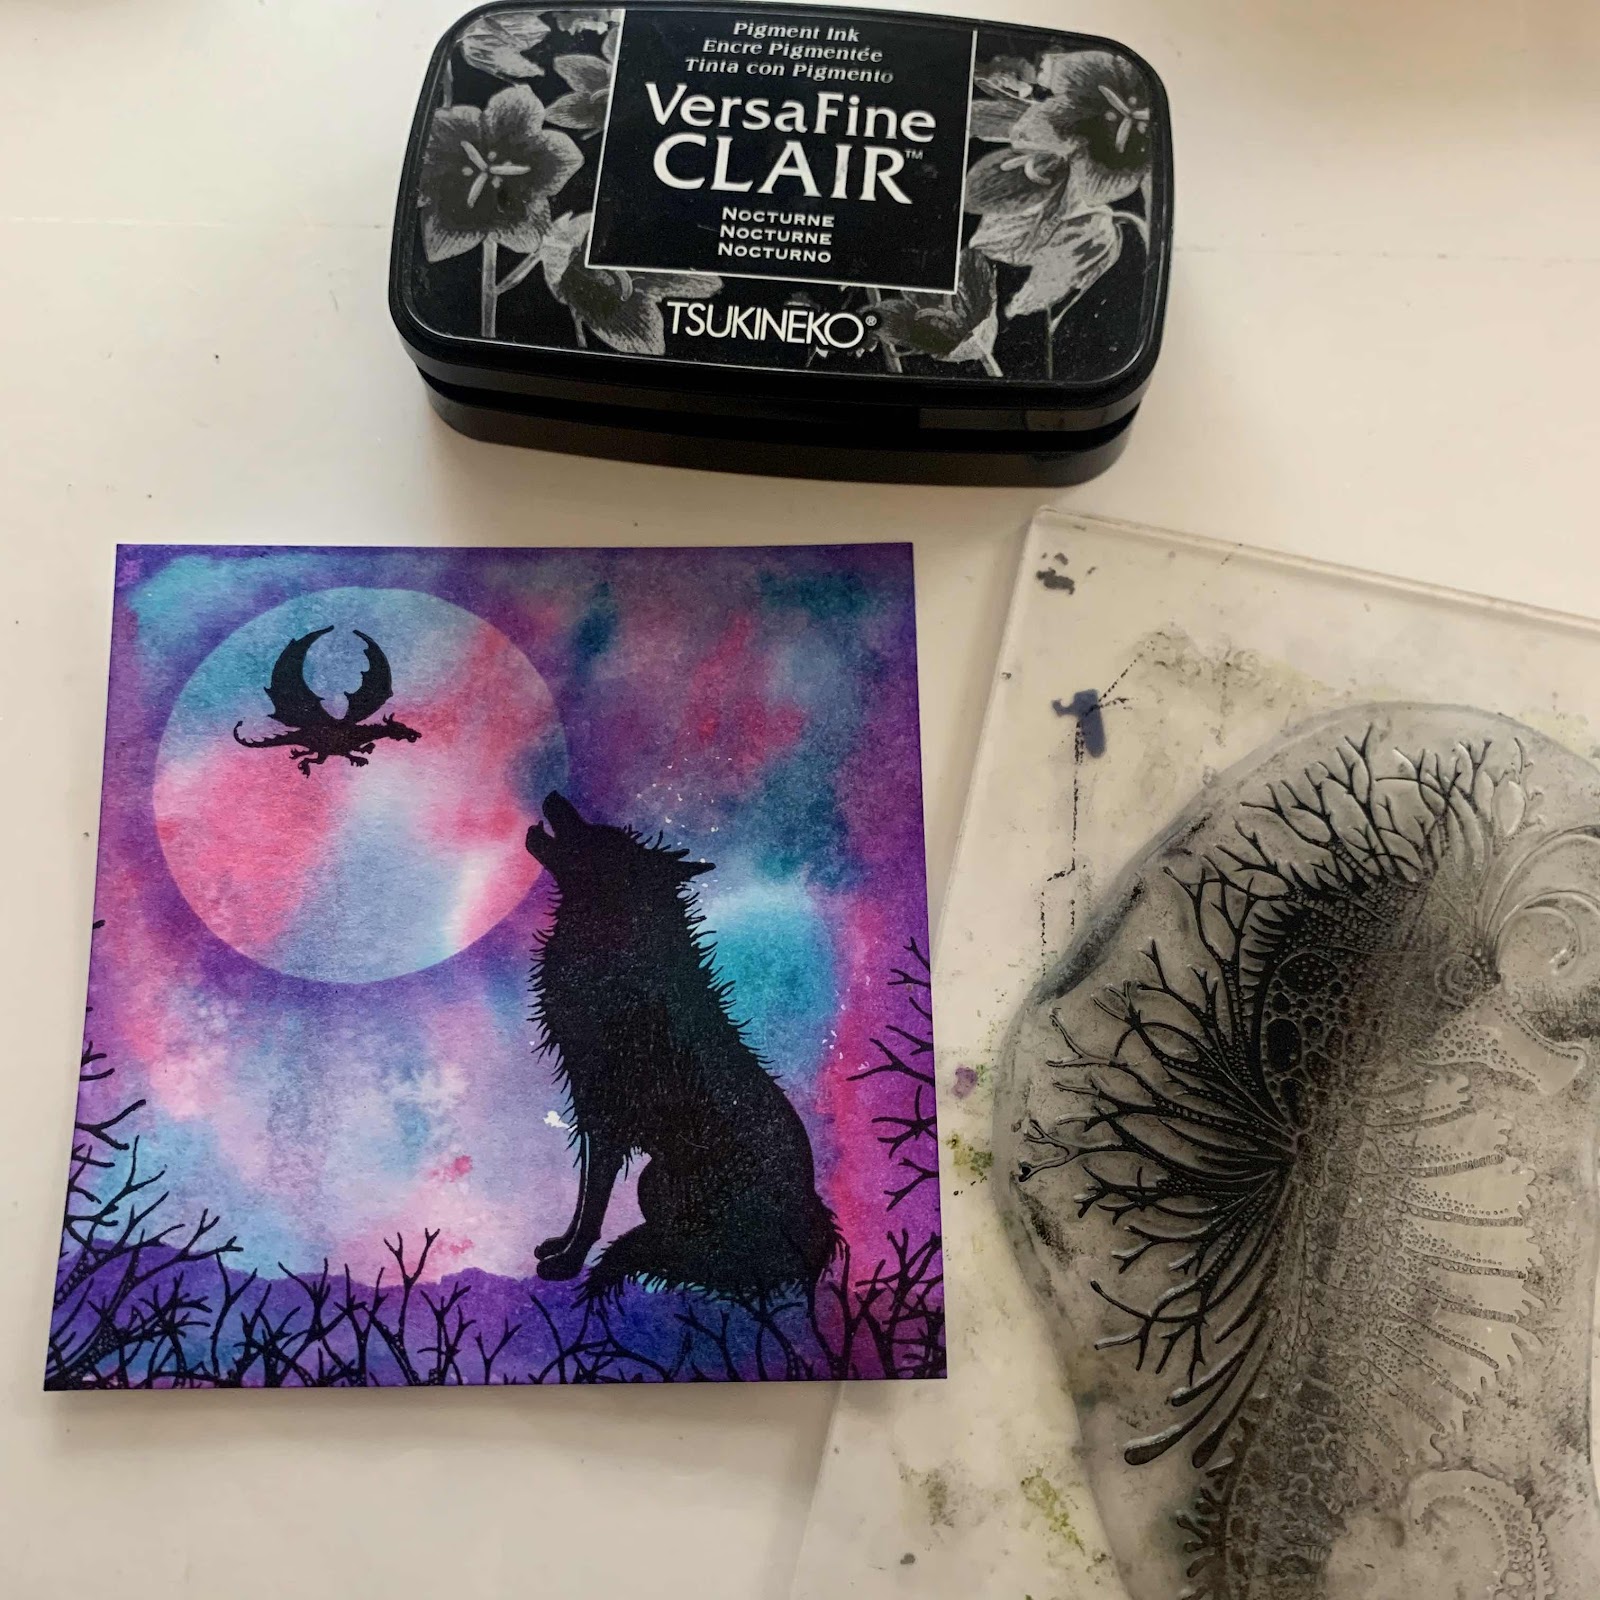
Stamp the little mini dragon in front of the moon.
Then take Sebastian the seahorse. Now I get this probably seems an unusual stamp to use - but, your not going to use the whole stamp. Just ink the edges up along Sebastian's back and stamp along the bottom edge and slightly up the edge of your topper. This gives the effect of spooky branches in the foreground. 


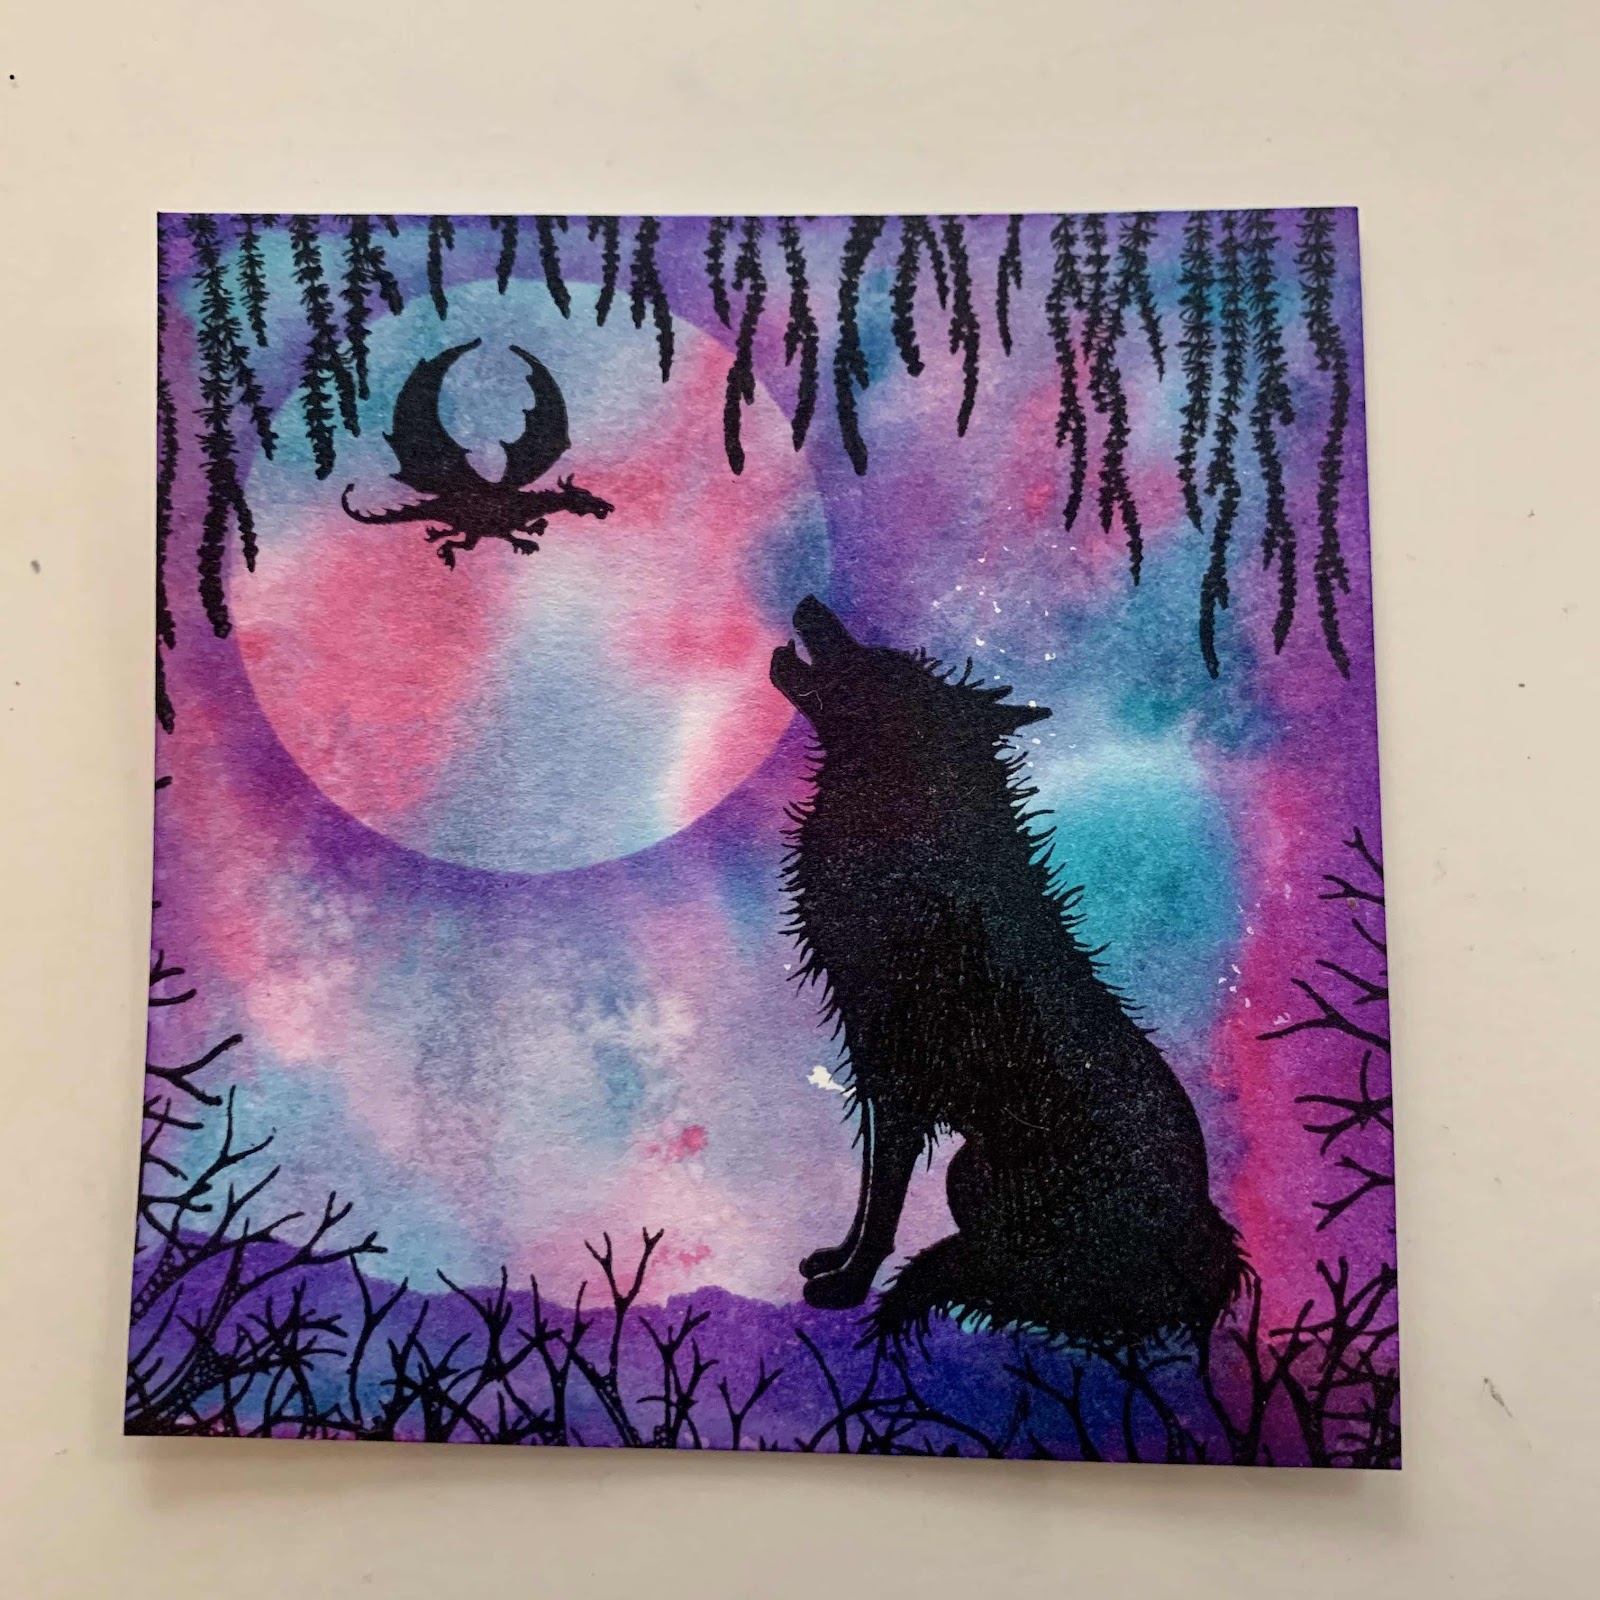
Stamp the forest spruce stamp along the top edge of your topper.


Cut and mount your card topper onto a piece of black card just slightly bigger than your topper.
Mount both pieces onto your card base. For this I used a pre-scored 6x6 white card.

Stamp the forest spruce across the top left corner of the base card and the star burst stamp in the bottom right corner. Allow the ink to dry and dab a small amount of ink (wilted violet) into the centre of the star burst. 


You can now add glitter to your desired areas.

Shopping list

- Maka
- Forest spruce
- Star burst set
- Sebastian the seahorse
- Dragon miniature

Distress inks 
- Picked raspberry
-Peacock feathers
- Wilted violet

White card
Black card
6x6 Card blank
Black Versafine clair ink pad
Cosmic shimmer glue
Glitter

I was able to purchase most of this list from a lovely little craft shop in Great Yarmouth, Norfolk. If your in the area make sure you pop into Noble Crafts 


Wednesday, 3 January 2018

Inkylicious splatter dancing lady

Inkylicious splatter dancing lady

First of all I’d like to start by wishing everyone a very happy new year. 
It’s been a while since I’ve done much crafting - at the beginning of November I managed to slip on the wet pavement and brake my leg. As you can imagine it wasn’t pleasant and unfortunately I wasn’t able to do much crafting as I couldn’t sit at my desk. I now have the cast off and got lots of new goodies for Christmas that I’ve been itching to play with. 

Today I had a play around with the new inkylicious splatter stamp. 


I started off by cutting a piece of square card approx 14cm square. 

Place your splatter circle onto your stamping block and using the pickled raspberry Tim Holtz distress ink pad randomly apply the ink. 


I then randomly applied broken china and wilted violet. 


Using I fine mist spray - spritz the ink. Don’t get it too wet though! 

Stamp the splatter onto your pre cut square card. It will look a little scary seeing all the ink move about when you apply pressure but this is what gives it a galaxy style look. 


Carefully pull the stamp back and dab off any clumps of ink you may have with a piece of kitchen roll (DO NOT drag it across your design)
To speed up the drying process I used my heat gun to dry the image. 


Next I used one of the dancing ladies from the inkylicious ‘dance’ set. I stamped this with black versafine ink and then heat embossed it with clear ultra fine embossing powder. 


Using my crafts too corner punch I cut the design into the corners. 

Take a piece of purple card and cut it just a bit bigger than your main piece to create a nice dark border. 

For the next step I used a small off cut of white card and stamped the sentiment from the crafters companion flutterby set. Cut it as close to the sentiment as possible then mount on purple card.


Now it’s time to stick it all down. 
I normally use the pre-scored 6x6 cards. Fold along the scored line then stick your mounted splatter image in the centre so you have a nice even plain border around the edge. 
Stick the sentiment down - for this I used foam pads to give it a slightly raised affect. 

Now finish off with some diamontes. 

Shopping list
Inkylicious- splatter stamp
Inkylicious- Dance set
Crafters companion- flutterby set 
White card 
Purple card 
6x6 card blank 
Tim Holtz distress ink
Black versafine ink pad 
Wow ultra fine embossing powder 
Cosmic shimmer glue 
Foam pads 
Xcut paper trimmer 
Diamontes 

Tuesday, 26 September 2017

Inkylicious dancing in the rain 

Hi Crafty friends!! 
So today I spent half the morning debating which inkylicious stamp to try out first. I bought several new stamps at the Thetford Sincerely yours craft show a few weeks back. So will be creating a blog post for these in the next few days. For now I thought I’d start with the ‘dance in the rain’ set. 
I started off by stamping the dancing lady with a black versafine inkpad on a piece of card cut to approximately 6.5 cm x 13cm. While the ink was wet I poured wow embossing powder over the image. Tip off any excess powder then emboss with the heat gun. 
For this card I used Tim Holtz new oxide inks. This is the first time I’ve really played with them and I have to say they’re incredible, so much nicer to work with than the distress inks - I highly recommend getting these!!! 
Anyway back to this card I started off with the wilted violet. Apply a layer of ink to about half way up the card. For this I used the sponges from creative expressions, dab off the excess ink on your glass mat then apply in circular motions. 
Now do the same with the worn lipstick ink to the top section. Blend into the voilet section
Next I used the salty ocean blue inkpad and applied it around edges
Now time for my favourite part. As I’m rather a clumsy person with water on my desk I did this step on my draining board in the kitchen. Run your fingers under the tap and then let any large amounts of water drip off. I then flicked the water over the inked piece of card. Adding extra droplets of water in areas it’s needed. Take a piece of kitchen roll and dab off the excess water. You’ll then be left with some lovely white rain effect splodges. 
One thing I should have mentioned at the start - I used a really thick 300gsm card stock. This prevents the card from going slightly rippled when wet with water. 
To finish the topper off I went round the edges again with blue oxide ink to darken the water effected areas. I then used a star dust Sakura pen around the edges to give it abit of a sparkle (unfortunately the camera hasn’t picked this up very well. 
Cut a piece of dark purple card just slightly larger than your main topper. And stick together using your choice of glue. I tend to use cosmic shimmer glue. 
 Cut a piece of white card Stamp, then heat emboss the verse ‘life isn’t about waiting for a storm’ - I just love this verse. Mount the stamped verse onto a slightly larger piece of purple card. 
Now we can start putting the card together. Take a prescored 6x6 card base - fold along the scored line. Then stick the topper and verse down. 
To finish off I added a few jems around the dancing lady and a few in the bottom right corner. The corner jems were purchased from ‘the range’ (my all time favourite shop!!). 
I then drew some lines around the edges. I also played around with a few different border effects. I included all 3 cards with different borders. 
Thanks all for reading. 
I’ll be back soon with some more cards using the inkylicious stamps. 

Shopping list 
Inkylicious dance in the rain stamp
Tim Holtz oxide inks 
Black versafine stamp pad
Wow ultrafine clear embossing powder
Heat gun 
Cosmic shimmer glue
Creative expressions blending sponges 
300gsm white card
Pre scored 6x6 card 
Purple card 
Xcut gillotine 
Gems 
Fine line black pen 
Sukura star dust pen 

Monday, 18 September 2017

Sunshine designs watercolour card


Hi crafty friends. 

I'm a little overwhelmed at just how popular this card has been, I've had so many people asking how I I made it so thought I'd better update my blog! 
The image I used here is made by sunshine designs. I think I've had it in my stash for about 8 years and never used it. I'm not really sure what the image is called but I love it and it stamps beautifully. 

I started by cutting a piece of card to approximately 10.5cm square, then stamped the image with versafine black ink. Those of you who've read my previous posts will know that this is best ink pad ever!!! 
While the ink is still wet. Pour a thin layer of ultra fine embossing powder over the stamped image and tap off any excess back into the pot. Then using the heat gun, emboss the image. 

Now time to get your water ready - if your anything like me I like to get this just before I'm about to use it, I'm the worlds clumsiest person! Or if it's not me that knocks it over it's my amazing 8year old boy who also likes crafting or my nosey boyfriend who just happened to knock the water over everything. As you could imagine I really wasn't impressed. Anyway, using the paint brush wet the centre of the image. Take your first colour - for this particular card I'm using rose and and violet from the Royal Langnickel watercolour set. I tend to start of with the lightest colour first. Put a really small amount of paint on your pallet and add lots of water. Place a largish amount of paint in the centre.

Now for the fun part - remember to work quickly!! Take a straw and blow the paint from the centre out. Keep going until you have your desired look.

I then took a little break and made a cup of coffee while I waited for the image to dry a little.
I then repeated with the next colour. I used a much smaller amount of violet so I didn't overpower the rose pink.

For the next step I cut out a pink mount just slightly larger than the main topper and stuck it down using cosmic shimmer glue. Then mount onto a prescored 6x6 white card base.

Finally I finished off with a double wavy line around the edges.

As you can see from the main photo I created a few different colour combinations. The colours I used  were:
Violet and Cerulean blue
Gamboge and Crimson red lake

I must apologise about the poor lighting - currently waiting on a new photo light box!


Shopping list

Sunshine designs rubber stamp - I'm afraid I have no idea what it's called!
Wow ultra fine embossing powder
Versafine black ink pad
White card
Coloured card
Royal Langnickel watercolour paints
Paintbrush
Water
Paper trimmer
Cosmic shimmer glue
Heat gun

Tuesday, 12 September 2017

Woodware reindeer card


Good Evening!!!

Its been a while since I posted on here so thought it was about time I started blogging again!
I have lots of half made cards on my desk waiting to be finished which means I'll have lots to show you in the coming week.

First up is this reindeer card.......

Shopping List 

- Woodware reindeer stamp
- White Card
- Hot off the press background papers 
- Versafine black ink pad - This ink pad is probably the best you can get!!!!
- Wow embossing powder
- ProMarker/Spectrum Noir pens
- Red card
- Woodware puff paint
- White glitter
- Cosmic Shimmer Glue 
- Clear stamping block
- Glossy accents 
- Heat embossing tool

I started off by Stamping the image onto plain white card with versafine black ink and embossing with a clear ultra fine wow embossing powder. I then used my Xcut guillotine to cut evenly around the edges - leaving a slighlty larger gap where the antlers and scarf overlap the main border.


On almost all my cards I use a selection of Promarkers and Spectrum Noir pens. They both have such  a great selection of colours - but I do love to mix them up, and they blend together really well. 
Colour the image with the colours pictured above.
For the background I used a blue watercolour based pen with a koi water brush.


Now time to use the puff paint. This is made by woodware and is so fun to work with. For this particular image I used white. They have a few different colours,but would highly recommend getting a white, yellow and black. These are great for doing the centres in flowers. 
Anyway back to this card. Puff paint is really thick and expands when heated. Be sure to only use a small amount on the desired areas. Once you have put the paint on, i normally sprinkle a small amount of glitter on top to give it abit of a sparkle.
Switch your heat gun on and give it a few seconds to heat up. Then hold a few inched above the puff paint and watch it expand. For this particular image I didn't do it for too long as I didn't want it 'too puffy'. I recommend never to do this after it has been stuck down onto a card - it will ripple!

Next I used a white Sakura pen to highlight selected areas and Ranger Glossy accents on the reindeer's nose. I just love using glossy accents on a card, it really makes the image pop! You will need to let this dry before continuing.


Take a piece of red card and using the guillotine cut it just slightly larger than the reindeer image. 

Now for the base of the card. I usually cheat and use pre scored card blanks, for this card I used a 6x6 base. 
Take the red card and cut it just slightly smaller than your base card.
Next take your decorative background papers. For this one I used the papers from Hot Off the Press that I bought as a set several years ago from QVC. I have to be honest I don't even know if you can still purchase them. When it comes to decorative papers I'm abit of a hoarder and like to look at them for ages before I actually use them. Id like to think I'm not the only crafter that does this?
Cut your decorative background paper just slightly smaller than your red card. 


Stick the various layers onto your base card, including the main reindeer topper.

I then Finished off by drawing a stitch affect border around the edge and placed a diamante on the snowflake.


Its always good to play around with different background papers. Here's a few examples.


Thank you for taking the time to read this blog. Hope to see you back here soon!!!